
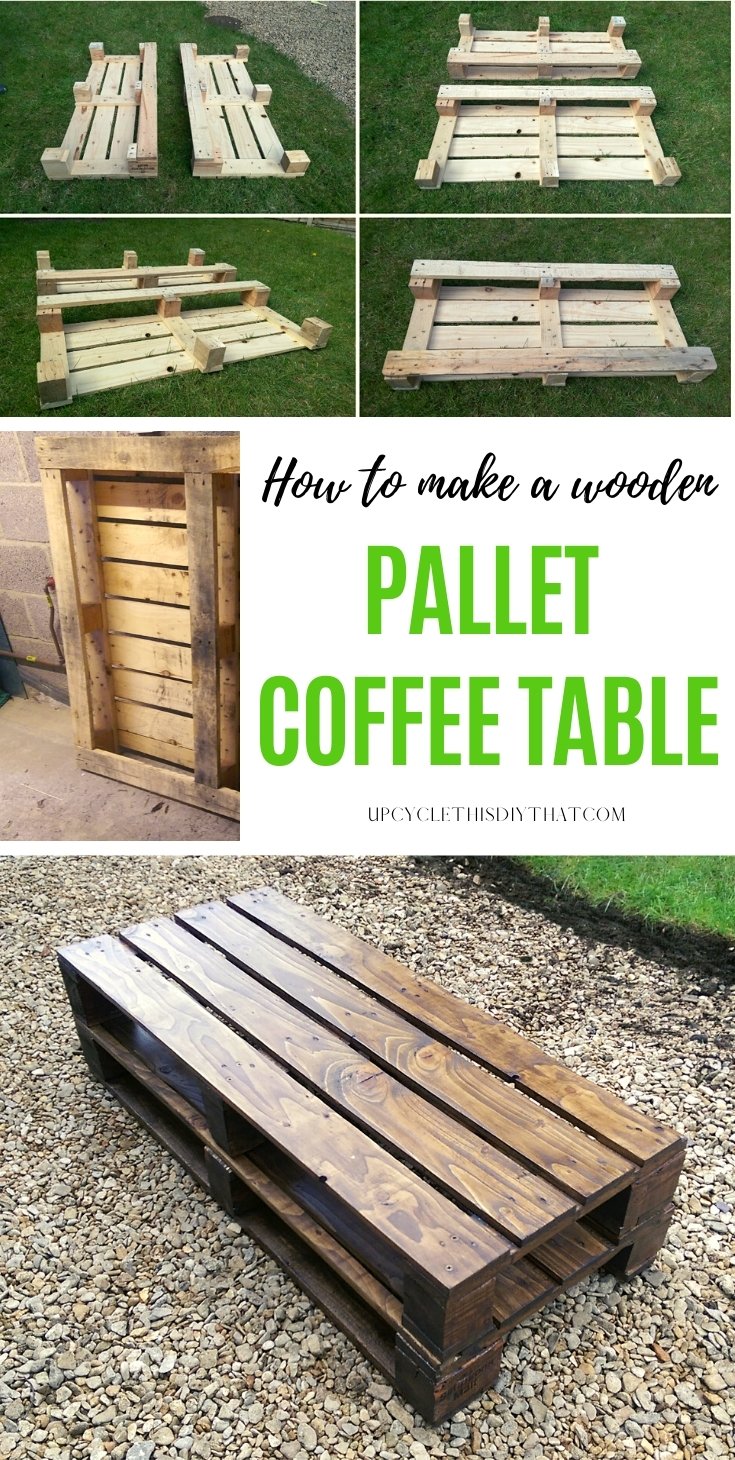
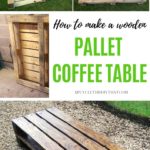
How to Build a Pallet Coffee Table Step by Step
This post includes affiliate links. If you decide to make a purchase through my link, I might get a small commission for it at no additional cost to you. Thank you for supporting Upcycle This DIY That!
Hello, my dear Upcyclers!
I’ve finally managed to make another pallet project. Yay!!! It’s taken me much too long, and I promise you won’t have to wait that long for the next one 🙂
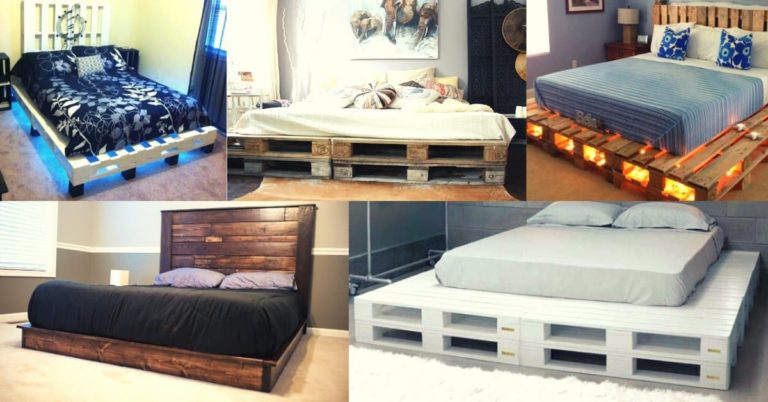
I know that you guys love to DIY and craft, so I wanted to share with you a way to do it for less! Pallet furniture is an easy way to get a rustic look without the hefty price tag.
This DIY tutorial will show you how to build a pallet coffee table. All it takes is some elbow grease and time (and, of course, a few tools)!
YOU MAY ALSO BE INTERESTED IN:
How To Make A Pallet Herb Garden
DIY Pallet Sandbox-A Simple Upcycling Project
How To Make A DIY Pallet Sofa For The Garden
Wood Sanding Tips for Upcycling and Pallet Projects
Get ready to DIY!
This is a guide with step-by-step instructions and photos so you never get lost. There are lots of helpful tips along the way, too.
This project is both fun and practical – perfect if you’re looking for something to do this weekend!
Tools and Materials
- a circular saw
- a hand saw
- a random orbital sander and different grit sandpaper (40, 60, 80, 120, 150)
- a hammer
- nails, and wood screws (I used single thread 12 x 4″ wood screws)
- a pencil
- clamps
- a wood glue
- some rags/cloths for wiping
- paintbrushes
- a wood stain and topcoat
- a measuring tape
Step 1 – Choosing a Pallet
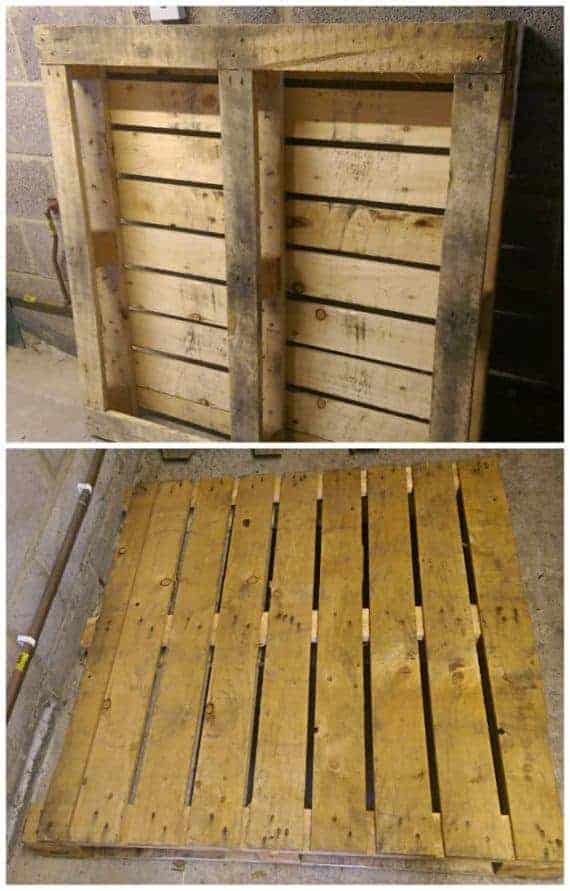
I chose a pallet that was medium-weight and had wide planks. The idea is to use whatever you’ve got to fit the project. This pallet was pretty much square and was roughly 4’x 4′ (1.2 x 1.2m). The coffee table I wanted was going to be 1.6’x 4′(0.55x 1.2m), so it fitted perfectly. All I had to do was cut it in half.
So I thought…
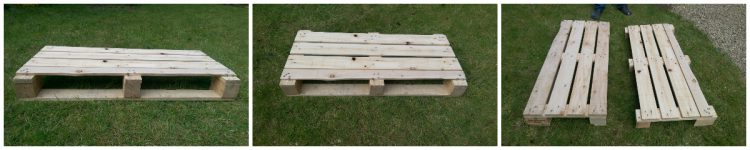
Step 2 – Cutting to size
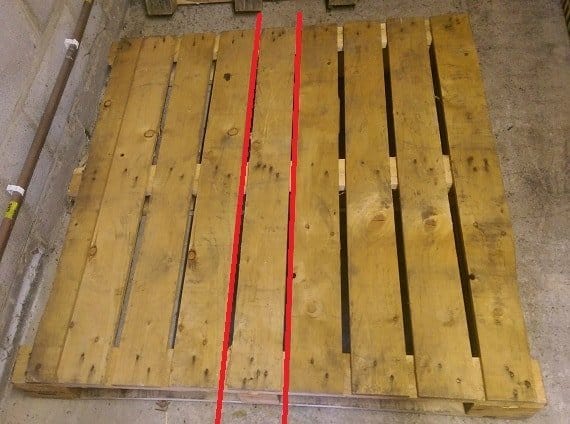
Because of the pallet size, I was planning to cut the middle plank out altogether with wooden blocks underneath (as shown in the picture above). This way I’d had 2 roughly the same size parts that I’d stack up to make the table.

I didn’t want to move any planks because the nails used were very difficult to remove. This way, I didn’t have to. The only thing I had to do was to detach the wooden blocks that were nailed to this plank. I was going to use them later on.
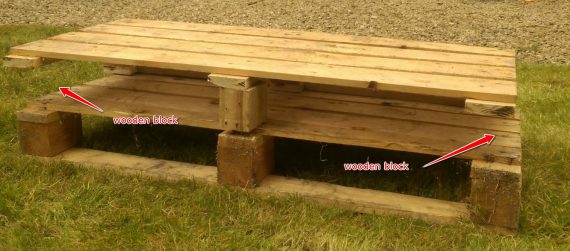
That was the only problem I came across – detaching the blocks. In the end, 2 out of 3 have split, and I had to use something else.
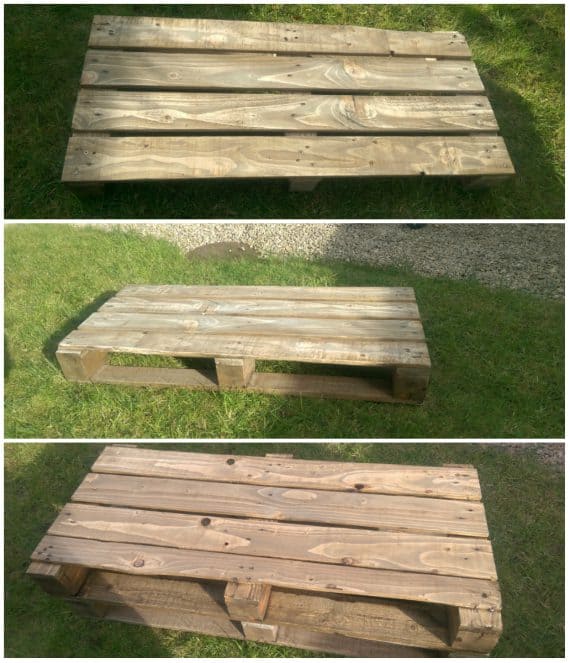
Step 3 – Sanding
To sand the wood, I used a random orbital sander with 40-grit sandpaper to start. I wanted to remove as much material as I could. Then I moved to grit 60 and 80.
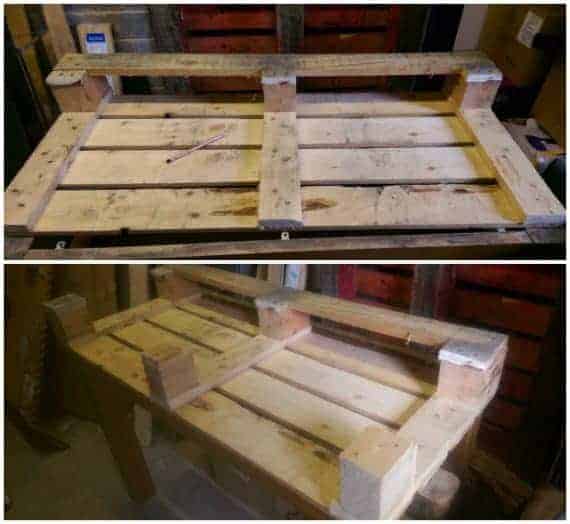
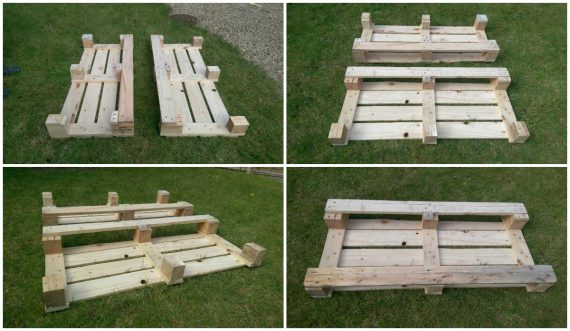
I also attached the missing wooden blocks.
The pictures below show results after sanding and before staining.
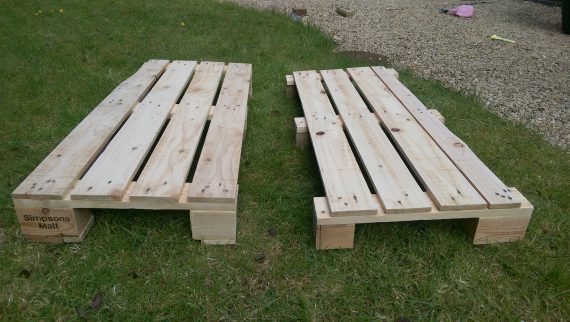
The left part was going to be the top, and the right the bottom.
Step 4 – Staining
Now the parts were ready to stain. I didn’t have a regular stain that you apply with a cloth and wipe the excess. Funnily I didn’t realize that and used the self-sealing stain as a regular one.
So after wiping, there was barely anything left on the wood. Check my post on staining pallets and wood in general if you want to know more about the staining topic.
YOU MAY ALSO BE INTERESTED IN:
Best Sander for Pallets
Best Finishing Sander-Buying Guide And Sanders Reviews
Best Sander to Remove Paint
Best Random Orbital Sander – Buying Guide and Sander Reviews
My excuse was that my brother was helping me with that, and he didn’t read the label. The result was poor, and that only meant I had to use more of this stain and apply it with a paintbrush.
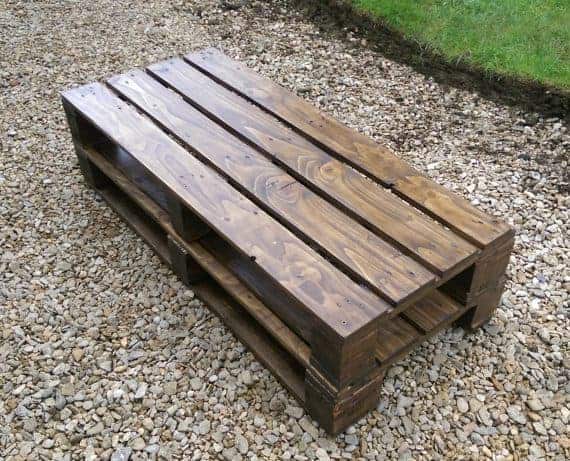
The plus side is that it has a lovely glossy finish and it’s waterproof. Not the outside-left-in-the-rain-proof but good enough for water/drinks spillages.
I applied 3-4 coats altogether, sanding with 120 grit in between coats. My sander was a bit too powerful, even at a slow speed, so I did it mostly by hand. I didn’t want to sand through the stain. Before the last coat, I used grit 150 to smooth the top surface.
This table is not “perfect.” It’s not meant to be. I wanted it to have a character you get when using used pallets.
In the end, all that was left was to stack the 2 parts on top of one another and join them together. The simplest solution is to glue them, and I used simple door hinges (I haven’t received them yet, so you won’t see them here) to make it more secure.
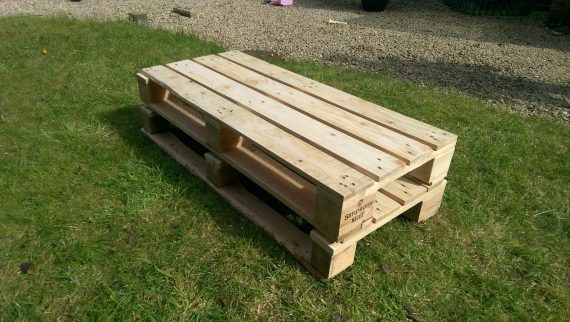
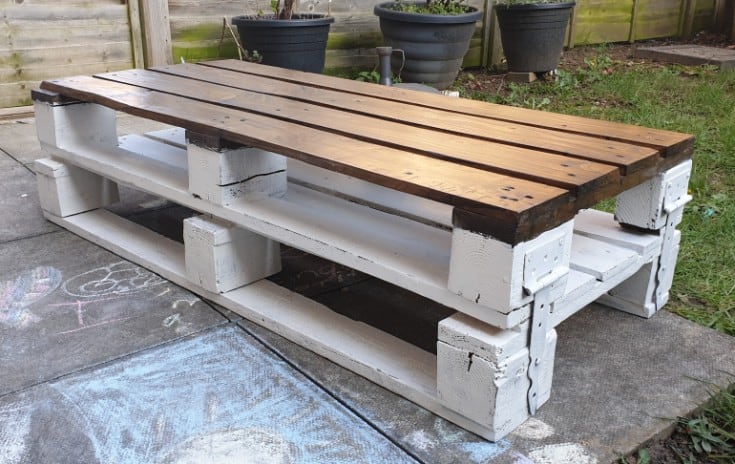
The Final Result
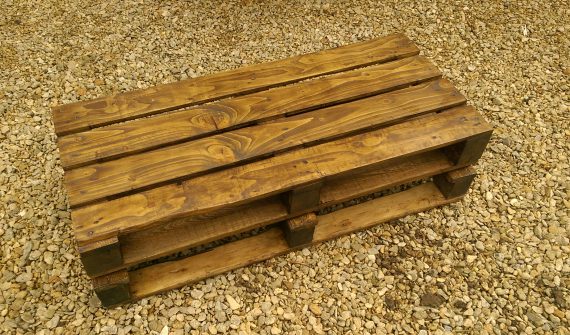
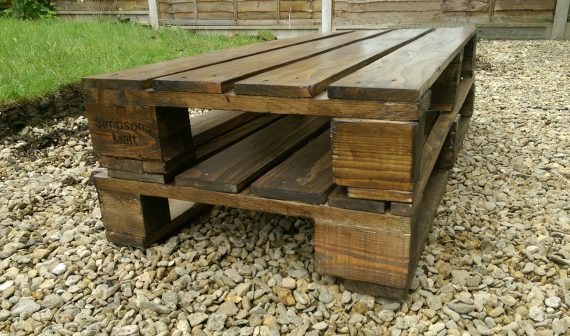
Do you like it? You’re more than welcome to leave a comment below and tell me what you think. For more ideas on Pallet Coffee Tables, check my Inspiration Section.
Update
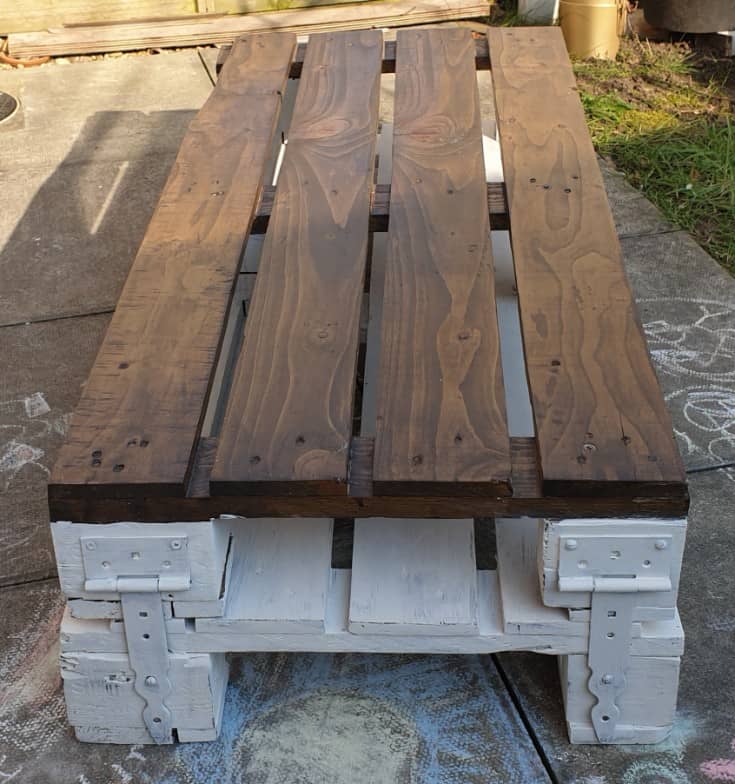
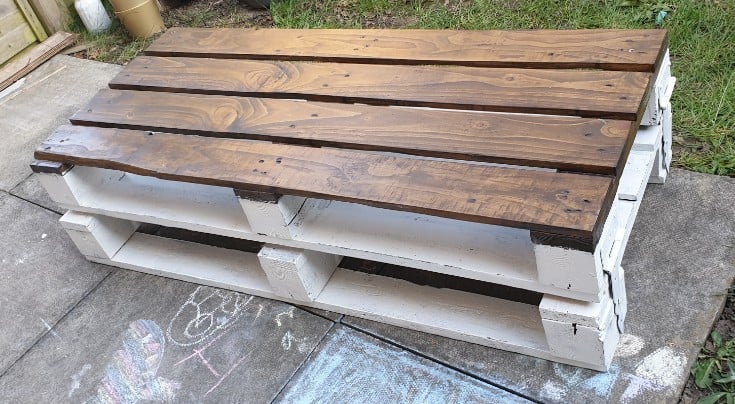
I was getting tired of the brown color, and because my living room is quite dark, I decided to give this coffee table a makeover. A lick of white chalk paint to the bottom and the hinges I ordered ages ago and haven’t had the time to add, and it was transformed.
It is not perfect. Not that I wanted it to be. I like the distressed look of it. I’ve left the top untouched mostly because it’s nicely smooth and waterproof.
When my youngest child is old enough, I may add some wheels to make it more mobile, but for now, I’ll leave it as it is. For more photos and details, check the full post on this coffee table makeover.
Forgive the chalk paintings as we’re in lockdown atm and we’re trying to stay creative 🙂
Let me know if you like the update 🙂 And don’t forget to pin it to your pallet projects board. Thanks!
Subscribe To My FREE DIY Newsletter!
Stay in touch and receive things like updates, special offers, new projects, tips, gear reviews, and more. No spam, promise!
By entering your email address, you agree to get an email newsletter from UpcycleThisDIYThat. I’ll respect your privacy, and you can unsubscribe at any time. For more details, review our Privacy Policy.


I never would have thought in a million years to turn a pallet into a coffee table like this. Now that I see how its done, I really want to take some of the pallets at my home and try this out. I can’t wait to see if I can do this and surprise my wife with it.
Hi, Jorge!
Thanks for stopping by 🙂 It’s amazing, isn’t it? Thr first time when I came across the idea of upcycling pallets I was very surprised what you can do with them. And I’ve been hooked ever since. I have some many ideas and only lack of time prevents me from making more projects. This project is pretty easy but you can even simplify it more by getting 2 “newish” pallets of the same size, sand them without taking them apart and stain them. Then just stack them on top of one another and it’s ready. You could also attach some wheels so it’s easy to move around. For my next table project(for my garden/patio), I plan something like that actually with a wine/beer cooler in the middle. When it’s done you’ll definitely see it here:)
If you make one for your wife send me a picture please 🙂 I could put it up here for everyone to check it out.
Have a great weekend!
Kasia
I’ve been trying to come up with a good way to decorate my yard. I didn’t know that you could make benches with wooden pallets! I’ll have to see if I can find some. Thank you for sharing!
You’re very welcome Braden! You can make a lot of different projects with them. I’ll be making sofas and a coffee table and sofas for my garden soon so stay tuned:) I’ll also try to make a patio decking whenever I can find some spare time. I hope you enjoy decorating your yard and feel free to send me some pictures when you’re done, so I can share them with my readers 🙂
Thanks for dropping by!
Kasia
This is a great idea to find some wooden pallets for sale and the projects are endless. I’ve wanted patio furniture for a while and this would be the perfect project for my husband and I to do together. I love how you reinforced it by making more wooden blocks to go on the other side. We’ll be sure to refer to this as we design our own ideas to our wooden pallet furniture.
Thanks for the awesome idea – exactly what I am looking for. I would like to ask though …. did you have any problems with sanding over the nails or did you have to use a punch to nail them in further? Any further tips would be much appreciated. Thanks again
Hi Sharna 🙂
I’m happy you like it. As for your question. Most of the nails were quite deep in the wood, so no problem there. The ones that were sticking out I treated with a hammer to make them level with the surface.
Then I just sanded over them. You have to pay attention while sanding that they are not sticking out otherwise you could damage the sanding pad(assuming you’re using power sander).
If you have any more questions let me know. I’m happy to help 🙂
Hi, I was wondering, what size clamps did you use? And exactly at what point were they needed? Thanks!
Hi Odara,
I used 9in quick grip clamps to secure the wooden blocks while drilling pilot holes and then screwing them to the boards. I use clamps to secure the planks while using a circular saw. If you use a miter saw that’s not necessary though. I hope that helps 🙂 Thanks for stopping by!