How to Cut a Circle with a Jigsaw for Beginners: A Step-by-Step Guide
This post includes affiliate links. If you decide to make a purchase through my link, I might get a small commission for it at no additional cost to you. Thank you for supporting Upcycle This DIY That!
Cutting a circle with a jigsaw can seem daunting for beginner woodworkers. However, it can be a simple and easy process with the proper technique and tools. In this article, I’ll show you step-by-step how to cut a circle with a jigsaw and some dos and don’ts to keep in mind.
The first step in cutting a circle with a jigsaw is choosing the right tools. You’ll need a jigsaw, a circle-cutting jig, clamps, a pencil, and safety glasses. A circle-cutting jig can be purchased commercially or made at home using basic materials like a piece of scrap wood or metal wire.
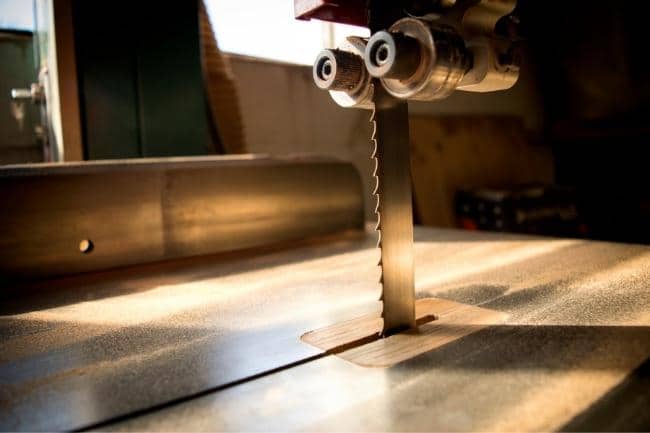
Make sure your jigsaw blade is sharp, as dull blades can make the job more difficult and may result in a rougher finish.
When choosing the suitable wood for your project, remember that softer woods like pine or cedar are easier to cut than hardwoods like oak or maple. So if you’re a beginner, starting with a softer wood is best until you get the hang of things.
Make sure to mark the cutting line using a compass or trammel head. Keep in mind that for the circle hole, the waste side is often inside the circle, so be sure to leave enough room for finishing later. Once you have marked your cutting line, you can begin the process of securing your workpiece and cutting your circle.
Before you begin cutting, ensure you have a clear workspace and wear safety goggles and ear protection. Cutting wood can create a lot of dust and noise, so it’s essential to protect your eyes and ears.
Now that your tools and workspace are ready let’s start cutting your circle!
YOU MAY ALSO BE INTERESTED IN:
Tool Tips: How To Use A Jigsaw To Cut A Straight Line
Tool Tips: How To Cut Curves Using A Jigsaw
Tool Tips: How To Cut A Square Hole In Wood With A Jigsaw
Best Curve Cutting Jigsaw Blades
What You’ll Need
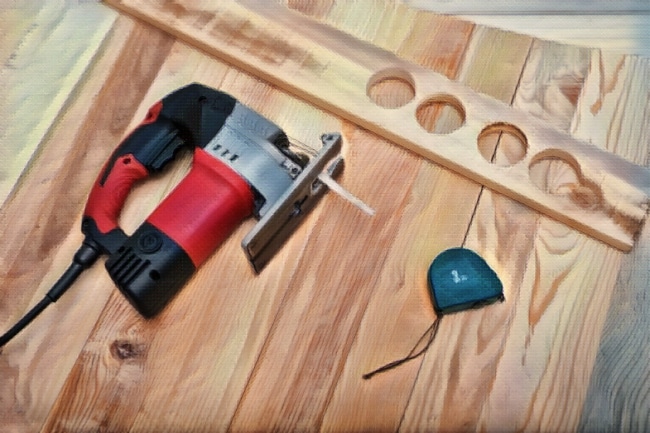
Before you start cutting circles with a jigsaw, having the right tools and materials on hand is crucial. Here’s a list of what you’ll need:
- A jigsaw with a fine-toothed blade
- A piece of wood or other material to cut the circle from
- A compass or a circle-cutting jig
- A drill and drill bit
- Safety glasses and ear protection
- Clamps to hold the material in place
- A pencil or marker to mark the circle
- Sandpaper or a sanding block to smooth the edges
Preparing the Jigsaw
Before cutting a circle with a jigsaw, it’s crucial to properly prepare the tool. Here are the steps you need to follow:
Step 1: Choose the Right Blade
The first thing you need to do is choose the right blade for the job. You should use a fine-toothed blade with a high TPI (teeth per inch) count that is best for cutting curves/circles. This will help you achieve a smooth, clean cut without splintering the wood.
You want to choose a blade suitable for the material you are cutting and the size of the circle you are making. For example, some blades are better for straight cuts, while others are designed for curves.
As mentioned above, look for a blade with a high tooth count(TPI), which will give you a smoother cut. Choose a blade with a narrow kerf, as this will allow you to make tighter turns. A blade with fewer teeth per inch will cut faster, but the cut may be rougher.
Make sure the blade is securely attached to the jigsaw and that it’s the right size for your project. If the blade is too short, it won’t be able to cut through the thickness of the wood, and if it’s too long, it will be challenging to maneuver.
Step 2: Adjust the Speed and Orbital Settings
Next, you need to adjust the speed and orbit(if your jigsaw has one) to match the type of wood you’re cutting. For example, you can use a faster speed and a higher orbit for softwoods, while for hardwoods, you should use a slower speed and a lower orbit.
Keep in mind that the lower orbit setting is less aggressive and produces a smoother cut. And the higher one is more aggressive, and the finish may be rougher, but it cuts quicker.
Make sure you test the speed and orbit on a scrap piece of wood before cutting your circle to ensure the best results.
Step 3: Secure the Wood
Before you start cutting, you must ensure the wood is securely clamped down to a workbench or sawhorse. This will prevent it from moving around while cutting and ensure you get a clean, accurate circle.
Make sure the wood is level and stable before you start cutting. If it’s not, you may end up with an uneven circle.
Step 4: Put on Safety Gear
Finally, before cutting, you need to put on the appropriate safety gear. This includes safety glasses or goggles to protect your eyes from sawdust and debris and earplugs or earmuffs to protect your hearing from the noise of the jigsaw.
Wear tight-fitting clothing and tie back any loose hair or jewelry that could get caught in the blade.
By following these steps, you can prepare your jigsaw correctly and ensure you get the best results when cutting a circle. Remember to take your time and work carefully, and always prioritize safety when using power tools.
Marking the Circle
Before you start cutting, you need to mark the circle on your wood. Here’s how:
- Choose the center point of your circle and mark it with a pencil.
- Measure the radius of your circle from the center point and mark it on the wood.
- Attach a compass to the center point and draw the circle onto the wood.
Make sure your measurements are accurate before you start cutting. If you’re unsure, double-check your measurements to avoid mistakes.
Remember to mark the side of the wood that you want to keep. This will help you make sure everything is clear when you’re cutting.
Here are some dos and don’ts to keep in mind when marking your circle:
- Do use a pencil to draw your circle. Pencils are easy to erase if you make a mistake.
- Don’t use a pen or marker. These can bleed into the wood and leave permanent marks.
- Do use a compass/circle-cutting jig/guide or a round object to draw your circle. This will help you get a perfect circle.
- Don’t try to freehand your circle. This will result in an uneven and imperfect circle.
Once you’ve marked your circle, you’re ready to start cutting. The following section will review setting up your jigsaw for cutting curves.
Cutting the Circle
Now that you have prepared your jigsaw and workpiece, it’s time to cut the circle. Follow these steps to ensure a clean and precise cut:
- Position the jigsaw blade at the starting point of the circle. For cutting a circle hole, make sure the jigsaw blade is in the starter hole you drilled on the inside of the marked circle.
If you’re cutting a circle shape, you either drill a starter hole on the outside of the pattern line and start the cut from there, or you can start from the edge of the wood and then follow the pattern. Make sure the blade is perpendicular to the workpiece as well.
- Turn on the jigsaw and start cutting along the line. Use a slow and steady motion, and let the blade do the work. Do not force the blade or push the jigsaw too hard, as this can cause the blade to bend or break.
- Follow the line around the circle using the pattern as a guide. Keep the jigsaw blade inside the line to ensure a clean cut.
- Stop the jigsaw and remove the blade from the workpiece when you reach the starting point.
By following these steps and guidelines, you should be able to cut a clean and precise circle with your jigsaw. Remember to take your time and be patient, as cutting circles can be tricky for beginners. But, with practice, you’ll soon be able to easily cut circles!
Tips and Tricks
Using a Guide
Using a guide is an effective way to ensure that your jigsaw cuts a perfect circle. If you have trouble cutting a circle freehand, consider using a guide/circle-cutting jig. A circle-cutting jig is a tool that you can use to guide your jigsaw. You can make a circle-cutting jig or buy one like this one from Festool for super easy cuts. It’s pricey, though. If you can’t justify the cost, then check the cutting jig trick below.
Choosing the Right Blade
Choosing the right blade for your jigsaw is crucial when cutting circles. Use a fine-toothed blade with a high TPI (teeth per inch) count. A blade with a high TPI count will make smoother cuts and reduce the risk of splintering.
You should also choose a blade with the correct length for the thickness of the material you want to cut. The blade should be long enough to cut through the material without bending or breaking.
Practice Makes Perfect
Practice is the key to cutting perfect circles with a jigsaw. Before starting your project material, practice on a scrap piece of the same material. This will help you get a feel for the jigsaw and the cutting process.
Dos and Don’ts
- Do use a guide to ensure accurate cuts.
- Do choose the right blade for the thickness of the material.
- Do use a sharp blade that is designed for cutting curves.
- Do practice on scrap material before cutting on your project material.
- Don’t force the jigsaw through the material. Instead, let the blade do the work.
- Don’t use a dull blade. It will make rough cuts and increase the risk of splintering.
- Don’t rush the cutting process. Instead, take your time and make smooth, accurate cuts.
- Don’t forget to wear eye and ear protection when cutting with a jigsaw.
By following these tips, you can easily learn to cut perfect circles with a jigsaw. Remember to use a guide, choose the right blade, and practice before cutting on your project material. With a bit of practice, you’ll be cutting circles like a pro in no time!
Subscribe To My FREE DIY Newsletter!
Stay in touch and receive things like updates, special offers, new projects, tips, gear reviews, and more. No spam, promise!
By entering your email address, you agree to get an email newsletter from UpcycleThisDIYThat. I’ll respect your privacy, and you can unsubscribe at any time. For more details, review our Privacy Policy.