
How To Stain Wood – The Ultimate Guide For Upcycling and Pallet Projects
This post includes affiliate links. If you decide to make a purchase through my link, I might get a small commission for it at no additional cost to you. Thank you for supporting Upcycle This DIY That!
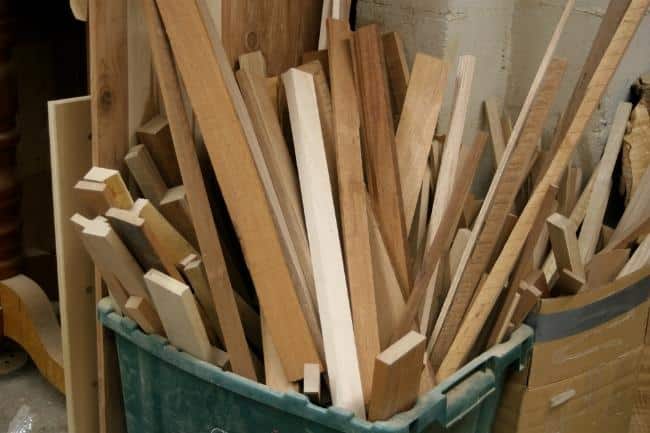
Staining wood is a great skill to have. It’s an awesome way to upcycle old furniture or use pallet wood for projects. This post will show you the basics of staining pallets or any other wood, for that matter.
If you have ever gone to a store intending to buy a stain/paint and you got lost in time-space trying to decide what to buy or even left empty-handed because you could not decide which one will be the best to suit the purpose, then read on.
I know exactly how confusing it can be. Trying to choose the best adequate product for your needs where there are so many you can choose from. That’s why I’ve decided to put together this guide on how to stain wood.
YOU MAY ALSO BE INTERESTED IN:
Wood Sanding Tips for Upcycling and Pallet Projects
How to Paint Furniture – A Guide for Upcycling
What is Chalk Paint and How to Use it – a Beginners Guide
Removing Paint from Wood- Tips, Tricks, and Techniques
What Is A Wood Stain?
A stain for wood is a colorant (pigment or dye) and a binder mixed together with lots of thinner. The thinner is there for easy wiping off of excess stain.
The stain leaves some color in or on the wooden surface. A stain also can be simply a dye and thinner with no binder at all.
A pigment is ground earth or colored artificial particles imitating the earth. Because it’s got its weight, it settles to the bottom of the can. And therefore, it has to be stirred into suspension before use.
A pigment can’t penetrate into the wood, but some of its particles stay in pores or larger scratches after wiping off. In this case, a lighter color can be achieved by finer sanding because less pigment can be implanted.
A dye is a chemical colorant dissolved in a liquid (different liquids are used for different dyes). Thus, the dye penetrates simultaneously with the liquid and doesn’t settle out.
You can darken the wood/pallet wood with as many coats as you wish without covering up the grain or creating any build.

All dyes, whether dissolved in a solvent or including an additional binder, fade in bright light, i.e., sunlight or fluorescent light.
All types of stains can differ in color depth depending on the proportion of colorant (pigment, dye, or chemical) to liquid (oil, thinner, varnish, solvent, etc.). The higher the ratio of colorant to liquid, the darker the stain colors the wood.
It’s quite easy to alter the ratio in any stain by adding pigment, dye, or thinner. Some people say that leaving a stain on the surface longer before wiping off the excess can make wood darker. They explain that the stain penetrates deeper.
This is not the case. The reason for the wood going darker is that the thinner evaporates over time, increasing the ratio of colorant to liquid.
Why Would I Need To Use A Wood Stain?
There are three main reasons why you would want to use a stain. The first is to make a cheaper, less interesting wood, like pallet wood, to look like a more expensive one, such as walnut or mahogany.
The second is that you want to match the color of something you already have. And the last one is to change the color of the wood to create the decor you have in mind.
Will Stain Enhance the Project?
You should ask yourself if the project you have in mind will benefit from staining. Like a stunning piece of wood that you want to show off. Or perhaps it would be better to paint it instead.
Required Tools and materials
A perfect finish requires skills. But don’t forget about the tools and materials that will help you achieve your goal. Luckily the list isn’t as extensive as the one for painting furniture.
- Paintbrush
- Rags
- 220-grit sandpaper
- Painters tape
- Stain
- Wood sealer
- Clear finish
Choosing the Right Stain
If you really want your project/pallet wood project to stand out, choosing the right stain is crucial. Not only do you have to take stain compatibility with the wood into account. But also other factors like wood preservatives, sealants, and a top finish.
This will allow for greater bonding and will keep your project looking great for many years to come.
The Main Differences In Stains
- The ease of application. Oil stains are the easiest to apply because they are the slowest to dry, so you have plenty of time to wipe off the excess. The rest of the stains dry quickly, so you have to work fast or on smaller areas at a time.
Choose an oil stain to apply underneath any finish except water-based. And in any other case where you don’t need any of the unique characteristics offered by other stains. - The drying time. Lacquer stains and dye stains dissolved in a solvent (not water) can be coated over within minutes. Water-based stains need about an hour before you can apply another coat.
Gel stains and dyes dissolved in water need four to six hours before another coat can be applied. Oil stains should be allowed to dry overnight. But always, it’s best to check on the can for instructions.
- The grain definition. All stains give a good grain definition if the excess is wiped off because more colorant is left in the grain. Dye stains generate slightly less definition than pigment stains.
- The color control. Dye stains provide the best color control. They allow for getting the color darker without covering the wood itself. A dye is transparent, and because of that, you can apply as many coats as you wish and still see the wood’s figure. Pigment hides.
Oil-Based Stains characteristics
- Longer working time- less likely to deal with dried lap marks
- Do not raise the grain-no need for sanding
Do Oil Stains Last Longer Than Latex Stains Outdoors?
The answer is it depends. If you have a rough wood surface to stain, you should choose an oil-based stain. Mostly because it will penetrate the wood better.
Semi-transparent oil stains would be excellent as they can give your project proper wood protection without hiding the texture/grain.
Even with several coats applied. It will last from four to seven years and are easy to refresh. Just give them a thorough wash with a pressure washer and recoat.
Latex stains are best for smooth wood surfaces, and they won’t erode as fast as oil-based stains. Life expectancy is 4-6 years on a smooth vertical surface.
Water-Based Stains characteristics
- Lower odor than oil-based
- Dry faster
- Not too much cleanup-only water and soap required
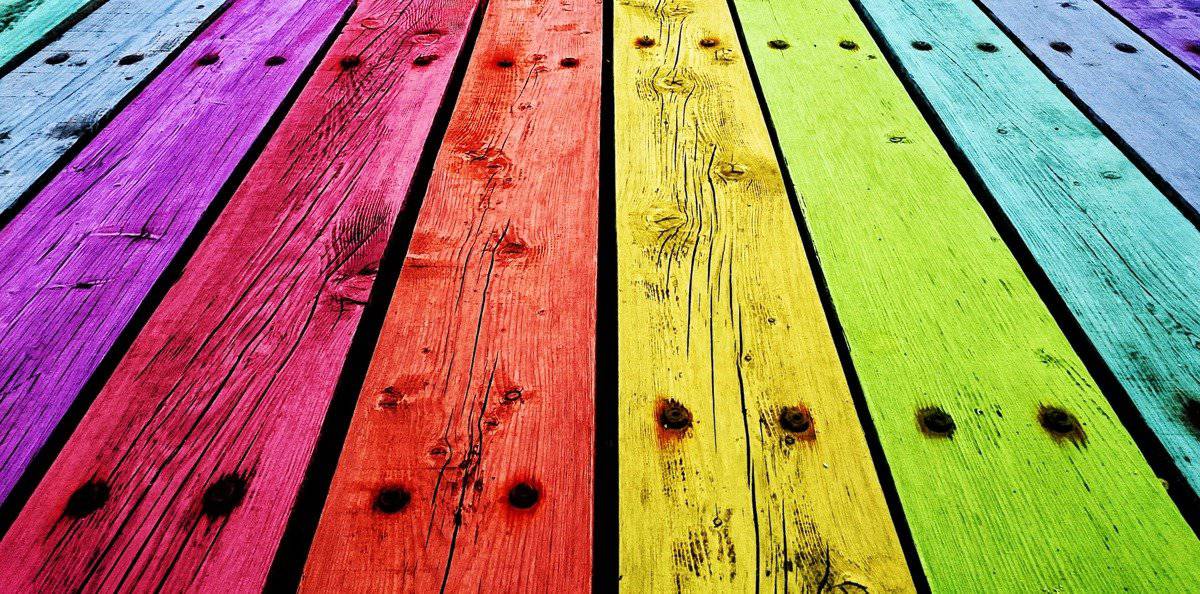
- A lot of vibrant colors to choose from

Types Of Stains
Surface Stains
These are fast-drying water-based stains that don’t penetrate the wooden surface more than a few layers. Great for logs, spindles, railings and wood trims, and frames.
Shallow Penetrating Stains
These are oil-based stains, alkyd dispersion stains, and water-oil emulsions. They can penetrate wooden surfaces up to four layers deep and have excellent water-repellent properties.
PureColor Stains
These are water-based stains that have the benefits of oil-based shallow penetrating stains. The difference is that they’re easier to clean up without any toxic chemicals and nasty smells.
Also, a lot of colors to choose from at PureColor Inc, and they’re available on Amazon as well.
Deep Penetrating Stains
Oil-based stains penetrate wood about ½” deep. The good news is that they don’t tend to flake like others, but the drawback is the oily residue left behind.
Homemade stains
If you want to go the natural route, you can use used coffee grounds or tea bags to make your own stain. All you need is a jar, some steel wool, vinegar, and used coffee grounds/teabags.
You mix it all. Leave it overnight, and voila, you got yourself a homemade stain. For full instructions, check my article on how to distress wood/aging wood.
Choosing the perfect color
Choosing the right color for a specific type of wood is also essential. A light brown stain will look different on redwood than on pine. Always test the stain on a sample piece of wood.
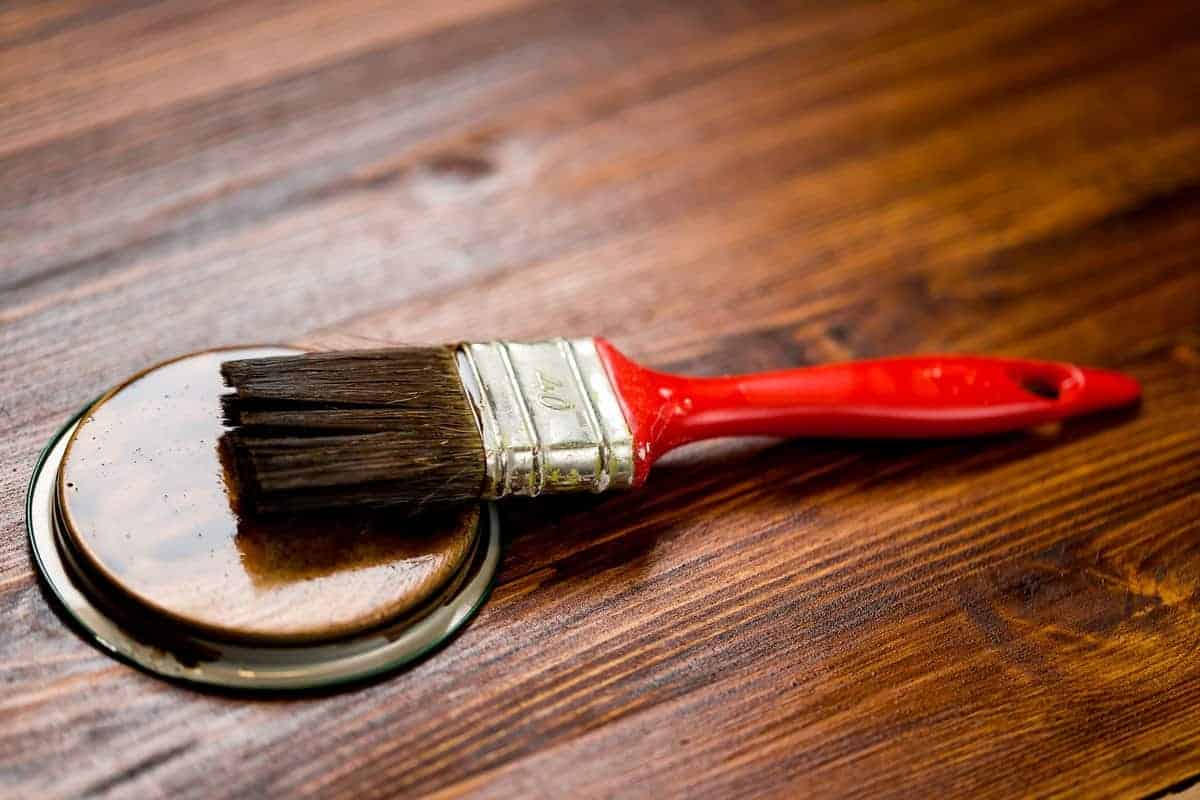
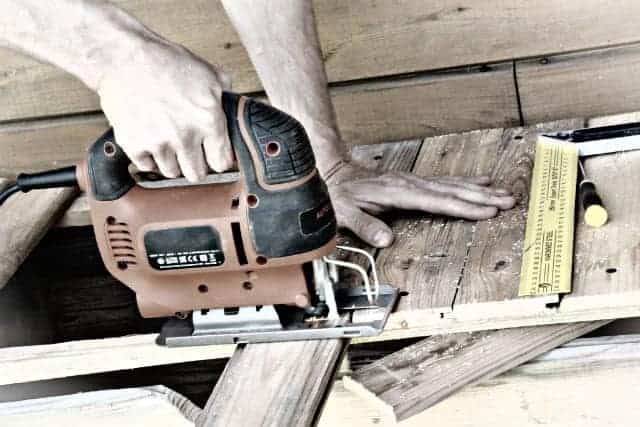
How To Apply A Stain
The main rule for applying the stains is to apply a wet coat and wipe off the excess before the stain dries. If you’re using one of the faster-drying stains, you may need to divide your project into smaller sections.
Or have someone else wipe as you apply to get good results. It’s much faster to wipe the stain onto the wood with a cloth, wearing gloves instead of brushing it.
Wood Conditioning
What is wood conditioning, and why do I need to do it? The reason behind conditioning or washcoating the wood is to prevent blotching( uneven coloring caused by differences in wood density).
A wash coat or wood conditioner is simply any finish thinned to about 10 percent, so it doesn’t fully “seal” the wood.
Bear in mind that you have to use this technique for only softwood, e.i. Pine or tight-grained hardwoods like maple. Since using pallet wood, you don’t really know what kind of wood they are made of. I’d say it’s safer to do it every time.
You can make your own conditioner by diluting any varnish with paint thinner (1:2 ratio) or buy a ready-made one.
Remember to let it dry thoroughly before applying the stain – at least six hours but better overnight. That’s the key to getting the wood conditioner to work.
Stain preparation and application tips
- Sand bare wood lightly.
To prepare the wooden surface for a stain, make sure you sand it first. It will open the pores of the wood for the stain to penetrate. You can’t use a stain on a finished surface. The existing finish will block it from pores.
Start with a medium grit sandpaper like P-120 and then move up a grit till you get to 220. Remember, you always sand with the grain to avoid scratches. - Flawless surface prep for oil-based finishes
Before you apply a stain on a freshly sanded surface, give it a rub with a no.0000 steel wool (remember to go with the grain!) It will burnish and shine the surface and lift the dust from the grain. Then wipe it off with a Swiffer Sweeper cloth. - Use a bristle brush, a foam brush, or cloth for staining
Choose the correct tool for your project. If you’re dealing with wood with larger pores, you should put some pressure on it while applying the stain. Go against the grain direction. I’ll help the stain to get to the deep pores. Don’t skimp on the amount of stain as well- the wood will have more to absorb. - Timing
The longer you leave the stain on, the deeper and reacher the color, so pay attention to the timing. As I wrote before, for quick drying stains, divide the project into small sections and work on one at a time. Never allow the stain to dry on the surface. It will cause a problem with the clear finish adhesion. - Remove the excess stain
Make sure you remove any excess stain with a dry cloth before letting the surface dry. Wipe it in the direction of the wood grain. - Vertical surfaces
Use a gel stain for vertical surfaces. Its thicker consistency means less stain running and more time to apply an even coat. - Remember: a stain gives color but not protection
As mentioned before, a stain will give you beautiful colors. But it doesn’t give the wooden surface any protection. That’s why it’s crucial to seal it with a layer of clear finish. - Spray bottle for stain
If you have a project with a lot of hard to get to spots and corners, this tip will be a lifesaver. Pour the stain into a clean spray bottle and spray it onto your project. Wipe up the excess as usual. It’ll not only save you time but the amount of stain used as well.
Shading with wood stain
For those who fancy something different, check out this staining technique. The results are amazing, and you sure will be able to make some fantastically unique designs with it.
Stain and Finish Wood in One Step with Minwax Polyshades
No time and busy life? There is a solution for you, as well. You can use a product called Minwax Polyshades. It’s a mix of stain and polyurethane finish.
It’ll give you both color and a protective finish. 13 colors are available in both sating and gloss sheen, so plenty to choose from.
Use a natural bristle brush(not foam brush) for the best results, and remember to test first.
Watch the video for full instructions.
How to Stain Wood Evenly Without Getting Blotches and Dark Spots
Everybody wants beautiful, even stain, but many times, something goes wrong. You end up with horribly blotched results that look awful. Below you’ll find some great advice on how to avoid it and get a fantastic finished project.
Problematic woods
Some types of wood, like cherry, pine, and birch, can be a bit difficult to stain evenly. They tend to become blotchy, and the end result doesn’t look very attractive. There is, however, a simple solution to this problem.
Seal the wood before applying the stain
It’s as simple as this. But before you even start, test the stain on a sample wood you’re working with. You can use pre-stain conditioners, but you should get better results with a wipe-on oil finish as a sealer.
Split the test board into three parts. Seal each with different concentrations of the sealer. A full strength, half strength(diluted with a mineral spirit), and leave the last one untreated.
Leave it for a few hours, and then sand lightly with 220 grit. Now the stain. Rub it over the whole board and wipe it off. You can now decide which look you like best. Make sure the stain and the sealer are compatible.
Choose the sealer concentration and then apply several coats of stain to get the desired shade. You can use a similar test board with a different number of stain coats.
Sometimes several layers of stain can start to obscure the grain. If you want to avoid it and still achieve deeper color, opt in for a less concentrated sealer. But mind that, you’ll get a more blotchy look. You have to compromise somewhere.
Finish your test board
Experiment with different types of finishes on your test board and decide which one you like best. You can choose from a range of sheens from flat to high gloss.
Wood Staining Do’s and Don’ts
DO’S
- Always prepare the wooden surface with a light sanding
- Stir the can thoroughly
- Use wood conditioner
- Test any stain you are considering
- For a deeper color, apply a second coat
DON’ts
- Leave hinges, handles, knobs, or pulls on a piece.
- Attempt to achieve a darker color by allowing any unabsorbed stain to dry on top of the wood
- Apply a clear protective finish before the stain has dried completely.
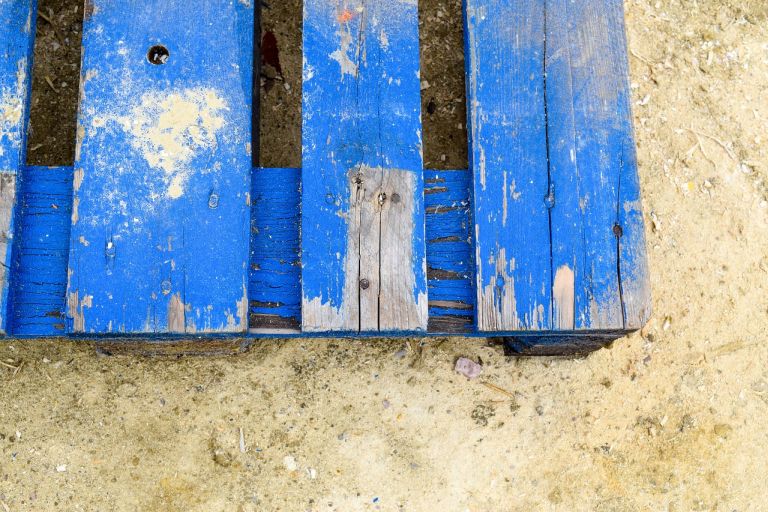
Any Special Tips For staining Pallet Wood Projects?
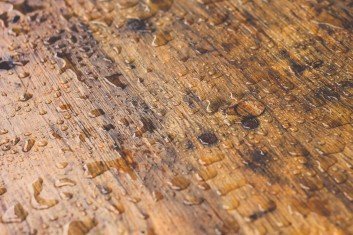
For pallet wood, avoid staining on wet days, and make sure the wood is completely dry. Staining humid pallet wood will cause it to flake off.
What to use to stain pallet wood projects?
You can use whatever you want 🙂 It really depends on the final effects you desire. Make sure that you test the stain on the pallet wood beforehand since we rarely know what type of wood was used to make the pallet.
Just remember to put a finish coat on top of a stain. If you want to change the color of the pallet wood entirely and don’t mind covering its appearance, you can paint it.
For indoor projects, there are many options to choose from, like chalk paint, mineral and milk paint, or enamel paint. For outside, I’d select oil or latex paint, which is going to protect the pallet wood from UV radiation.
I’d say that is one more reason you’d like to use some kind of protective layer on the pallet wood. This and water.
I mean, it really depends on which part of the world you live in you’d want to add protection against the sun or rain or both.
To do that, you can use just paint or some kind of water sealer, e.i. Yacht sealer. It’s super waterproof and great for protecting pallet wood from UV radiation. It will also allow the water within the sealant to evaporate to avoid splitting, rotting, and warping.
This will give you peace of mind that your creations are well protected from all elements.
Summary
In short, these are the five steps you should remember when staining a pallet or other wood.
- Sand the wood
- Use wood conditioner
- Different woods absorb the stain differently, so always test, test, test
- Apply the stain and wipe off excess
- Always seal the wood for protection
If you’re looking for a good staining job, don’t forget that it’s all about preparation. Make sure your wood is clean and dry before applying the stain of choice.
And if you’re planning to use pallet wood as part of your project, give it an extra coat or two! The more coats you apply, the darker color will be when finished.
So make sure to allow adequate drying time between each application of stain – this may take some trial-and-error on different types of woods until you find what works best for your needs.
Good luck with achieving those rich colors in no time at all! And most of all, don’t be afraid to experiment and have fun!
Don’t forget to pin the article to your woodworking/upcycling board for later!
Subscribe To My FREE DIY Newsletter!
Stay in touch and receive things like updates, special offers, new projects, tips, gear reviews, and more. No spam, promise!
By entering your email address, you agree to get an email newsletter from UpcycleThisDIYThat. I’ll respect your privacy, and you can unsubscribe at any time. For more details, review our Privacy Policy.
Hi Kasia,
What a great article!
I’ve been admiring pallet projects on Pinterest for a while now but just didn’t know where to source them to attempt a project of my own. Your article makes it all seem so simple to treat the pallets and stain them… I’m sure my project wouldn’t turn out to be amazing as I’m sure yours would! I probably wouldn’t be able to make up my mind as to what stain I wanted before even starting!
Sammi
Hi Sammi,
Isn’t that amazing how many ideas you can find on Pinterest?You can actually spend hours browsing and saving:) These projects can vary from easy to more complicated and will require some work and knowledge. I learn as I go 🙂 Each time I know more than the one before so it gets easier with time 🙂 and same here with the stain choice. I always spend definitely too much time making the decision lol. More funny is that with every project I realize I need new/more tools so my family have Christmas and birthday presents sorted for me lol. Anyways thank you for dropping by.
Kasia 🙂
Glad you mentioned the wood conditioning. that is probably what I did wrong; I did not put any. I stained my whole deck two years ago and the rought winter months has been really hard on it. this time i am staining it a cute color like orange. Can I just go ahead and put the color stain right away? Or do I have to apply some other product first?
HI Loren,
If you staining a new deck or re-stain an old one the secret is in preparation. As you’ve mentioned you refreshing an old decking you have to clean it first. The good way of doing it is using Sodium percarbonate wood cleaners, also known as oxygen bleach wood cleaners. They safe for plants and won’t harm you either. That’s the choice if you have untreated deck but in your case I’d go for stain stripper. For the stubborn leftover stains just use a sander to get rid of them. Next step is a wood brightener. This will neutralize any stain stripper used and improve wood penetration and restore wood appearance. Remember to rinse all the chemicals with plenty of water and let it dry.Now the deck is ready for staining. Have a look what is available, there is so much choice. I’d lean towards water-based stains.I have in plan to write a blog post dedicated to deck staing but that’s yet to come.I hope I’ve helped a little 🙂 If you have any more questions I’ll happy to help.Have a nice day 🙂
Kasia
Hi Kasia,your site is very different and I mean that in a good way.Who would have thought that you could use pallets the way that you have.Then stain them to look so nice. You have an great idea here with probably very good potential. I don’t know much about staining,(just our deck) but your have a wealth of info and tips here and I’m going to bookmark your site for future reference. I enjoyed my visit and will return.Thank you.
Barry
Hi Barry,
thank you for your kind words :)I’m glad you enjoyed your visit on my website.You can find a lot of information on the internet regarding pallet projects, but the idea is to have them all in one place so you don’t waste time looking for them. Instead, you can spend your time creating. I’ll be posting more ideas or tips soon. Thank you for dropping by.
Kasia 🙂
Hi Delmar,
thank you for your comment.Half the job is to choose the right pallet for each project.I’ve done one so far – DIY pallet sandbox and I’m in a process of making a herb planter which I’ll be posting about in the next couple of days 🙂 I have lots of ideas it’s the matter of finding the time and having a fair weather which in this country is sometimes near impossible 😉
Kasia
Hi Kasia,
I like this post! I am into pallet wood work as I like DIY stuff. I did one coffee table for myself and I bought this MRF woodcoat to finish the surface. Unfortunately I ruined the entire table. After applying the coat, I found the surface became rough and the color is so dull. I went back to the shop and questioned the seller. He told me that I should wipe the excess with dry sponge every time I finish a coat. Is that how it should work?
Regards,
Alex
Hi Alex,
I’m glad you liked my article. Staining wood, especially pallet wood can be tricky, as it’s usually hard to tell what kind of wood you’re dealing with. Different wood soaks up the stain in a different way. Hardwoods behave differently from softwoods. The seller was right. You should wipe any excess stain off while staining. You can also use wood conditioner beforehand. I usually do some sanding between coats as well because everything you put on will raise wooden hair and the wood feels rough. You also have to remember that the final effect depends on many circumstances like the type of wood, wood moisture content and the way wood has been prepared i.e sanded. The best way is to try and make some samples from the leftover pieces and check how the stain will turn out when dry.
I’d say you can save this table by sanding off this stain and try different one or if you can’t you can always paint it with wood paint or latex paint.
I hope I shed some light on your stain issues 🙂 If you have any other questions feel free to get in touch.
My Regards
Kasia
I found this really interesting. A friend of mine has just built a whole load of outdoor furniture using pallets, so I’m going to pass this onto him. I never realized there were so many options for treating wood. Is there such a thing as a UV-protection stain? I seem to remember my father treating a timber fence many years ago, but the climate was very dry and hot, so I think he used a UV varnish to treat the fence. Good advice on stirring the pigment into the suspension before using! I bet that’s something easily forgotten. Great article – you are clearly very knowledgeable on this subject.
Hi Mara,
Thanks for dropping by 🙂 There are so many ideas you can use for pallet projects. I’m in a middle of making a pallet coffee table and my next project is to make some garden furniture as well. As for treating wood it’s a broad subject and effects differ from wood to sanding to climate. As far as I know there isn’t a UV protection stain but you can get nice finishes for that purpose like marine varnish or coating. It’s meant for extreme conditions so would be perfect but it comes out very glossy so I’m not sure if you could use it on everything like a fence for instance. The other way is to get special kind of finish for particular purpose i.e fence or garden furniture and remember to repaint every now and then. This is a one thing I still learn about 🙂
Kasia
Hi, Like a lot of people I wanna do a pallet wall I’m just not sure about a top coat to use. When I was just a little guy I would help my parents with decoupaging the problem with that was the varnish would tarnish after several years and turn yellow. So my question is has varnishes changed or should I go with should I go with something else? Can you use beeswax over stain or is that more for the plain look. Thank you
Hi, Jon!
Thanks for stopping by. I apologize for a late response but I’ve got some family related issues and I haven’t had much spare time.
As far as I know any water based finish like General Finishes QTHS High Performance Water Based Topcoat or Minwax Satin Polycrylic Protective Finish would be appropriate. Or you could try acrylic varnish like Krylon Acrylic Spray Paint Crystal Clear that has high transparency levels, doesn’t go yellow and has good UV and dust resistance.
You can use them over anything like stain or paint. Just keep in mind that water-based top coats shouldn’t be used on top of oil based stains. And to answer your question: yes, varnishes have changed over the years and you can find pretty much anything to match your needs these days.
I hope that this will help you with your project and if you have any more questions I’m happy to help whenever I can 🙂
Kasia
Hi Kasia
I am embarking on my first pallet project and its fair to say I’m a complete novice. I am creating a pallet coffee table with hairpin legs, and have found your article super helpful for deciding what type of stain to use. I am concerned about “little hands” getting splinters from the coffee table though and was wanting to know what you would recommend in terms of prepping/sanding the pallet?
There is also some blue spray paint on the side of the pallet from its previous use and wondered if you had any experience removing spray paint from the pallets? Will the stain hide it do you think?
Any advice gratefully received!! Cheers – Hannah
Hi Hannah:)
First of all, I’m sorry for a late reply. As for your question. I usually sand with 2-3 different grades of sandpaper starting at 40 or 60 – depending on how used the pallet is. And then I go gradually up to a grade when the pallet is smooth to touch. Then stain and sand between layers. It all depends on how smooth you want it to be and what kind of stain you’re using. Wood sanding tips for pallet projects may help 🙂
As for a spray paint. Just make sure it’s a spray paint, not a blue pallet which shouldn’t be used for projects(I’ve written an article about what pallets to use).
If it’s only a paint the best way is just to sand it off.
Hope this will help a bit. If you have any other questions please let me know. And I promise to hit the reply button quicker than this time 😉
Kasia
Hi I want to make a feature wall using pallet wood and have various shades of natural wood in a grey dark and light but not sure what to use any help pls?
Kasia! So glad I found you. Just what I was looking for! I am into making signs from pallet wood. Prefer using homemade stains, etc.
Ken