3 Easy Ways How to Transfer a Pattern from Paper to Wood: A Quick Guide
This post includes affiliate links. If you decide to make a purchase through my link, I might get a small commission for it at no additional cost to you. Thank you for supporting Upcycle This DIY That!
Have you ever seen a beautiful pattern on paper and wished you could transfer it onto wood? Pinterest is full of fantastic typography/designs with quotes and/or drawings. You could even use these methods for transferring wood burning/pyrography patterns.
This article will show you how to transfer a pattern from paper to wood in 3 quick ways! It is easy, and anyone can do it.
I am going to walk through the steps with some hints and tips for getting good results. You don’t need any expensive equipment or software – all you need is something to trace your design onto the wood. I’ll show you three simple methods to do it quickly and efficiently. Let’s get started!
how to transfer a pattern from paper to wood Using a newspaper and ballpoint pen
This method can be used on any size design to be transferred.
Tools and materials
- Printed pattern
- Old newspaper
- Ball pen/dotting pen
- Piece of wood/wooden surface
- Painters tape
Firstly print your pattern on a sheet of paper. If you have a bigger design, you can print it in a print shop or use a site like Block Posters to split it into several A4 size sheets of paper and print it on a regular printer.
Then tape the pattern to a piece of wood with a bit of newspaper underneath using painter’s tape. Make sure that the newsprint is underneath the entire pattern.
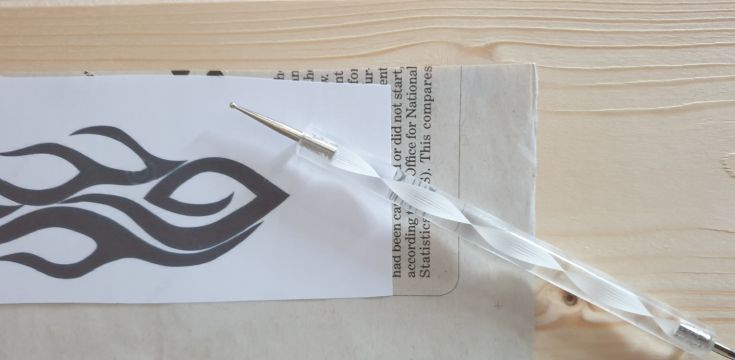
Then trace over your design using a ballpoint pen or pencil. Press firmly on the pattern with a pen, but don’t press too hard! The classified pages and stock market pages are the best because there are many small newsprints all over these pages. I used a doting pen I had at hand.
Once your design is transferred, remove the paper and newspaper. Now you need to use a pencil or a paintbrush to go over your design.
The newspaper and ballpoint pen method is one of my favorites because you don’t need any special tools. It is easy to find newspapers, and you can use it for large and small projects.
Just make sure that the newspaper has lots of ink to transfer to wood. If the wood is soft enough, the ball pen/doting pen will leave marks on it, so even if the ink transfer is not visible enough, your design will be easy to trace with a pencil afterward.
Using a pencil/chalk/ piece of charcoal /charcoal pencil
This method is pretty similar to the one above in the way the design is transferred. All you need is a pencil, chalk, or charcoal.
Tools and materials
- Printed pattern
- Soft pencil/chalk(for dark surfaces)/charcoal pencil/piece of charcoal
- Ballpen/dotting pen
- Piece of wood/wooden surface
- Painters tape
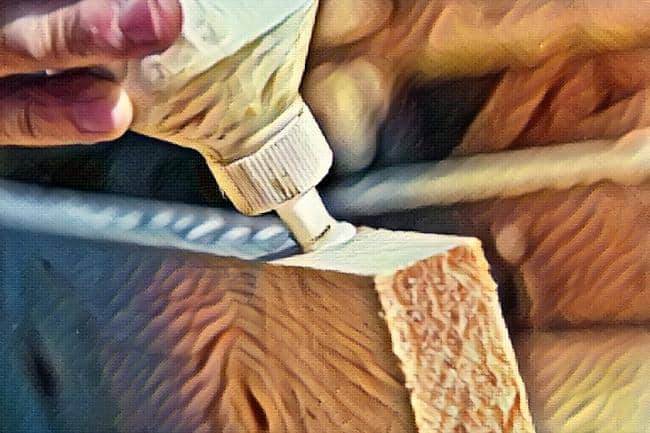
First, you need a printout of your design or typography. Then cover the back of your design with a soft pencil, charcoal, or chalk(for dark surfaces). Make sure you cover the entire space behind the design you want to transfer.
Flip the design over and place it on the surface you want to transfer it to, with the pencil side down. Tape it to the wood with painter’s tape. Make sure the design is placed correctly.
Now use a pen or sharp pencil to trace over the design.
When you are done, peel the tape off. You can finish your design in any way you’d like. Sharpie paint pens are great for doing letter signs, but paintbrushes are a good option as well.
Tip: If you’re using chalk or charcoal, make sure there’s enough pressure behind your strokes for an even transfer. You can also use this method with graphite pencils and soft/charcoal lead-based drawing pens.
how to transfer a pattern from paper to wood Using a carbon paper sheet
This method uses a carbon paper sheet. To transfer your design, place the pattern on the wood and secure it with painter’s tape. This way, it’s not likely to move.
Tools and materials
- Printed pattern
- Carbon paper
- Tracing paper
- Ballpen/dotting pen
- Piece of wood/wooden surface
- Painters tape
Place a sheet of carbon paper between the pattern and wood, then trace over the design onto one side of your work.
Place a tracing paper sheet on top. This step will make it easier to trace the design with the doting pen. The carbon paper will transfer the design onto your workpiece.
Track the design with a pencil or doting pen. Remove the pattern and carbon paper to see if you’re happy with how everything looks. This method gave me the sharpest and most visible result.
If you’re happy with how everything looks, now you can either trace the pattern with a paintbrush or a paint sharpie like in methods 1 and 2 or cut the design out with a jigsaw or scroll saw if you want to.
If you have cut it out, the last step in this process is to sand down the edges of your work so that they’re not rough and sharp.
You have now successfully transferred a pattern onto your wood! Your new design can now be used for awesome DIY home decor projects, including wooden signs with quotes or anything else you can imagine.
If you are interested, I also have a post on how to transfer photos to wood worth checking out. Don’t forget to pin this article for later to your DIY craft board. Thank you!
Now go make something beautiful. 🙂
Subscribe To My FREE DIY Newsletter!
Stay in touch and receive things like updates, special offers, new projects, tips, gear reviews, and more. No spam, promise!
By entering your email address, you agree to get an email newsletter from UpcycleThisDIYThat. I’ll respect your privacy, and you can unsubscribe at any time. For more details, review our Privacy Policy.