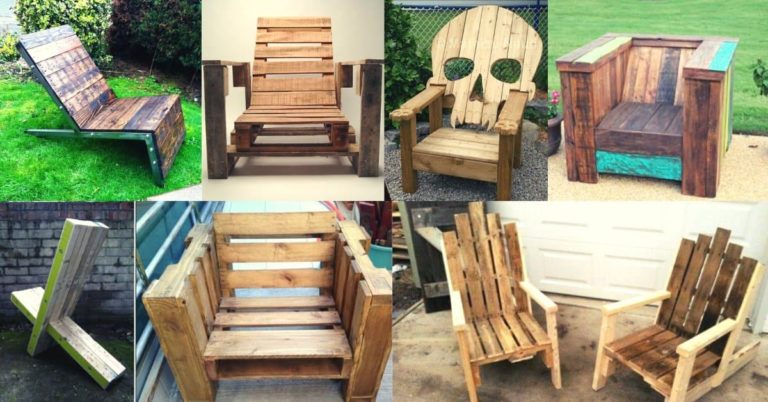
Unlock Your Crafty Side: Navigating the Basics of Woodworking Hand Tools
This post includes affiliate links. If you decide to make a purchase through my link, I might get a small commission for it at no additional cost to you. Thank you for supporting Upcycle This DIY That!
From Tree to Treasure – The Woodworking Journey
It starts with a profound connection to nature. The tactile feel of bark, the scent of freshly cut wood, the comforting rhythm of a saw or plane against a piece of timber. Woodworking unearths the primal delight of crafting with your hands.
Every chip carved, every corner sanded, each joint fitted brings with it an unrivaled satisfaction. It transforms simple, raw material into a real treasure; a process so rewarding that it’s often viewed as more than a pastime—a journey.
Woodworking is a timeless craft that has been enjoyed by countless generations. As a DIY enthusiast/woodworker, I’ve come to appreciate the value of quality hand tools in my projects. In this article, we’ll explore the world of woodworking hand tools and their importance in creating beautiful, functional pieces for your home and beyond.
Hand tools are the backbone of any woodworking project, and if you’re like me, you know that having the right tool for the job can make all the difference. From carving intricate details to shaping and joining pieces, these tools are essential in every woodworker’s collection.
Let’s dive right in and discover which hand tools you should consider adding to your workshop, ensuring your projects turn out not just good but great.
Remember, there’s no one-size-fits-all approach to woodworking – the beauty of the craft is in discovering your unique style and process. Embrace the learning and experimentation that comes with every project, and don’t be afraid to seek advice or inspiration from fellow woodworkers.
With practice, patience, and a reliable set of hand tools, you’ll be well on your way to mastering the art of woodworking.
Understanding the Basics: Introduction to Woodworking Hand Tools
A maestro is only as good as his orchestra, and in woodworking, your tools play the symphony.
Importance of Knowing Your Tools
Understanding your tools— their purpose, operation, and maintenance—forms the bedrock of your woodworking journey. A well-honed familiarity with your tools enhances precision and promotes safety.
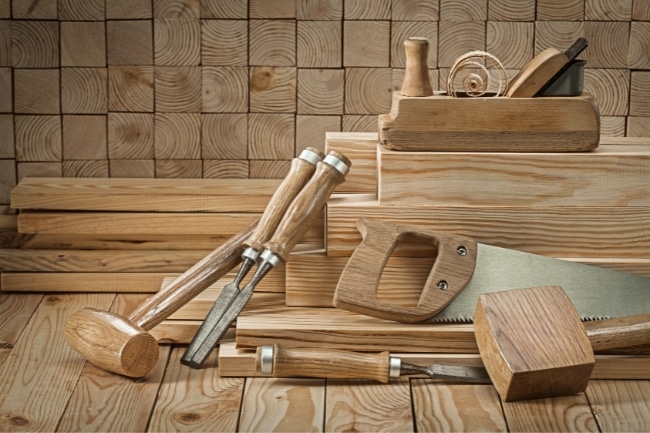
A Brief Overview of Essential Woodworking Hand Tools
Each tool has a unique role in woodworking, from the versatile chisels that breathe life into a design to the robust saws that shape the raw timber. Planes, hand drills, measuring, and marking tools have their own symphony to play, orchestrating the artisan’s masterpiece.
The Toolbox Talks: Getting to Know Your Hand Tools
Hand-tool woodworking is not only about craftsmanship but also about understanding and connecting with the material.
In this section, we’ll discuss the types of hand tools you’ll need and how they compare to power tools in terms of efficiency and precision.
Types of Hand Tools
There are several essential hand tools that every woodworker should have in their workshop, each designed for a specific purpose:
- Saws: include handsaws, coping saws, and dovetail saws for cutting wood into different shapes.
- Planes: A hand plane, like a #4 bench plane, is used for smoothing and shaping wood surfaces.
- Chisels and Gouges: A set of chisels and gouges is a must for carving intricate details and removing wood.
- Hammers and Mallets: These tools help you drive nails or chisels and assemble various project parts. A suitable woodworking mallet is essential for your workshop.
- Files and rasps:
- Measuring and Marking Tools: Accurate measurements are necessary for precise woodworking projects, so having a quality ruler, tape measure, and marking tools is essential.
Knowing Your Arsenal: A Deep Dive into Woodworking Hand Tools
There are specific hand tools that are absolutely essential for your projects. Investing in these tools allows you to create beautiful furniture, upcycle old pieces, and make stunning home decor.
Hand Saws: Your Cut Above the Rest
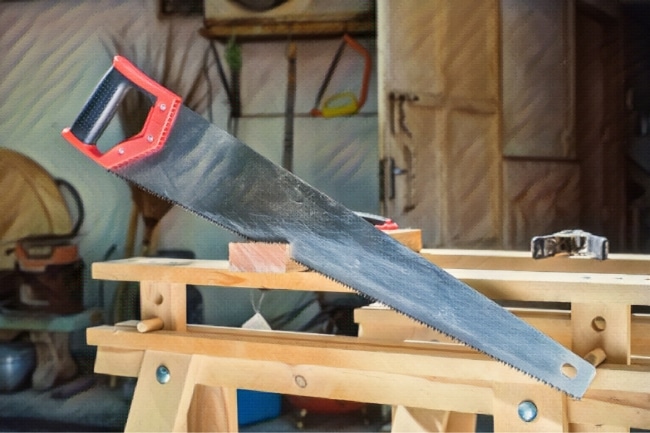
Saws are an indispensable part of any woodworking project. From cutting lumber to shaping intricate details, you need a variety of hand saws to achieve different cuts and finishes. From rip saws, designed for cutting along the grain, to crosscut saws, made for slicing across the grain, each type of hand saw caters to specific woodworking needs. Understanding their utility will help ensure precise and efficient cutting.
- Dovetail saws for precise cuts in joinery
- Hand saws suitable for crosscuts and rip cuts
- Coping saws to make curved cuts or remove waste from joints
Tips for Choosing and Using Your First Hand Saw
Choosing your first saw is akin to choosing a dance partner—it should feel comfortable and in sync with your movements. Once selected, remember that every saw has its rhythm; find it and let your cuts flow naturally. Keep extra blades on hand, as they often need replacing.
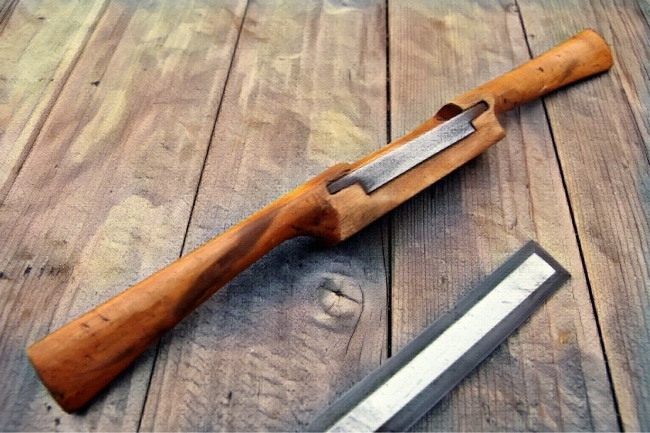
Planes: Smoothing the Path to Success
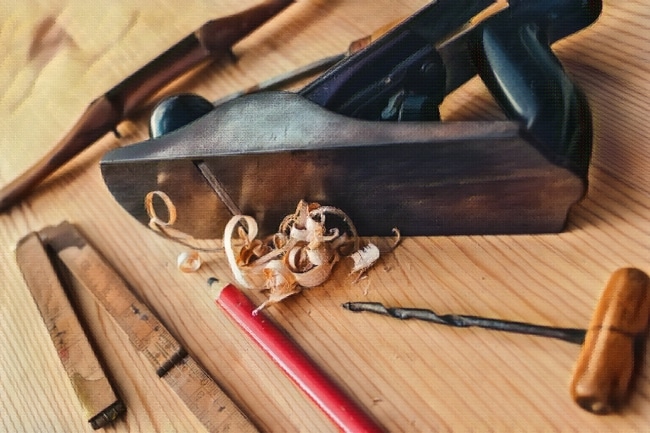
From flattening surfaces to fine-tuning edges, the plane’s role is to refine the raw cut, bringing your design one step closer to realization. A good set of hand planes is essential for woodworking tasks such as smoothing surfaces, jointing edges, or removing material.
The choice of plane depends on your project’s specific requirements.
- Jack plane for reducing thickness or flattening boards
- Block plane for smoothing edges and trimming end grain
- Router plane for grooves and dadoes
Choose planes that feel comfortable in your hand, and keep them properly maintained to provide smoother results.
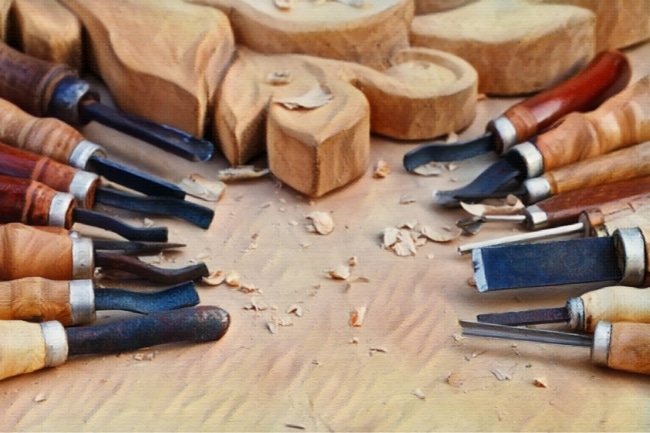
Chisels: Carving Your Masterpiece
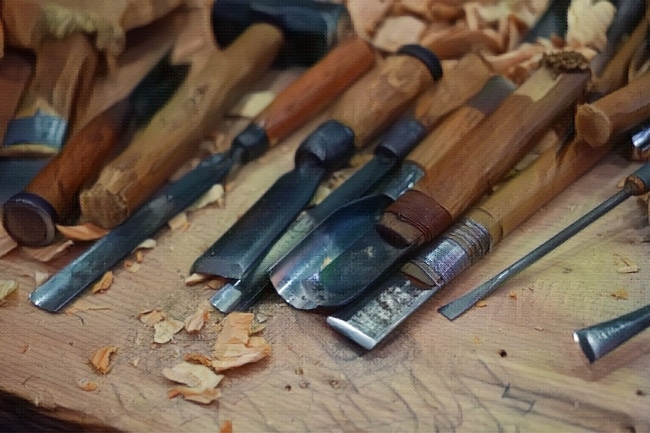
Chisels are the paintbrushes of the woodworking world, delicately carving your imagination onto the canvas of wood. They come in handy for various woodworking tasks, from carving intricate details to removing excess material from wood joints. A good set of chisels should include the following:
- Bench chisels for general-purpose woodworking tasks
- Mortise chisels specifically for creating mortise or square holes
- Bevel edge chisel, perfect for intricate carving
A chisel’s effectiveness lies in its sharpness. Regular honing and judicious use will ensure your chisels stay sharp, guaranteeing precision in your work.
Clamps: The Unsung Heroes of Woodworking
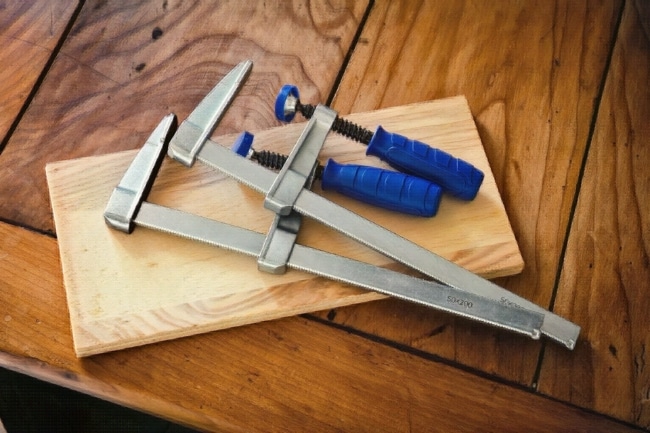
Clamps often go unnoticed in the grand symphony of woodworking, yet they hold the key to maintaining harmony. They are crucial for keeping your workpieces in place, ensuring they are secure while you work.
The Role of Clamps in Woodworking
Clamps are your third hand in the workshop, securing pieces as you work on them. They’re the unsung heroes that ensure the integrity of joints, maintain alignment during glue-ups, and keep your work stationary during intricate carving or drilling.
Different types and sizes of clamps cater to various woodworking projects:
- Bar clamps/pipe clamps are perfect for holding large workpieces or panel glue-ups. Whether you’re building a tabletop or a custom door, bar clamps will ensure that everything lines up perfectly.
- C-clamps with a deep throat for accommodating thicker pieces and a screw mechanism for precise pressure control can hold your work securely, whether carving intricate details or drilling precise holes.
- Spring Clamps – lightweight, quick to position, and easy to release, spring clamps are perfect for light-duty work, such as holding a jig in place or securing a workpiece while the glue dries.
- Quick-Release Clamps- these clamps are all about speed and convenience. They can be tightened with one hand, leaving your other hand free to hold the workpiece. These are particularly useful when time is of the essence, such as during complex glue-ups when you must simultaneously secure several joints.
- Pocket holes- These clamps are invaluable for any woodworker utilizing pocket hole joinery. Their unique design lets you align and hold the pieces together while you drive in the screws, ensuring a flush and secure joint every time.
- Specialty Clamps- These are the special forces of clamps, each designed for a specific task. Corner clamps, for instance, hold workpieces at a right angle, perfect for a frame or box construction. Band clamps wrap around irregularly shaped or circular projects, ensuring even pressure throughout. Miter clamps hold mitered joints at a precise 90 degrees, which is crucial for picture frames or door trims.
Understanding each clamp type’s unique strengths and applications allows you to make the most of these unsung heroes, transforming your woodworking from a chore into a seamless dance of creativity.
Remember, a woodworker can never have too many clamps. As your projects grow in complexity and size, so too should your assortment of clamps. Invest in various clamps to have the right tool for any situation. If your clamps don’t have the capacity to hold wider materials, you can learn how to clamp beyond your clamp’s potential using these tips.
Rasps and Files: Shaping Your Creativity
Rasps and files, the sculptors of the woodworking world, give you the power to shape and refine your work with a precision that’s hard to achieve with other tools. They are crucial when it comes to shaping or refining your woodworking creations.
These tools help to remove material from tight spots, smooth out rough edges, and perfect curves. Here are two important types:
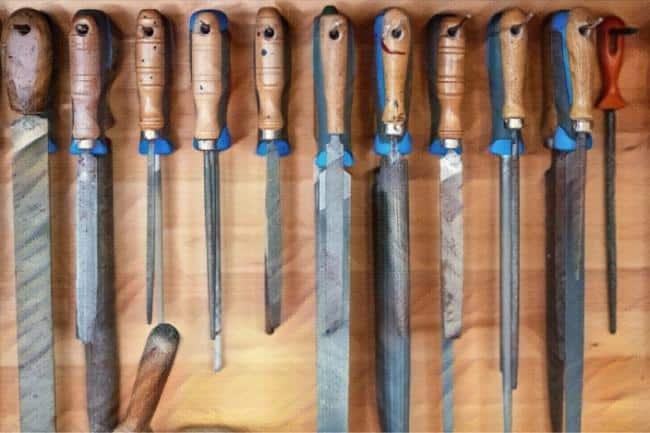
- Wood rasps ideal tools for the early stages of shaping, quickly removing material to outline your design- for rough shaping and contouring. Cabinet rasps for general shaping, round rasps for creating grooves, and needle rasps for fine detailing, each tailored for specific tasks.
- Needle files are perfect for refining the rough marks left by the rasp and adding intricate details. They come in various shapes, including flat, round, and half-round, each designed to cater to different aspects of your project -for finer, more intricate work.
Mallets and Hammers: The Impact Tools of Your Workshop
Impact tools such as mallets and hammers play a pivotal role in your woodworking projects. With each strike, they exert influence, driving chisels, pounding dowels, or adjusting workpieces. Let’s dive into the specifics of these integral tools.

Mallets: Your Gentle Persuaders
In the world of woodworking, mallets are your go-to tool when you need a little persuasion. They’re perfect for tasks that require a softer touch, such as driving chisels or tapping pieces into place.
Mallets generally have larger, blunt heads from softer materials like wood, rubber, or rawhide. The wooden mallet, particularly the traditional beech ‘joiner’s mallet,’ is a staple in many woodworking shops due to its versatility and durability.
Hammers: The Powerhouse of the Toolbox
Hammers, on the other hand, offer a bit more brute force. While a standard claw hammer may be a common sight, there are a host of specialized hammers designed for woodworking.
For example, with its narrow, wedge-like peen, a cross-peen hammer is perfect for starting panel pins or tacks without hitting your fingers. With its cross-pane and flat face, a Warrington hammer is ideal for fine cabinet and furniture work.
Choosing the Right Mallet or Hammer
Choosing the suitable mallet or hammer comes down to the job at hand. A wooden mallet is typically used for tasks where you don’t want to damage your tool or workpiece, like driving a chisel. A metal-headed hammer is a tool for jobs requiring more force, like driving nails.
Maintaining and Using Your Mallets and Hammers
Good practice involves using the right size and weight of the mallet or hammer. A tool that’s too heavy can cause fatigue, while a tool that’s too light might not do the job effectively.
Keep the faces of your mallets and hammers clean and smooth to prevent marring your workpiece. Regularly check the tightness of the head; a loose head can be a safety hazard.
Safety First
When using a mallet or hammer, ensure you have a secure grip and swing with control. Always ensure your workpiece is well-supported and won’t move as you strike.
Mallets and hammers might not have the precision of a chisel or the cutting power of a saw, but their impact is undeniable. Mastering their use will add another level of proficiency to your woodworking skills.
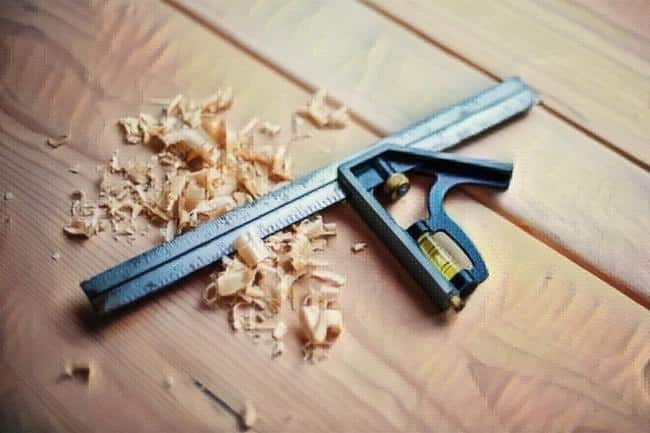
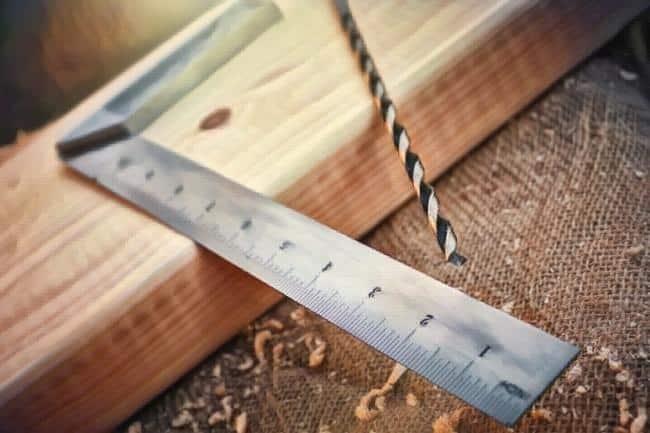
Measuring and Marking Tools: Precision is Key
Accuracy is the unsung hero in woodworking—a slight miscalculation can turn a masterpiece into scrap.
In the realm of woodworking, precision is the key to success. Measuring and marking tools are your trusty architects, defining the parameters of your project and guiding your hand tools with pinpoint accuracy.
The Importance of Accuracy in Woodworking
In the woodworking world, “measure twice, cut once” isn’t just a saying—it’s a philosophy. Accuracy is critical to ensure pieces fit together perfectly, leading to more stable and visually appealing results. Measuring and marking tools allow you to work with confidence, knowing that each cut, notch, or hole will be exactly where it needs to be.
Must-Have Measuring and Marking Tools for Woodworkers
Tape Measure: The backbone of any measuring task, a good quality tape measure with clear markings is an absolute must. Look for one that has a sturdy hook at the end for accurate measurements.
Carpenter’s Square: A carpenter’s square, also known as a framing square, helps to ensure corners are square and angles are correct. This tool is indispensable when building anything with right angles, like cabinets or frames.
Sliding Bevel: This adjustable tool helps you to replicate angles. Once the desired angle is measured, the bevel can be locked, making marking on multiple pieces a breeze.
Marking Gauge: This tool, with its sharp pin and adjustable fence, is perfect for scribing parallel lines to an edge, which is crucial when marking out joints.
Marking Knife: A marking knife offers more precision than a pencil when marking your cut lines, especially for joinery work. The fine-cut line it leaves provides a clear path for your saw or chisel to follow.
Calipers: A good set of calipers is essential for precision measurements, particularly of diameters or thicknesses. Whether digital or traditional, calipers provide accuracy that can make the difference between a good fit and a perfect one.
Remember, just as a house is only as strong as its foundation, a woodworking project is only as good as its measurements. Taking the time to measure and mark accurately will save you hours of frustration and prevent the waste of valuable material. Invest in quality measuring and marking tools, keep them in good condition, and they’ll help you build your project right the first time.
Hand Tool Sharpening Maintenance: Ensuring Longevity and Efficiency
The saying “Take care of your tools, and they’ll take care of you” rings true in the world of woodworking.
Consistent success in woodworking depends on well-maintained hand tools. Keeping your tools clean, sharp, and rust-free not only extends their lifespan but also ensures consistency in your work. In this section, we’ll discuss different methods to keep your hand tools sharp and fully functional.
Sharpening Tools
Sharpening is an art in itself. Regular sharpening keeps your tools in their prime, be it the gentle sweep of a whetstone against a chisel or the precise angling of a plane blade against a honing guide. Sharpening your woodworking tools is an essential skill you should develop. Dull tools will only slow you down and lead to subpar results. Here are some general tips:
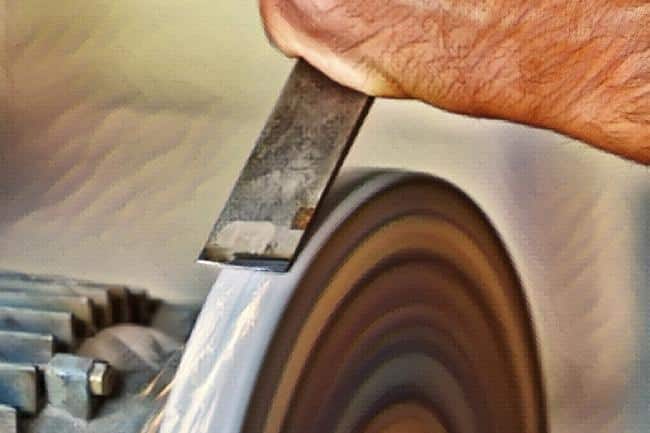
- For hand planes, consider using diamond stones for sharpening. These stones are long-lasting, and their flat surface ensures precise results.
- If you’re working with gouges, roll the tool as you move it along the sandpaper to ensure even sharpening on curved edges.
- Saws should be sharpened using files that match their tooth size. You can use a hammer and a nail punch instead of a sawset for smaller teeth.
Experiment with different sharpening techniques to find what works best for your specific tools and woodworking projects.
Honing
After sharpening your hand tools, honing refines their edges for improved precision in your work. A few key points to consider for honing:
- Use a honing guide to maintain a consistent angle while sliding the tool over the honing stone.
- Begin with a coarse stone and transition to a finer grit to achieve a sharper edge.
- Ensure your tools are debris-free, and wipe them clean after honing them.

Polishing
Polishing is the final step in maintaining your hand tools, giving them a smooth, mirror-like finish that will result in cleaner cuts and a professional appearance.
- Use a leather strop or buffing wheel to polish your hand tools.
- Apply a fine abrasive compound to the strop or buffing wheel for the best polishing results.
- Be gentle when polishing with a buffing wheel, as applying excessive pressure can round the tool’s newly sharpened edges.
Polishing not only enhances the performance of your woodworking hand tools but also prolongs their life, allowing you to craft with confidence for years to come.

Investing time and effort in sharpening, honing, and polishing your woodworking hand tools will significantly improve your overall woodworking experience. Keep up with regular maintenance; your hand tools will serve you well throughout your DIY adventures.
Woodworking Hand Tool Maintenance Tips
Caring for your woodworking hand tools is crucial for their longevity and performance. Over the years, I’ve learned a few essential maintenance tips that have helped me keep my tools in shape. I’ll share them here to help you get the best out of your hand tools.
- Keep them sharp: Gouges, chisels, and planes require regular sharpening. Honing their edges and grinding them to the correct shape will ensure they remain effective. A simple grinder is perfect for small woodworking hand tools, and remember to use a proper technique to avoid damaging the tool.
- Protect against rust: Moisture is an enemy to your hand tools, leading to rust and corrosion. Make sure to store any tools in a dry environment and occasionally apply a thin coat of oil to protect metal surfaces. A good quality oil, such as machine oil or light mineral oil, would do the job.
- Clean after use: Cleaning your tools after use is essential in maintaining their performance. Remove any wood debris, dust, or dirt with a soft brush, and wipe down metal surfaces with a clean cloth. This simple routine will help prevent buildup that can cause damage to your tools.
- Check for wear and tear: Regularly inspect your tools for any signs of wear or damage. Catching minor issues early allows you to address them before they become bigger problems. For example, check for looseness in the handles of your chisels and planes and tighten them as needed.
- Proper storage: Store your hand tools tidy and organized. This helps maintain their condition and makes it easier to find and access them when needed. Use a tool rack, a pegboard, or a toolbox to keep everything in its place.
- Maintain wooden handles: For tools with wooden handles, periodic maintenance is necessary. Sand away any splinters or rough spots and apply a coat of linseed oil to help preserve the wood, keeping it smooth and comfortable to hold.
Exploring Specialty Hand Tools in Woodworking
As you progress in your woodworking journey as you may find yourself working with various specialty hand tools to achieve the perfect finish on your projects.
In this section, we’ll go over some of the essential specialty hand tools used in woodworking, including spokeshaves, drawknives, scrapers, and carving tools. These tools will help elevate your woodworking skills and give your projects a professional touch.
Spokeshaves
Spokeshaves are versatile tools designed to easily shape and smooth curved surfaces such as chair spindles, paddles, and round surfaces. They have a distinct U-shaped design with a cutting blade in the middle and are available in different sizes and styles to suit your needs.
To use a spokeshave, you simply pull it towards you while applying pressure to remove wood shavings. The key to success with a spokeshave is maintaining a consistent angle and pressure throughout your strokes, which becomes easier with practice. Now and then, check your progress and adjust as necessary.
Drawknives
Drawknives are perfect for surfacing and shaping your woodworking project. These tools consist of a long, razor-sharp blade with handles at both ends. To use a drawknife, grip the handles tightly, and pull the blade toward you with the bevel side facing away from you, applying even pressure to shave off thin strips of wood.
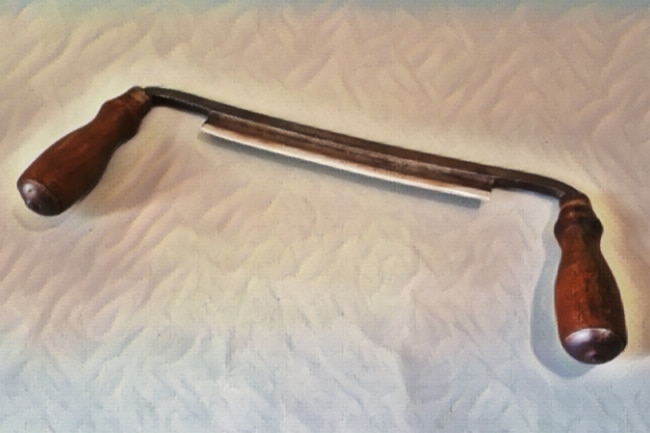
Drawknives excel at quickly removing material and can create smooth surfaces or rough-hewn surfaces, depending on your preference.
Scrapers
These thin, flat pieces of metal help you remove any rough spots, paint, or varnish from the surface of the wood, resulting in a smoother end product.
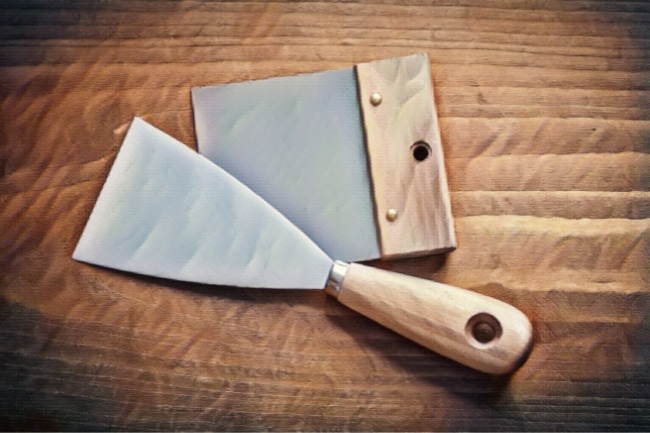
You can find scrapers in various shapes, such as rectangular, gooseneck, or chair-bottom, fitting the unique contours of your workpiece. Sharpen the edge of your scraper before using it to achieve the best results.
Carving Tools
Carving tools, such as chisels and gouges, allow you to add intricate details and decorative elements to your woodworking projects, making them unique and personalized. Chisels have a flat cutting edge, while gouges have a curved one, giving you control and precision in your carvings.
To use carving tools effectively, make sure they are razor-sharp and work in a controlled, deliberate manner, whether crafting furniture, upcycling old furniture, or creating DIY home décor.
With these specialty hand tools in your woodworking arsenal, you’ll be prepared for a wide range of projects and tasks. Embrace the learning process and enjoy the journey as you bring your woodworking vision to life.
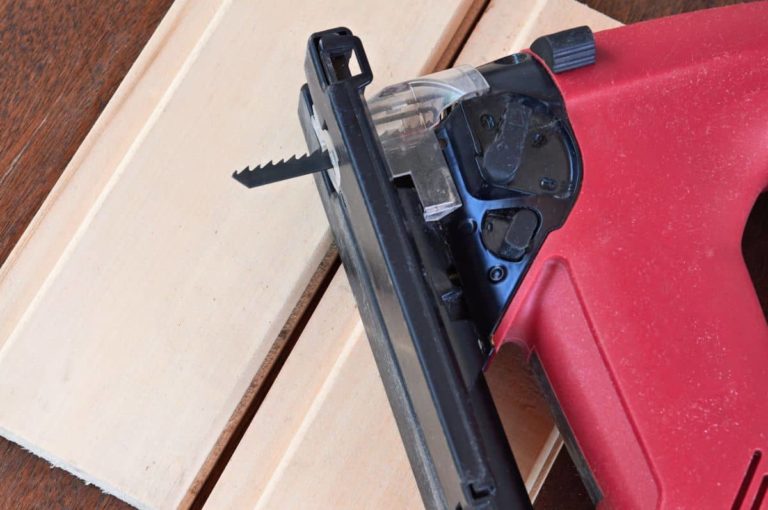
Hand Tools vs. Power Tools
Every woodworker will have their preferred working method, and there are pros and cons to consider when deciding whether to use hand or power tools.
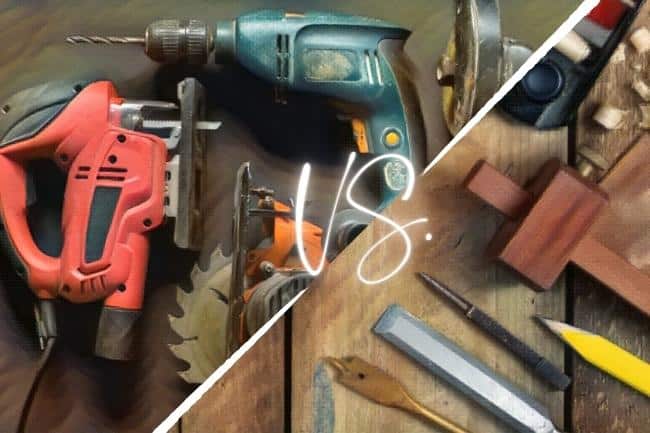
Hand Tools:
- Control: Hand tools allow better control over cutting, shaping, and carving.
- Precision: Hand tools can often produce greater accuracy in woodworking projects when used correctly.
- Connection: Hand tools help you connect with the material, better understand woodworking techniques, and build your skills and craftsmanship.
- Quiet: Compared to power tools, hand tools create significantly less noise, making your workshop a more enjoyable and peaceful space to work in.
Power Tools:
- Efficiency: Woodworking power tools, such as a circular saw or router, tend to be more efficient at cutting, shaping, and joining wood, as they can remove material quickly.
- Less Fatigue: Using power tools often requires less physical effort and strain over time, making working long hours on your projects easier.
- Consistency: Power tools provide consistency and repeatability in your projects, especially if you’re producing multiple pieces or working on a large-scale project.
As a DIY-er/woodworker, I’ve found that a balance between hand tools and power tools is the best approach. You can take advantage of the control and precision of hand tools while also benefiting from the efficiency and power of woodworking power tools.
Whether you’re making your own furniture, upcycling old pieces, or creating DIY décor, having the right tools in your workshop can make all the difference in the success of your projects.
Workshop Safety: Your Health Matters
In the dance of creation, safety plays the tune. It’s the invisible guard, ensuring the dance continues unabated.

General Workshop Safety Tips
Setting up and organizing your workspace, using protective gear, and following proper tool operation protocols are some measures that ensure a safe and enjoyable woodworking experience.
Organized Space: A clean and organized workshop is not just an efficient workspace; it’s also a safer one. Keep your tools in their designated places, clear away scrap wood, and remove sawdust regularly to prevent potential accidents.
Proper Lighting: Good lighting is crucial to avoid mishaps. Ensure your workspace is well-lit so you can see and handle your tools properly and the details of your work are clearly visible.
Fire Safety: Wood, finishes, and dust can be fire hazards. Keep a fire extinguisher handy, store flammable materials properly, and avoid open flames.
First Aid: Despite all precautions, accidents can happen. A first aid kit that handles minor cuts or burns should always be within reach.
Ventilation: Good airflow is crucial, especially when sanding or applying finishes that might release fumes. If you don’t have good natural ventilation, consider installing an air filtration system or an exhaust fan.
Safety Guidelines for Using Hand Tools
Each tool has safety guidelines—like keeping your hands away from the cutting edge or ensuring your tools are sharp. Adhering to these rules safeguards you from potential injuries.
Sharp Tools are Safe Tools: It might seem counterintuitive, but dull tools are more dangerous than sharp ones. They require more force to work, increasing the chance of slips. Keep your tools sharp and in good condition.
Secure Your Work: Use clamps or vises to secure your workpiece. A stable workpiece lets you focus on controlling your tool rather than holding your material.
Use the Right Tool: Every tool is designed for a specific job. Using the wrong tool can lead to accidents and damage to your workpiece or tool.
Tool Handling: Handle your tools with care. Avoid loose or awkward grips, and keep your body parts clear of the cutting paths.
Protective Equipment: Safety glasses shield your eyes from flying debris, and dust masks or respirators protect your lungs from fine particles. When using loud power tools, don’t forget hearing protection.
Workshop safety is not just a list of precautions—it’s a mindset. By fostering an environment of respect—for the tools, the craft, and above all, for yourself—you’ll ensure that woodworking remains a joyous and fulfilling journey.
Crafting Your Future in Woodworking
As we conclude this journey into woodworking, remember that this is just the beginning. The essential basics of woodworking hand tools and the joy and satisfaction of crafting with wood can transform your life in ways you never imagined. Embrace the process, appreciate the learning, and unleash your inner artisan. Every piece of wood holds a story; it’s up to you to tell it.
Subscribe To My FREE DIY Newsletter!
Stay in touch and receive things like updates, special offers, new projects, tips, gear reviews, and more. No spam, promise!
By entering your email address, you agree to get an email newsletter from UpcycleThisDIYThat. I’ll respect your privacy, and you can unsubscribe at any time. For more details, review our Privacy Policy.