
Delving Deeper into Wood Clamps: The Essential Guide for Beginners
This post includes affiliate links. If you decide to make a purchase through my link, I might get a small commission for it at no additional cost to you. Thank you for supporting Upcycle This DIY That!
Ah, the simple yet versatile wood clamp! A tool that’s as humble as it is crucial in the dynamic world of woodworking. Diving into the multifaceted realm of wood clamps, we find a device that has evolved, adapted, and become an indispensable ally for artisans, DIY enthusiasts, and woodworking professionals.
These handy tools securely hold your workpieces in place, allowing you to easily make precise cuts, joinery, or gluing operations. Without them, your projects might not come together with the level of accuracy and sturdiness you desire.
I can’t stress enough the significance of having suitable clamps for your projects. Trust me; owning a variety of clamps will save you time, frustration, and potential do-overs down the line.
YOU MAY ALSO BE INTERESTED IN:
Unlock Your Crafty Side: Navigating The Basics Of Woodworking Hand Tools
Crafting Dreams From Scratch: Introduction To Woodworking Tools For Beginners
Dive Into DIY: Essential Woodworking Tools For Beginners
How Long Does Wood Glue Take To Dry- What You Need To Know
Why Mastery Over Wood Clamps is a Game Changer
Imagine trying to build a house of cards in a gusty breeze. The challenge lies not in the design but in the stability. Similarly, in woodworking, it’s not just about cutting and assembling pieces; it’s about holding them firmly and precisely. And that’s where wood clamps come into play.
Mastering the use of wood clamps is akin to having a superpower in the workshop. Let’s delve deeper into why this is so vital:
In essence, gaining proficiency in using wood clamps is like upgrading your woodworking toolkit. It elevates craftsmanship from a hobby to an art, enabling creations that are precise, durable, and safe.
The Evolution of Clamps: A Historical Perspective
Woodworking clamps, while often overshadowed by more flashy tools, stand as silent testaments to the march of time, chronicling the journey of human ingenuity. Their history is intertwined with the growth and progress of woodworking, shaping and being shaped by the craft in equal measure.
From the ancient civilizations of Egypt to the flourishing Renaissance workshops, clamps have always played a pivotal role. Ancient woodworking illustrated early humans’ determination as they made use of basic clamping mechanisms.
Even the grandest Egyptian temples or the sturdiest Greek furniture might owe their existence to these rudimentary tools. These clamps, though crude, were integral to ensuring stability and precision.
During these times, clamps were primarily made of wood and were much larger and cumbersome. The construction of furniture, buildings, and even ships heavily depended on these tools. They became symbols of emerging craftsmanship, representing a society’s commitment to art, functionality, and durability.
As the centuries rolled on, the world of clamps didn’t remain stagnant. The Industrial Revolution, a period marked by rapid advancements and innovations, brought with it significant changes in clamp designs.
Mechanization allowed for the creation of clamps with more intricate designs and finer adjustments. No longer were they just tools; they became engineering marvels.
With the modern era came materials like stainless steel, aluminum, and high-grade plastics. These materials transformed clamps, making them not only more durable but also lighter and more user-friendly.
The sheer variety of clamps available today, from C-clamps to bar clamps, testifies to this era of specialization and sophistication.
In addition, modern advancements in technology have also added features like quick-release mechanisms and ergonomic designs. These features ensure that clamps are not only effective but also a pleasure to work with.
The journey of clamps from their humble beginnings in ancient civilizations to the state-of-the-art tools we have today is truly fascinating. It underscores the human spirit’s relentless pursuit of improvement and refinement.
Unveiling the Basics: What are Wood Clamps?
Picture this: you’re assembling a puzzle. Each piece has a specific place, and when they all fit together perfectly, it forms a beautiful picture. Now, consider working on a wood project. Each cut, nail, or joint needs to be in the right spot for the final piece to come together seamlessly.
And just like a puzzle requires your hands to guide each piece into place, woodworking often demands a tool that holds everything securely. Enter the world of wood clamps.
So, what exactly are wood clamps?
Wood clamps are essentially a woodworker’s extra set of hands. They are tools specifically designed to hold or secure pieces of wood in place, ensuring they don’t move during operations like cutting, gluing, or drilling.
Key Features of Wood Clamps:
Why Are They Important? Beyond their basic function, wood clamps play a crucial role in ensuring accuracy in woodworking. When two pieces of wood are being glued together, it’s the clamp that ensures a tight bond.
When a plank needs a precise cut, it’s the clamp that holds it steady. In other words, clamps are the unsung heroes that facilitate precision, safety, and efficiency in the workshop.
In the grand tapestry of woodworking tools, wood clamps may not be the most glamorous. They don’t cut, shape, or polish. Yet, their role is foundational. As we progress deeper into the realm of woodworking, you’ll come to appreciate the irreplaceable value these tools bring to the table, making every project a little more perfect and the woodworking journey a whole lot smoother.
The A to Z of Wood Clamp Types
Types of Woodworking Clamps
Woodworking clamps, diverse and versatile, come in different varieties, each serving a unique purpose. From bar clamps to spring clamps, each variant has a role to play, fulfilling specific needs in the woodworking process.
Each clamp type has its part to play, whether providing higher pressure, reaching difficult angles, or accommodating irregular shapes.
Pipe Clamps
Components and Assembly
Pipe clamps are essential in any woodworking shop, and assembling them is a breeze. A standard pipe clamp consists of a clamp head, a tail stop, a crank handle, and the pipe itself.
When it comes to the pipe selection, you have various options. For most woodworking projects, a 3/4″ black iron pipe is a popular choice due to its durability and affordability. However, you can also use galvanized or stainless steel pipes if you require more corrosion resistance.
To extend the clamping capacity, you can connect two pipes using couplers, which are readily available online or at your local hardware store.
Uses and Application
Pipe clamps are incredibly versatile and boast numerous applications in woodworking. Whether gluing up large panels, constructing a tabletop, or making a custom frame, a pipe clamp provides reliable clamping pressure and helps ensure a perfect fit.
When using pipe clamps in your projects, it’s essential to keep a few tips in mind to get the most out of them:
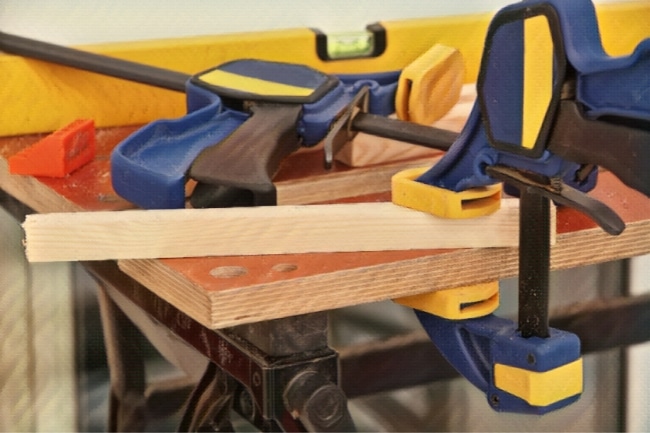
Bar and F-Clamps
These clamps are designed to apply even pressure across your workpiece, making them perfect for gluing, securing, or holding your project together.
Bar clamps are perfect for tackling larger tasks, such as holding panels or boards together during glue-ups. They are highly beneficial for gluing lengthy boards and ensuring a level alignment, serving as a cornerstone for projects requiring length and stability.


They have a long, flat bar with a fixed jaw on one end and an adjustable jaw on the other. To use a bar clamp, simply slide the adjustable jaw to accommodate the size of your workpiece and then tighten the screw mechanism to apply the desired pressure. Bar clamps are especially useful for larger projects or when you may need a more substantial clamp.
F-clamps, however, feature a horizontal bar with a fixed jaw at one end and a sliding locking mechanism connecting to an adjustable screw on the other end. This design allows for precise control over the clamping pressure, making F-clamps ideal for smaller or more delicate projects.
They boast versatility and adaptability. With adjustable jaws and a deep throat, they can accommodate various workpiece sizes, offering a balanced and steadfast grip, making them an all-rounded choice for diverse woodworking needs.
Keep these points in mind when working with both types of clamps:
Selecting the Right Clamp
When choosing between bar and F-clamps for your woodworking projects, consider the following factors:
Parallel-Jaw Clamps
Parallel-jaw clamps are a versatile tool that you should consider having in your workshop. These clamps are known for their parallel alignment of the jaws, allowing for even pressure distribution across the entire clamped surface. Some popular brands of parallel-jaw clamps include Bessey and JET.


Application
Parallel-jaw clamps are an excellent choice for:
Limitations
While parallel-jaw clamps have many advantages, they do come with some limitations. First, they can be pretty expensive. However, you’ll find that the investment is worth it, given the durability and versatility of these clamps. Second, parallel-jaw clamps can be bulky and may take up more space in your workshop compared to other clamps.
Spring Clamps
Spring clamps are smaller and more affordable and use a spring mechanism to create clamping pressure. They’re perfect for light-duty projects such as holding small pieces together while glue dries or attaching a tarp to a workbench.
Spring clamps are best suited for:
Limitations
As for spring clamps, they are not suitable for heavier applications due to their limited clamping force. They’re best used for small, quick tasks where you need to keep your hands free, but may not provide enough pressure for more demanding projects like joining thicker plywood or large panels.
C-Clamps: Small but Mighty
C-Clamps, characterized by their robust C-shaped frame, are indispensable for exerting substantial pressure to secure workpieces. Popular brands like Pony|Jorgensen and Wilton are known for their high-quality C-Clamps.
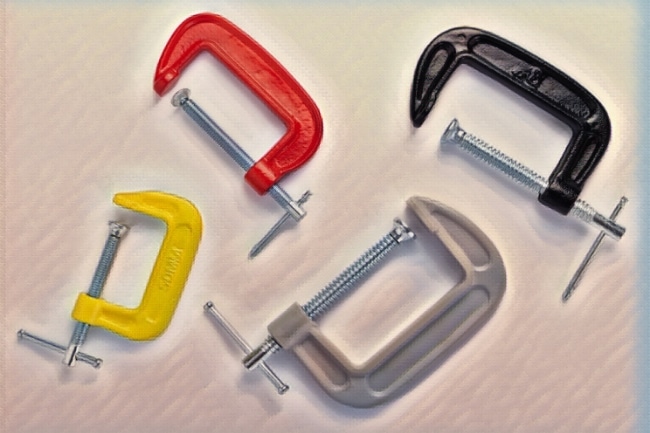
Applications
C-Clamps excel in various applications such as:
Limitations:
C-Clamps’ reach is limited due to the frame’s width, constraining their use on wider workpieces. They may cause indentation or damage to softer materials due to their concentrated force, necessitating protective padding. The adjustment of the screw mechanism on larger models can be slow, posing challenges in tasks requiring rapid modifications.
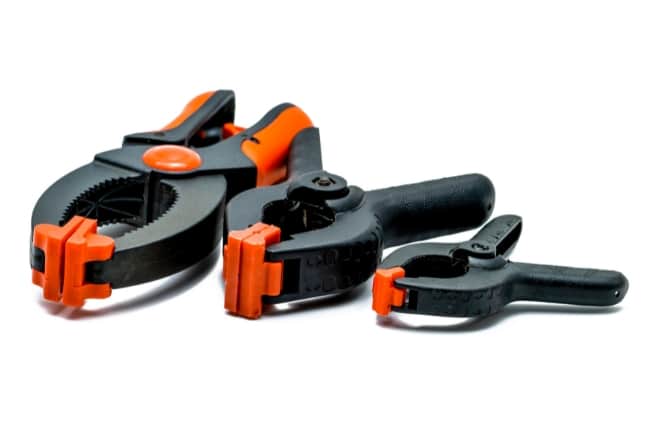
Quick Grip Clamps: Speed and Efficiency
Ideal for one-handed use, quick-grip clamps make the task of holding your workpiece in place much more manageable. They usually have a convenient trigger mechanism for quick adjustments and releases. Brands like Irwin are renowned for producing top-notch, quick-grip clamps.
Application
Quick grip clamps are ideally used for:
Limitations:
While convenient, quick grip clamps might lack the clamping force that some other types of clamps provide, making them unsuitable for heavy-duty tasks. Additionally, their reliance on plastic components can raise questions about long-term durability, especially under extensive usage.
Corner Clamps
Corner clamps are paramount in achieving precise angles to construct frames and boxes. Wolfcraft and Kreg are brands associated with producing reliable right-angle clamps.
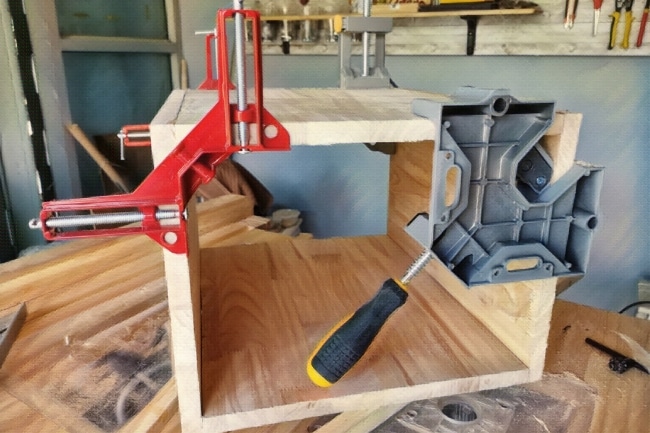
Application
Right angle clamps are instrumental in:
Limitations:
Their specialization in right angles can be a limitation when working with objects of varied angles. Also, the right angle clamps can be cumbersome in terms of adjustment and might not hold the workpieces as firmly as some other types of clamps, especially during high-pressure tasks.
Pocket Hole Clamps: Securing and Aligning with Ease
In the intricate world of woodworking, pocket hole clamps stand out as exceptional tools designed for specialized tasks. These clamps are highly valued for their ability to secure workpieces at a precise angle, particularly when creating pocket hole joints.


Leading brands like Kreg and Milescraft are well-known for manufacturing durable and reliable pocket hole clamps.
Application
Pocket Hole Clamps are uniquely suited for:
Limitations
Despite their specialized functionality, pocket hole clamps do come with certain limitations. Their use is predominantly confined to pocket hole joinery, which may limit their versatility compared to more universally applicable clamps.
Additionally, achieving the desired clamping pressure and maintaining the alignment can be challenging, requiring a meticulous approach and, at times, additional adjustments. Moreover, due to their design constraints, their application is limited to thinner and smaller workpieces.
Nonetheless, for woodworkers who frequently employ pocket hole joinery in their projects, the pocket hole clamp is a crucial component in achieving precise and reliable joints, ensuring the integrity and longevity of the finished piece.
T-Track Clamps: Precision and Flexibility
Heralded for their precision and adaptability, T-Track clamps are indispensable tools in the woodworking arena. They are especially recognized for their ability to secure workpieces effectively within T-Tracks, allowing for superior maneuverability and adjustment. Brands such as Rockler and Powertec are recognized for their high-quality T-Track clamps.


Application:
T-Track Clamps are invaluable for:
Limitations:
While T-Track Clamps are prized for their precision and versatility, they do possess some limitations. One of the primary limitations is that their functionality is restricted to worktables and surfaces equipped with T-Tracks, which may necessitate additional investments in compatible equipment.
Additionally, securing the clamp adequately within the track can sometimes be time-consuming, especially for novices. Moreover, these clamps may offer a lower clamping force than some other varieties, making them less suitable for tasks requiring substantial pressure.
Despite these constraints, the precision and flexibility offered by T-Track Clamps make them an invaluable asset in any workshop where detail and adaptability are paramount.
Strap Clamps: Flexible Solutions for Creative Challenges
Strap clamps are like the helpful friends in the world of woodworking, known for their versatility and adaptability.
These clamps use a long strap, usually made of polyester or nylon, to wrap around irregular, round, or multi-angle assemblies, making them a go-to tool for any project that seems out of the box.


Many woodworkers rely on brands like Wolfcraft or Bessey for durable and reliable strap clamps.
Application:
Strap Clamps prove to be incredibly useful for:
Limitations:
While strap clamps are versatile and user-friendly, they do have some limitations. One of the main challenges is that they provide less pressure than other clamps, so they are not the best choice for every project.
Also, setting them up can be tricky sometimes, especially for beginners, and may require some practice to get it right. Lastly, ensuring the strap is clean and free from damage is crucial to avoid any slip-ups or mishaps.
However, the strap clamp stands out as a valuable companion when it comes to holding together uniquely shaped or multi-angle projects, helping woodworkers bring their creative visions to life with precision and ease.
Handscrews and Bench Vises
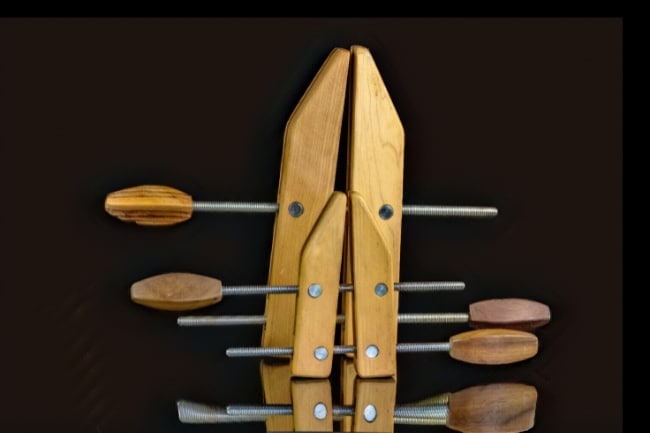
These traditional wooden clamps feature two wooden jaws with long threaded screws. You can adjust the jaws independently, making them great for clamping angled or irregularly shaped workpieces. They also work well for securing your project to a workbench.

Bench vises, on the other hand, are fixed to your workbench and provide an essential work-holding solution. Available in various designs, a typical bench vise features a pair of jaws that securely hold your workpiece while you work on it using power or hand tools.
Incorporating into Workshops
I’ve found both handscrews and bench vises extremely useful in my workshop. Here are a few ways I incorporate them into my projects:
- Sanding: When sanding a workpiece, handscrews can clamp it securely on the edge, making it easy to smooth the surface and edges without movement or slipping. Similarly, you can utilize a bench vise to hold a workpiece upright, providing stability for sanding or planing.
- Temporary Bench Vise: If you need a quick and convenient holding solution, turn your handscrew into a temporary bench vise. Attach a board to the side of the outer jaw of the handscrew, and then clamp the wings in your bench vise. This setup is perfect for planing longboards without the need for a deadman.
- Adaptable Workholding: Handscrews are perfect for holding irregularly shaped workpieces that may not fit a traditional bench vise well. The adjustable jaws can accommodate a variety of shapes and sizes for your woodworking projects.
Clamp Extenders and Accessories
Plywood Clamp Extenders
Plywood clamp extenders are one of the most useful accessories you can make for your clamp collection. Sometimes, bar clamps are too short for a particular project, but you can easily increase their capacity with these extenders.
To make them, attach pieces of ¾” plywood or solid wood to the clamps, ensuring they have a hole at one end for the fixed jaw and a squared-up side for the clamp to grab onto.
These extenders are practical and cost-effective, utilizing scrap material you might already have in your workshop. Plus, they are much simpler than trying to couple two bar clamps in the middle.
Third Hand
During your DIY woodworking adventures, you might find yourself in situations where an extra hand would be helpful. That’s where the “third hand” comes in! Attach a couple of hand screws to your workpiece, and use small bar clamps to secure them in place.
This setup is perfect for holding boards on edge while you work on them, whether with your spring clamps, pipe clamps, deep jaws, or f-clamps.
A third-hand setup can save you time and frustration, allowing you to focus more on the task, whether you’re routing, planing, or simply need a sturdier hold on your work.
Couplers
Another great accessory for your clamps collection are couplers. These small attachments can extend your clamps’ capacity and come in handy when dealing with projects that require longer clamping surfaces.


While using couplings may not provide the exact same hold as parallel-jaw clamps, they can be a reasonable and cost-effective workaround in certain situations.
Keep in mind that coupling two clamps doesn’t always provide the same strength as using one long clamp, so use this method with caution, especially with heavy-duty projects or uneven surfaces.
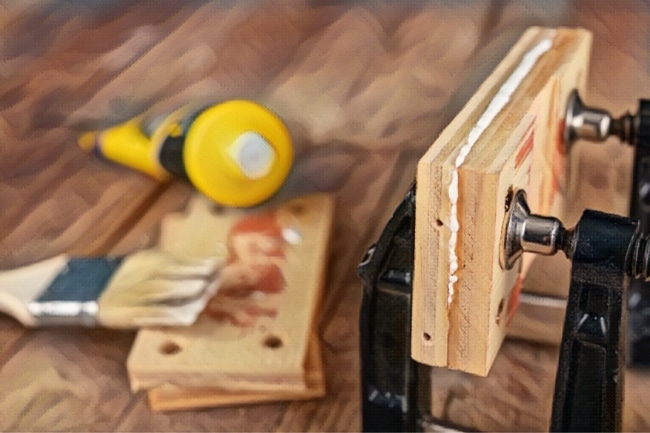
Glue-Up Process and Best Practices
As a passionate DIY-er and woodworker, I want to share my experience and knowledge on the glue-up process to help you achieve the best results in your projects. This quick guide will cover surface preparation, clamp placement, and pressure application during glue-ups.
Surface Preparation
Before starting the glue-up process, properly preparing your wood surfaces is crucial. Ensure the edges are straight, flat, and square to achieve seamless joints. Any discrepancies will lead to unsatisfactory results and weak joints.
If you work with raw wood, use a moisture meter to confirm that your project’s stock has a moisture content between 6% and 11%. Allow the rough stock to acclimate in your shop for 24 hours before milling, and after milling, stand it on edge or rest it on stickers (wood spacers) to ensure proper airflow.
When selecting glue for your project, consider whether it needs to be water/moistureproof. If your project will be exposed to moisture, choose the appropriate adhesive to prevent future issues.
Clamp Placement
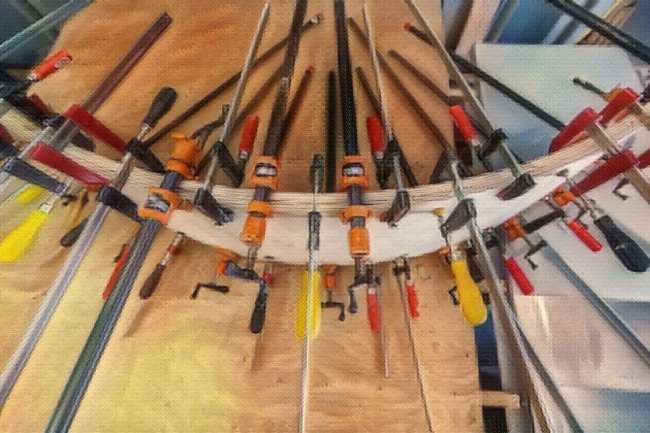
To achieve the best glue joints, proper clamp placement is essential. The force from a clamp spreads out in a 45º cone from each head, and for the cones to overlap and provide even pressure, clamps need to be spaced correctly.
Measure the distance between clamps using the 45º angle rule, ensuring that the force radiates sideways in both directions the same distance as the clamp head.
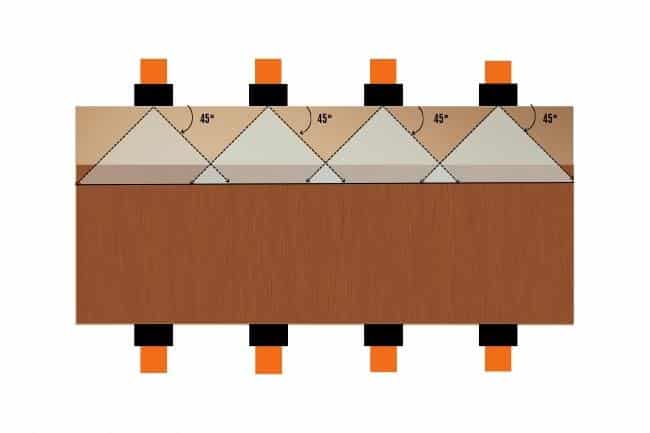
Alternate clamps over and under a panel or long glue-up to balance the clamping pressure. While tightening clamps, add a little pressure to each in sequence rather than fully tightening each clamp before moving on to the next. This technique helps to distribute the pressure evenly across the glue-up surface.
Pressure
Applying the right amount of pressure during glue-up is crucial for strong, stable joints. Over-tightening clamps can squeeze out too much glue, leading to starved joints and weak bonds. On the other hand, inadequate pressure may result in gaps and compromised joint integrity.
Ensure the clamps are snug and tighten them evenly while closely following the tips mentioned in the clamp placement section. Keep an eye out for excess glue squeeze-out and clean it up using a damp cloth or scraper.
Reviews and Cost Considerations
Selecting the suitable clamp involves consideration of various factors, ensuring that the chosen clamp aligns with the project’s needs. Evaluating and matching the project requirements with the clamp’s capabilities is crucial for successful outcomes..
Balancing quality and budget is essential in making an informed and economical choice. Scouring online retailers, local hardware stores, and woodworking forums can unveil a treasure trove of clamp deals.
A discerning eye and a bit of research can lead to acquiring high-quality clamps at competitive prices, adding value to your woodworking arsenal.
Be sure to compare the features, such as clamp types, sizes, and materials, to find the clamps that suit your specific woodworking needs.
Budget and Space Factors
Considering your budget and available space is essential when investing in woodworking clamps. Clamps can range in price depending on the type, size, and quality. So, think about how much you’re willing to spend and start with a few basic clamps like C-clamps or bar clamps that fit well within your budget.
You can always expand your collection as you progress in your woodworking journey.
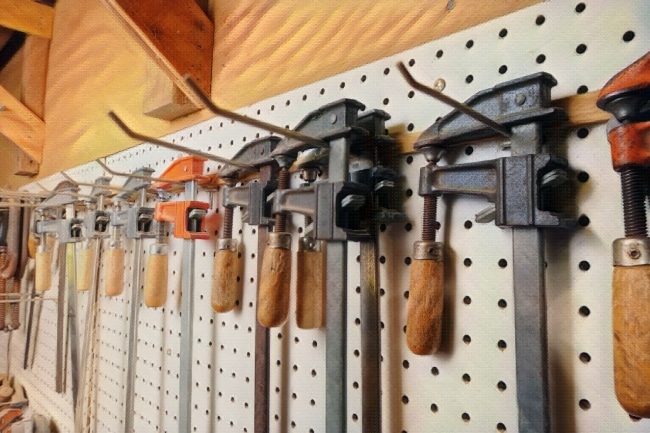
Also, keep in mind the storage requirements for your clamps. If you’re working with limited space, consider clamp racks, wall-mounted storage solutions, or other creative ways to store and organize your clamps to keep your workspace tidy and efficient.
Overcoming Challenges: Solutions to Common Issues
In the comprehensive world of clamping, where a myriad of clamp types and techniques exist, encountering challenges is inevitable.
Whether dealing with inadequate pressure, poor alignment, or damage to the workpieces, adeptly navigating these issues is crucial for achieving woodworking success. Here’s a guide to overcoming some common challenges and ensuring your clamping journey is smooth and efficient.
Addressing Typical Clamping Dilemmas
Inadequate Clamping Pressure
Damage to Workpieces
Slippage and Misalignment
Reach and Depth Limitations
.Ineffective Holding on Irregular Surfaces
Pro Tips for Avoiding Clamp-Related Problems
- Assess the Situation: Before clamping, assess the workpiece’s characteristics and requirements to select the most suitable clamp type, thus avoiding undue stress and potential damage.
- Maintain Your Equipment: Regularly inspect and maintain clamps to identify and address any wear or damages, ensuring reliable performance and longevity.
- Start Gentle: Initially, apply gentle pressure and progressively increase it, monitoring the workpiece’s reaction to prevent any damage or deformations.
- Practice Makes Perfect: The more you use different clamps and encounter varied situations, the more adept you become at efficiently selecting and using the correct clamping solutions.
- Knowledge is Power: Constantly educate yourself on the latest clamping techniques, innovations, and products to stay updated and enhance your clamping skills.
Conclusion
Diving into the world of clamps is like discovering a treasure chest of helpful tools. Each kind of clamp, whether it’s the sturdy bar clamp or the specialized pocket hole clamp, has its own way of helping us with our wood projects.
Learning about the different clamps, how to use them right, and how to fix common issues means we can become really skilled at making cool things.
This knowledge about clamps makes our wood creations even better and more exciting. So, let’s continue to explore, learn more about the helpful world of clamps, and share what we know with friends. This way, we can all have fun building awesome things!
Keep exploring, keep crafting, and see the beautiful things you can make with the help of clamps!
FAQs
Subscribe To My FREE DIY Newsletter!
Stay in touch and receive things like updates, special offers, new projects, tips, gear reviews, and more. No spam, promise!
By entering your email address, you agree to get an email newsletter from UpcycleThisDIYThat. I’ll respect your privacy, and you can unsubscribe at any time. For more details, review our Privacy Policy.
Last update on 2024-04-28 / Affiliate links / Images from Amazon Product Advertising API

Absolutely love the comprehensive guide! As a beginner woodworker, this post has been incredibly insightful and helpful. Can’t wait to delve deeper into the world of wood clamps. Thank you.