Dive Into DIY: Essential Woodworking Tools for Beginners
This post includes affiliate links. If you decide to make a purchase through my link, I might get a small commission for it at no additional cost to you. Thank you for supporting Upcycle This DIY That!
Woodworking is an enriching hobby that allows you to create beautiful and functional pieces for your home or to sell. As a beginner, starting with the right tools is essential to make your journey enjoyable and successful. This article will introduce essential woodworking tools for beginners, ensuring you have everything you need to get started.
When diving into the world of woodworking, it’s easy to feel overwhelmed by the sheer number of tools available. Don’t worry, we’ve all been there, and you’ll quickly learn which tools are indispensable and which are not.
To give you a head start as a beginner, we’ll focus on a mixture of essential hand tools, recommended power tools, and measuring tools that will be useful for various projects. Remember, it’s crucial to prioritize safety and efficiency when setting up your woodworking shop, and always invest in quality tools within your budget.
Key Takeaways
- Equip your woodworking shop with a mix of essential hand tools, recommended power tools, and measuring tools for a successful start.
- Prioritize safety and efficiency when setting up your workshop to ensure a seamless woodworking journey.
- Invest in quality tools within your budget, as they will provide better results and last longer.
Getting Started
Venturing into this magnificent world has its prerequisites, however. Having the right tools is akin to having the right brush for an artist or the correct lens for a photographer. A well-equipped toolkit can propel a novice woodworker to higher precision, efficiency, and creativity.
To start your journey as a woodworker, there are specific tools you will need. These tools are the fundamental building blocks of woodworking and will serve as your loyal companions throughout your journey.
Safety First: Protecting Yourself and Others
Importance of Safety in Woodworking
Woodworking, while a rewarding and engaging craft, also has its risks. Sharp tools and heavy equipment demand respect and careful handling. Therefore, safety is paramount and should never be compromised.
Essential Safety Equipment for Beginners

Starting with essential safety gear such as safety glasses, ear protection, and a durable pair of work gloves is a must. Further investment in a dust mask and a quality first-aid kit is also advisable. These safety devices act as a buffer between you and potential accidents.
Basic Safety Guidelines and Practices
While using tools, maintain a stable posture and avoid loose clothing and dangling jewelry. Keep your work area tidy and well-lit. In woodworking, haste often leads to accidents.
Creating your workspace is essential for successful woodworking. Invest in a sturdy workbench that provides ample space to conduct your projects safely. This will be the central hub for organizing your wood, assembling pieces, and refining your techniques.
YOU MAY ALSO BE INTERESTED IN:
Beginners Guide To Setting Up A Woodworking Shop
Now, let’s talk tools. As a beginner, you’ll need to start with the basics to build a solid foundation. Some essential woodworking tools for beginners include a tape measure, square, sawhorses, and various saws. As you progress, you can incorporate more specialized tools to enhance your skill set.
Don’t be shy to explore different methods and tips regarding woodworking techniques. Remember that mastering woodworking is an ongoing journey that requires time and practice.
YOU MAY ALSO BE INTERESTED IN:
Crafting Dreams From Scratch: Introduction To Woodworking Tools For Beginners
Unlock Your Crafty Side: Navigating The Basics Of Woodworking Hand Tools
Visit woodworking blogs, forums, and social media groups to learn from fellow DIY enthusiasts like yourself. You’ll also find that watching YouTube tutorials or reading woodworking books can help develop new skills.
In summary, your woodworking hobby begins with a focus on safety, a well-equipped workspace, and a basic set of tools. As you practice and develop your techniques, branching out to more advanced projects will become a natural progression. Remember to always stay patient, learn from your mistakes, and, most importantly – have fun along the way!
Manual Mastery: Fundamental Hand Tools for Every Craftsman
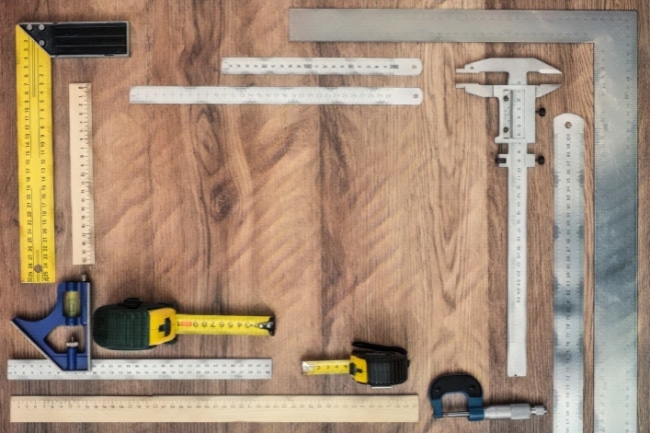
Measure Twice, Cut Once: Essential Measuring and Marking Tools
First of all, you’ll want to have a framing square in your toolbox. It’s essential for marking sheets of plywood and other framing-related duties. You can use it to check 90-degree angles and find 45-degree angles as well.
It is a must-have for laying out your projects accurately. If you start with smaller projects, though, you can use try square, which is a pretty much smaller version of the framing square.
Combination Square: Accurate Measurements and Angles
The combination square, a multi-faceted tool, is a gem in a woodworker’s toolbox. With its adjustable sliding head, it’s a versatile tool that will become your go-to for checking 90-degree angles, marking 45-degree angles, and even measuring small distances.
It’s perfect for checking the squareness of your corners and ensuring your layout is precise.
And serves as a rule and depth gauge.
Speed Square: A Must-Have for Angled Cuts
The speed square is the go-to guide for marking and measuring angles quickly. Its utility for marking angled cuts on rafters and stairs is unparalleled.
Tape Measure: The Versatile Measuring Tool

The humble tape measure is perhaps the most frequently used tool in woodworking. It provides quick, efficient, and reasonably accurate measurements for almost all types of woodworking projects.
Marking Gauge: Ensuring Precise Markings on the Wood
For precise marking, a marking gauge is a godsend. This tool, often overlooked by beginners, ensures absolute precision in laying out joinery.
Going The Extra Mile: Sliding T-Bevel Square
Consider adding a sliding t-bevel square to your collection for additional versatility during the layout process. It helps transfer angles, such as when marking moldings. The adjustable blade lets you lock in any angle, making it an indispensable aid for your woodworking projects.
When working with these various squares, there are a few tips to keep in mind:
- Always check your squares for accuracy before using them to make markings
- Use a sharp pencil for precise layout lines
- Keep your measuring tools clean and free of sawdust to maintain accuracy
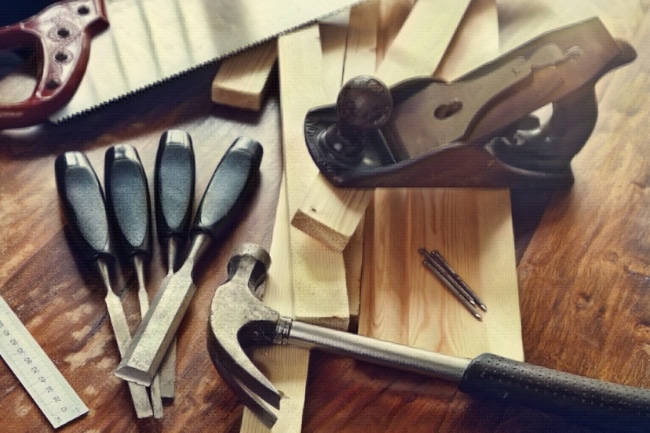
Cutting Made Easy: Must-Have Hand Tools for Beginners
Hand Saw: The Basic Cutting Tool for Various Woodworking Tasks
When we think of woodworking, the image of a hand saw often comes to mind. It’s one of the most fundamental tools in the woodworker’s arsenal. A trusty hand saw can accompany you through a multitude of woodworking tasks, from sawing timber to crafting intricate details.

There are a myriad of different types of hand saws, each with a unique design suited for specific tasks. Below, we will explore some of these variants:
Rip Saw: Distinguished by its large teeth and a low rake angle, it is designed to cut wood along the grain. It essentially ‘rips’ the wood apart, and its design allows it to remove material quickly, though with less focus on a clean finish.
Crosscut Saw: Unlike a rip saw, a crosscut saw is designed to cut wood perpendicular to the grain. It features smaller teeth, often angled backward, and is adept at producing a smoother, cleaner cut than a rip saw.
Backsaw: Backsaws are smaller than most other saws and have a stiffening rib on the edge opposite the cutting edge, giving them their name. They provide exceptional control, making them perfect for more precise tasks like cutting joints. The family of backsaws includes tenon saws, dovetail saws, and carcass saws.
Coping Saw: Perfect for Intricate Cuts and Curves
A coping saw is characterized by a narrow blade stretched across a U-shaped frame. This design makes it perfect for cutting intricate shapes and curves, especially in thinner pieces of wood.
Additional Saws to Consider
Japanese Saw (Dozuki or Ryoba): Japanese saws cut on the pull stroke, contrary to Western saws that cut on the push. They are renowned for their thin, sharp blades, producing remarkably clean cuts with minimal effort.
Chisels: Versatile Tools for Carving and Joinery
Chisels, coupled with a sturdy mallet, are a dynamic duo in woodworking. Few tools personify the craftsmanship and artistry associated with woodworking quite like chisels. Their ability to shape, carve, and cut through wood with precise control makes them a staple in any woodworker’s toolkit.
Starting your woodworking journey, you’ll want a few basic chisels that are versatile and user-friendly. Here are the types of chisels that should be considered for beginners:
Bevel Edge Chisels: These chisels are essential for any beginner. They offer versatility in function, allowing you to carry out various tasks, from carving to joinery. They come in a range of sizes, but a set that includes 1/4 inch, 1/2 inch, 3/4 inch, and 1 inch would cover most of the needs of a beginner.
Mortise Chisels: As a beginner, you may not immediately need mortise chisels, but once you start crafting mortise and tenon joints, these chisels become very handy. A 1/4 or 3/8 inch mortise chisel would be a good starting point.
Paring Chisels: Paring chisels are perfect for making precise, delicate cuts. They are not as essential as the bevel edge chisels for a beginner, but having a 1-inch paring chisel in your toolkit could prove beneficial as your skills progress.
It’s worth investing in a few good-quality chisels as a beginner rather than a complete set of lower-quality ones. High-quality chisels will stay sharp longer, making your work easier and more enjoyable. Also, remember that chisels need regular sharpening to maintain their edge and efficiency, so learning how to sharpen them is an essential skill for any woodworker.
Broadening Your Toolkit: Considering Additional Chisels for Advanced Projects
As your woodworking skills grow and your projects become more varied and complex, you may wish to expand your collection of chisels.
With their curved blades, gouges are ideal for more detailed carving work and adding depth and texture to your pieces.
Corner chisels can help achieve perfectly square corners, especially in creating mortises.
And then there are Japanese chisels, or “Nomi,” renowned for their exceptional quality and precision.
These are an investment but are prized by many woodworkers for their unparalleled sharpness and durability. Considering your projects and identifying what tools you’ll need before investing is always a good idea. After all, a craftsman’s work often reflects the tools they use.
Mallet: Essential for Driving Chisels and Other Woodworking Tasks
A mallet, often underappreciated, is a vital component of the woodworker’s toolkit. When it comes to striking tools, a hammer and mallet are both essential additions to your collection. Hammers are great for driving in nails and working with metal fasteners, while mallets are perfect for tapping chisels and adjusting wood joints without causing damage to the wood.
Shaping and Smoothing: Essential Sanding and Planing Tools
Hand Plane: Fine-Tuning Edges and Surfaces
The hand plane is your key to fine-tuned edges and surfaces. With a bit of practice, it becomes a versatile tool for shaping and smoothing wood.
Sandpaper and Sanding Blocks: Preparing for a Flawless Finish
Sandpaper and sanding blocks, although simple, play a significant role in preparing wood for finishing. They are instrumental in removing any remaining rough patches and ensuring a perfect final touch.

These essential hand tools will provide a strong foundation for your woodworking projects. As you gain experience and confidence, you’ll likely want to expand your collection with more specialized tools. However, starting with these essential hand tools will allow you to develop your skills and lay the groundwork for a successful woodworking journey.
Harnessing Power: Essential Power Tools for the Modern Woodworker
In today’s age, power tools have become an integral part of woodworking, offering a blend of efficiency, precision, and convenience that manual tools can’t always match. They can significantly speed up your work while still allowing for a high degree of accuracy and control. Here are a few power tools that are essential in a modern woodworker’s toolkit:
Circular Saws: The Versatile Powerhouse
Considered one of the most versatile power tools, a circular saw is excellent for making straight cuts in a variety of materials. While it might not match the precision of a table saw, it’s far more portable and economical.
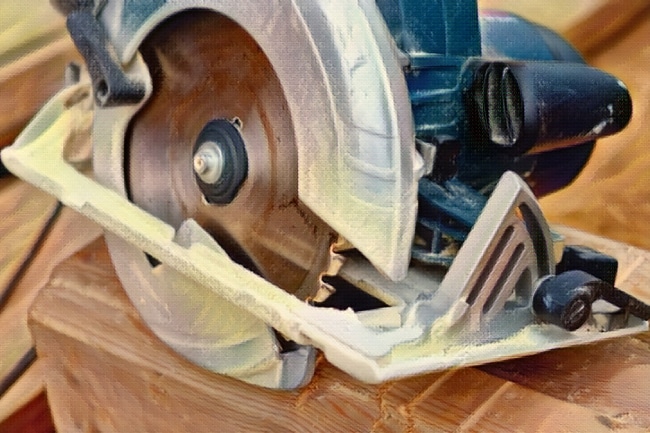
When purchasing a circular saw, beginners should consider factors such as blade size, power, adjustability, and safety features. A 7-1/4 inch blade is typical and will serve most needs. Cordless models offer convenience and portability but ensure they have enough power for your tasks.
Circular saws come in different types, each with unique features and intended uses:
Sidewinder Circular Saws: Its design features the motor positioned parallel to the blade, making it lightweight and compact. This type of saw is known for its speed and ease of use, making it an ideal all-around choice for the average DIYer or beginner woodworker.
Cordless Circular Saws: Offering excellent portability, cordless circular saws are perfect for workspaces without easy access to power outlets or for tasks that require moving around. However, their power can be limited compared to corded models. A cordless circular saw can be a handy, user-friendly tool for beginners working on small projects.
Mini Circular Saws: These compact saws are designed for one-handed operation. They are great for small projects and less intimidating for beginners due to their size. Although they lack the power for larger cuts, they are great for small cutting tasks.
Worm Drive Saws: In these saws, the motor is at the rear of the tool. A worm drive mechanism increases torque output, making these saws powerful enough for heavy-duty tasks. They’re larger and heavier than sidewinders, making them less ideal for beginners.
Hypoid Saws: Similar in appearance to worm drive saws, hypoid saws employ a different gear technology and don’t require regular oil changes, making them a low-maintenance option. They’re just as powerful as worm drives but also share the increased weight and size.
Power Drill: The Essential Companion
A power drill is a non-negotiable tool for any woodworker. It’s used for drilling holes, driving screws, and pocket hole joinery, making it an indispensable tool for many projects. Power drills come in various types, including corded, cordless, and drill drivers.
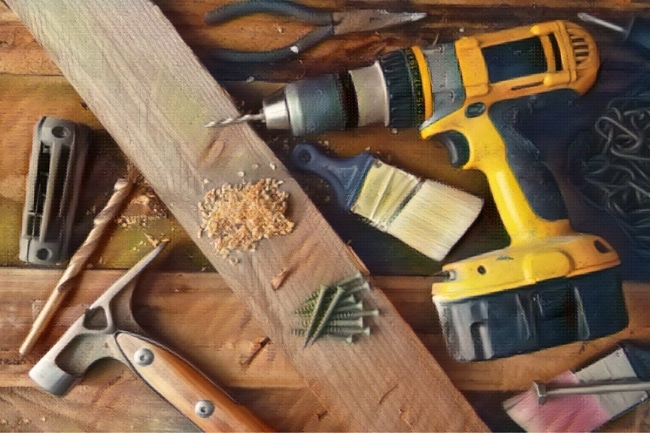
For beginners, a cordless drill is a practical and versatile option. When considering a power drill, look at factors such as power (measured in voltage for cordless drills), speed settings, the type of chuck (keyed or keyless), and comfort in hand. An additional feature to consider might be a hammer function for masonry drilling.
Cordless Drills: A cordless drill is an excellent choice for beginners because of its versatility and convenience. Look for a model that offers variable speed controls and adjustable clutch settings, giving you more control over the tool.
Drill Drivers: These are cordless drills with added torque for driving screws. They are versatile and easy to use, which makes them suitable for beginners.
Impact Drivers: They are powerful tools that deliver a strong, sudden rotational force and forward thrust when driven by a motor. They’re incredibly efficient at driving screws, even long screws, into hard materials without stripping the screw head.
This makes them a valuable addition to a beginner’s toolkit, especially for projects involving lots of screw driving, such as deck building or assembling large pieces of furniture.
However, impact drills are not intended for precise drilling, so a regular power drill or drill driver would be more suitable if you need to drill accurate holes. As a beginner, start with a power drill or drill driver for their versatility, and consider adding an impact drill as you take on more complex projects.
Jigsaws: Your Curve-Cutting Companion
A jigsaw is a must-have power tool for any woodworker looking to make curved or intricate cuts. It uses a reciprocating blade to cut through the wood, and the base can be angled for making bevel cuts. It’s also useful for making quick rough cuts when needed.
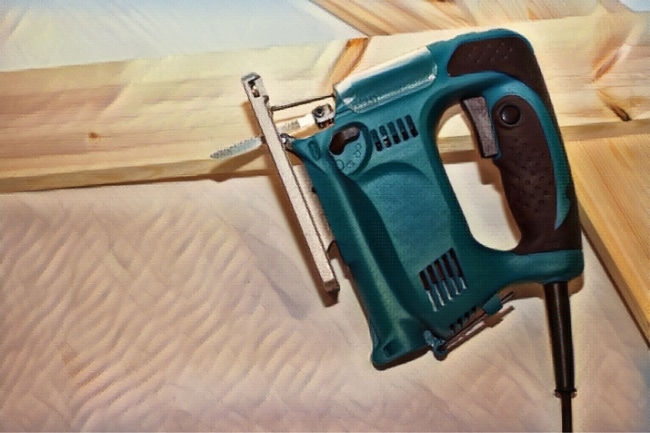
When choosing a jigsaw, beginners should consider factors like power, speed variability, orbital settings, and the type of blade clamp. Higher power will allow for cutting thicker materials.
Speed variability allows better control for different types of cuts. Orbital settings adjust blade motion for aggressive or smoother cuts. The toolless blade clamp makes it easier to change blades. Investing in good quality blades for curved and straight cuts is worth considering, as they can produce much better results than cheap ones.
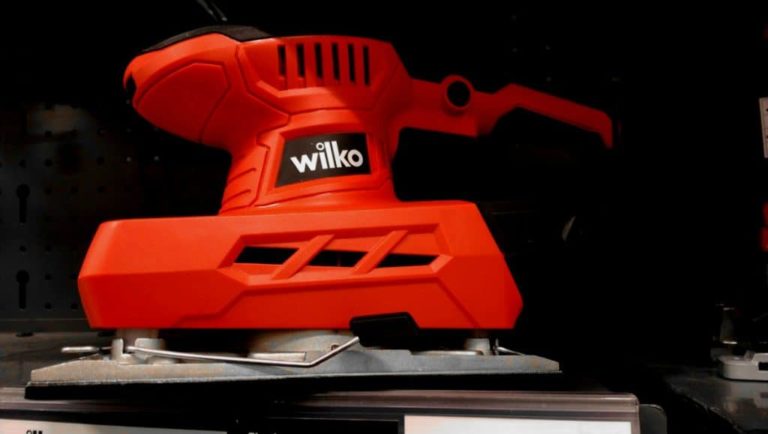
Random Orbital Sander: Achieving Smooth Surfaces
A random orbital sander is a prized tool in a woodworker’s arsenal. Renowned for its versatility and efficiency, this power tool is a game-changer for anyone seeking to achieve flawlessly smooth surfaces.
Unlike other types of sanders (like belt sanders) that move in fixed, repetitive patterns, a random orbital sander pad moves/vibrates in random orbits or ellipses as well as spins.

This unpredictable movement reduces the chance of leaving visible swirl marks or patterns on the wood surface. Instead, it creates a smooth, even finish, making it an ideal tool for both stock removal and ultra-smooth sanding.
Random orbital sanders use round sanding discs that attach using either a hook and loop system or adhesive. These sanders come in various sizes, but the 5-inch model is the most common, offering a good balance between capability and control.
Sanding discs are available in a range of grits, from coarse to fine, enabling you to choose the right one for each stage of your project.
When purchasing a random orbital sander, beginners should consider the tool’s weight, grip comfort, dust collection efficiency, and variable speed control.
A lighter model with an ergonomic design can minimize user fatigue, allowing for more extended work periods. Dust collection is a crucial aspect not just for cleanliness but also for your health, as it helps limit airborne wood dust. Variable speed control can be helpful when working on delicate pieces or when you need to control the material removal rate.
A random orbital sander can elevate the quality of your work, taking your projects from rough and ready to smooth and professional.
A detail sander is an excellent addition to your toolset for more delicate tasks or tight corners. This smaller, more compact sander lets you easily smooth out intricate details and hard-to-reach areas.
Exploring Further: Additional Power Tools for Advancing Your Craft
These power tools are recognized as the building blocks of any serious woodworking shop, prized for their precision and versatility but optional for woodworking newbies.
Nevertheless, they are super helpful and make your work easier. Let’s delve deeper into the unique capabilities of miter saws, table saws, and routers.
Miter Saws: Mastering Angled Cuts
A miter saw is designed to make quick, accurate crosscuts and miter cuts at various angles. It has a mounted circular blade that can pivot from side to side, allowing for angled cuts. Some models can also tilt in one or both directions to make bevel cuts.
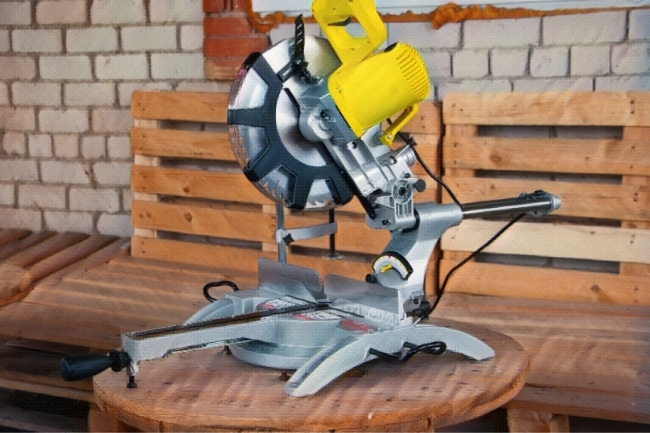
Miter saws come in different sizes, typically between 7-1/4 and 12 inches. The size refers to the blade’s diameter and determines the maximum width and depth of the cut. A 10-inch miter saw offers a good balance between cutting capacity and price for beginners.
Standard Miter Saws: The simplest form of miter saws, standard miter saws, can make miter cuts, or angled cuts, up to 45 degrees in either direction. They’re perfect for tasks like cutting picture frames or molding.
Compound Miter Saws: These miter saws can pivot left and right for miter cuts and tilt in a single direction for bevel cuts. Some models, known as dual compound miter saws, can tilt both ways. Compound miter saws are ideal for cutting beveled, mitered, or compound angled cuts, such as those needed for crown molding.
Sliding Miter Saws: Sliding miter saws have all the capabilities of compound miter saws but can also move forward and backward, allowing them to make wider cuts. These saws are perfect for cutting large pieces of material like fence boards or deck planks.
Cordless Miter Saws: These miter saws offer the convenience of portability and are beneficial for jobs without access to power outlets. However, they are typically less powerful and have limited battery life.
When choosing a miter saw, consider features such as positive stops (which allow quick, accurate adjustments to common angles), a laser guide for precise cutting, and a dust collection system.
Table Saws: The Heart of the Workshop
A table saw is a versatile tool used to make various cuts, including rip cuts (cutting along the grain), crosscuts (cutting across the grain), and bevel cuts. It consists of a circular saw blade mounted on an arbor that protrudes through the surface of a table.
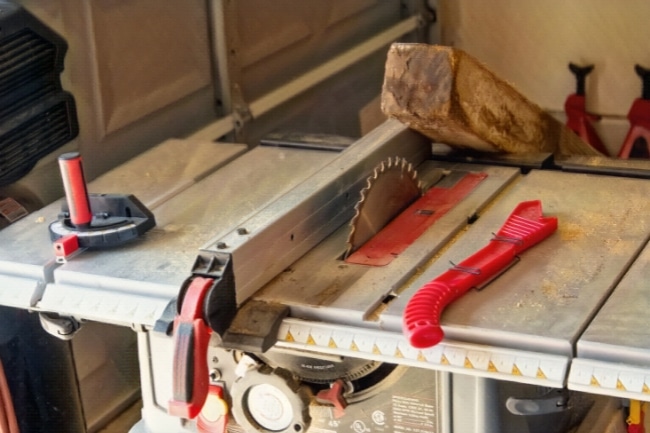
Table saws come in several types, including portable models like benchtop and job site saws and larger stationary models like contractor, hybrid, and cabinet saws. For beginners, a job site table saw offers a good mix of portability, power, and precision.
Safety features are an essential consideration when choosing a table saw. Look for features like a riving knife (to prevent kickback), blade guards, and anti-restart switches.
Routers: Shaping and Detailing with Precision
A router is a versatile tool used primarily for hollowing out areas in the surface of a workpiece. However, a router can also be used with different bits to shape edges, cut joints, create decorative moldings, and more.
Routers come in two main types: fixed base and plunge. Fixed base routers are perfect for edge cuts and molding, while plunge routers are ideal for interior cuts and intricate work. Many brands offer combo kits, including both bases for interchangeability. For beginners, a mid-sized (1-2 HP) fixed-base router is often a suitable choice.
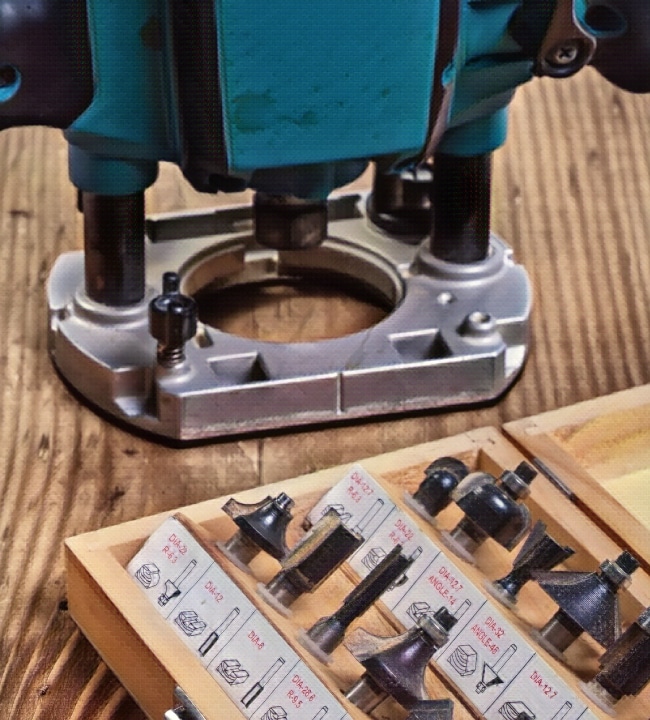
When selecting a router, consider features such as a soft start (which helps prevent the tool from jerking when started), variable speed control, and a comfortable grip.
Each of these power tools – miter saws, table saws, and routers – although not necessary to start woodworking/DIY endeavors, can significantly enhance the range and quality of your woodworking projects.
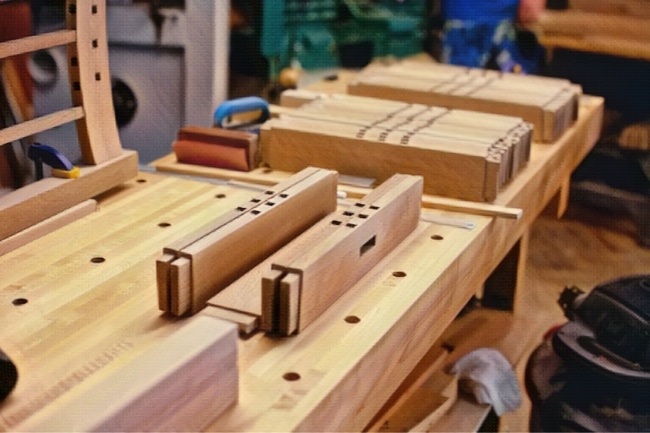
Holding It All Together: Fastening and Clamping in Woodworking
As a woodworker, you’ll soon discover that holding pieces of wood together securely and accurately while you work is as crucial as the cutting and shaping operations. This is where fastening and clamping come into play.
Fastening: More than Nails and Screws
Fastening involves securing pieces of wood together, and while nails and screws might be the first fasteners that come to mind, there’s more to it than that. The world of fastening includes a range of devices, each suited to different applications:

Nails: Ideal for rough construction, nails are fast and easy to use but offer less strength and can damage the wood if not used carefully.
Screws: Screws provide solid connections and can be removed if needed. They come in various types and sizes for different applications.
Bolts and Nuts: Used in conjunction with drilled holes, bolts, and nuts, provide exceptionally strong and removable joints.
Dowels and Biscuits: These are used for joinery to provide hidden, strong joints. They require special tools (dowel jigs or biscuit joiners) but offer a clean, professional finish.
Glue: Wood glue is a woodworking mainstay, often used with other fasteners. Modern wood glues are very strong and, when used correctly, can create bonds more robust than the wood itself.
Nail Guns: Speed and Efficiency in Fastening
Another critical tool for fastening in woodworking is the nail gun, also known as a nailer. A nail gun is a power tool that drives nails into wood or other materials. It is much faster and requires less effort than hammering nails manually.

Nail guns come in various types, each designed for a specific task or size of the nail:
Framing Nailers: These are heavy-duty nailers used for large projects and can drive in big nails. They are ideal for framing houses, decks, and rooms or any other project requiring wood structure assembly.
Finish Nailers: As the name suggests, these are used for finishing work. They can handle smaller nails and are used for molding, baseboards, and other precision tasks requiring a clean finish.
Brad Nailers: These are smaller than finish nailers and use even smaller nails (or brads). Brad nailers are perfect for attaching lightweight trim and for tasks that require a nail that leaves a small hole.
Pin Nailers: These use the smallest gauge of nails for delicate trim work and for securing thin or delicate materials that might split using larger nails.
Staple Guns: While technically not a nailer, staple guns are similar tools used to drive in staples for tasks like upholstery or securing thin, flat materials.
When choosing a nail gun, consider the type of projects you plan to undertake. Also, remember that nail guns require a power source. Some are powered by compressed air (pneumatic nailers) and require an air compressor, while others are powered by a fuel cell and battery (cordless gas nailers) or just a battery (cordless electric nailers).
A cordless electric brad nailer can be a great starting point for beginners as they are smaller, easier to handle, and don’t require a separate air compressor. They are also suitable for various light-duty tasks that a beginner might take on.
Clamping: The Extra Hands You Need
Clamps hold your workpieces together while the glue dries, or steady a piece while you work on it. Selecting the correct type of clamps as a beginner woodworker primarily depends on the nature and scale of the projects you intend to tackle. However, here are a few types that can offer you a good start:
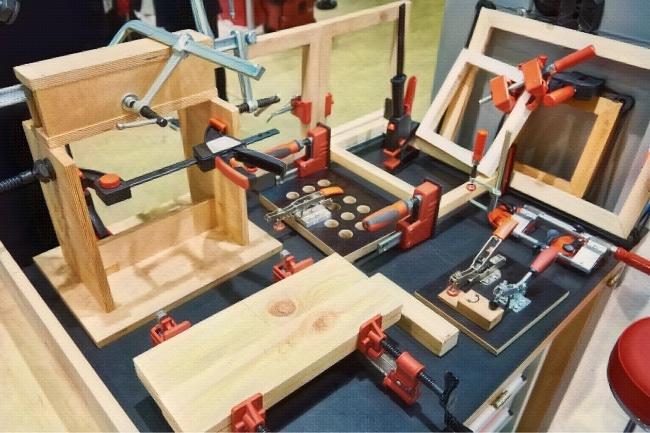
F-Clamps: Also known as bar clamps, these are versatile and adjustable, excellent for various general clamping tasks. Due to their versatility and simplicity of use, F-clamps or bar clamps are excellent choices for beginners. They come in various sizes and are straightforward to use.
C-Clamps: These clamps are named for their C shape and are invaluable for a variety of tasks. C-clamps offer strong clamping pressure and are great for holding small to medium-sized workpieces. They are straightforward to use, and their compact size makes them easy to store.
Spring Clamps: These function similarly to a clothespin and are great for light-duty work. They are inexpensive and very easy to use, making them an excellent addition to a beginner’s toolkit.
Quick-Grip Clamps: These are user-friendly and can be operated with one hand. This feature can be incredibly convenient when you’re trying to hold your work in place with one hand and need to apply a clamp with the other.
Corner/Frame Clamps: If you plan to make frames or boxes, corner clamps can be a great help. They hold workpieces at a 90-degree angle, freeing up your hands to fasten the pieces together.
Parallel Clamps or Pipe Clamps: Ideal for gluing up large panels or cases, these clamps apply even pressure across a wide surface and keep your assembly perfectly square. Although they seem intimidating initially, parallel/pipe clamps are pretty simple to use and offer great flexibility due to their adjustability. If you foresee working on larger projects, having a couple of these in your toolkit can be beneficial.
As you gain experience and undertake more complex projects, you may need to expand your clamp collection. Start with a few basic ones and gradually add to your arsenal as your needs grow.
Joining It Together: Essential Woodworking Tools for Joinery
Joinery is the art of connecting pieces of wood together to create a robust and stable structure. It requires precision, patience, and the right tools. Here, we’ll explore three popular woodworking tools for joinery: those used for pocket holes, biscuits, and dowels. These will be more than enough for a beginner to create various woodworking and DIY projects.
Pocket Hole Jigs: Creating Strong, Hidden Joints
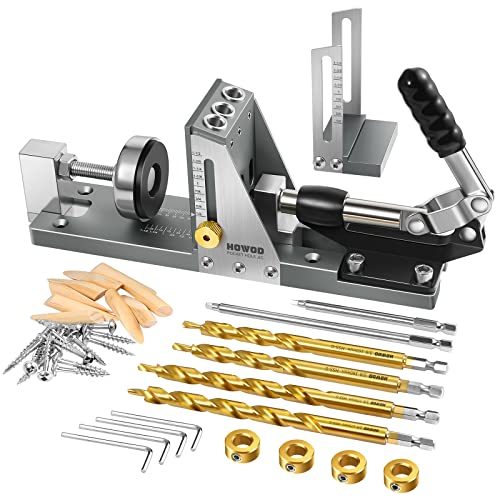
A pocket hole jig is a must-have tool for making strong, hidden joints quickly and easily. This simple tool guides your drill at a specific angle to create a pocket hole, into which a screw is inserted to join the pieces of wood.
It’s excellent for building furniture or any project where you want the screws to remain hidden.
When choosing a pocket hole jig, look for one that offers easy adjustability for different thicknesses of wood and includes a clamping mechanism to hold the workpiece steady.
Biscuit Joiners: Seamless and Secure Joints

A biscuit joiner, also known as a plate joiner, is a tool that cuts slots into two pieces of wood. A wooden ‘biscuit’ is then inserted into these slots with glue, and the pieces are clamped together.
As the glue dries, it swells the biscuit, creating a tight, secure joint. This method is excellent for aligning pieces when edge joining, like in table tops or cabinet carcasses.
When considering a biscuit joiner, look for features such as an adjustable fence that allows for precise alignment and a dust collection bag to keep your workspace clean.
Dowel Jigs: Traditional, Strong Joinery
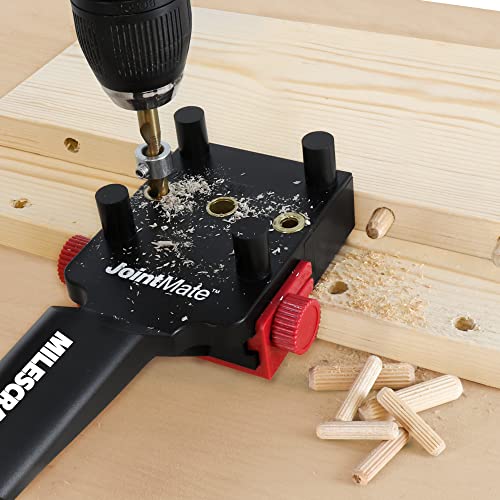
Dowels are a traditional method of joinery that involves inserting round pegs into corresponding holes in two pieces of wood. Dowel jigs guide the drill to create perfectly aligned holes for the dowels.
Dowel joints are strong and don’t require any special screws or fasteners, making them a favorite choice for visible joints in furniture.
When selecting a dowel jig, choose one that can accommodate different sizes of dowels and offers precise alignment capability.
Each of these tools—pocket hole jigs, biscuit joiners, and dowel jigs—offers a different method of joining wood together. They allow the creation of sturdy, reliable joints that ensure your finished project will stand the test of time.
Choosing Quality Tools on a Budget
Starting your woodworking journey can be an exciting experience, but it can also be a bit expensive if you’re not careful with your tool selections. Don’t worry. I’m here to help you choose quality tools on a budget without sacrificing performance or safety. Follow these tips, and you’ll be well on your way to building your dream projects.
One of the first things to consider when purchasing woodworking tools is to focus on the essentials. In most cases, you don’t need the highest-end, most expensive tools to get the job done. Invest in the basics like a circular saw, power drill, and random orbital sander. You can slowly build up your collection as you gain more experience and determine what additional tools you want.
Shopping for tools in bundles or sets can save you money and ensure you get a collection of tools that work well together. Look for deals online or at local home improvement stores, and keep an eye on sales during holidays or other special occasions. You can also consider refurbishing used tools or buying pre-owned equipment if they’re in good working condition.
When shopping for budget-friendly woodworking tools, consider brands that balance quality and affordability. There are several brands to consider, like Porter-Cable, Skill, and Ryobi.
With a wide range of power tools, accessories, and even cordless options, they are a reliable choice for beginner woodworkers on a budget. It’s essential to read reviews and compare prices before purchasing, as sticking to your budget doesn’t mean compromising quality.
Lastly, remember that taking care of your tools will extend their lifespan and keep them in top working condition. Keep your tools clean, store them properly, and maintain them regularly, as this will save you money in the long run by reducing the need for frequent replacements.
With these tips, you can build your woodworking tool collection and create gorgeous projects without breaking the bank.
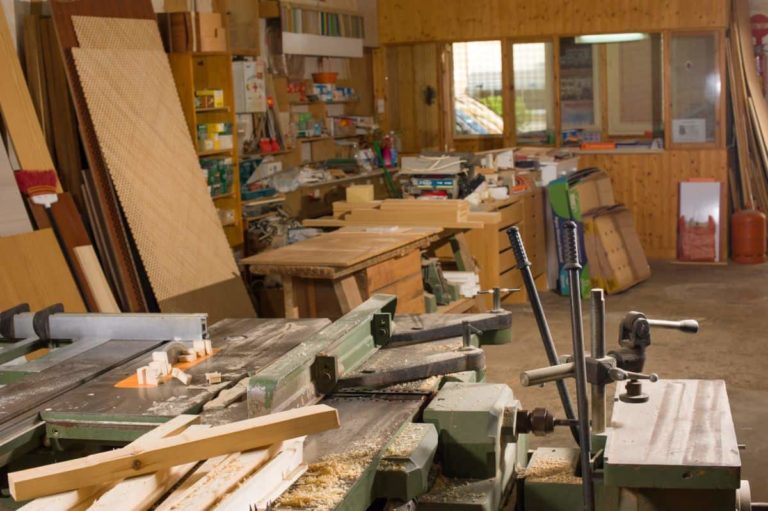
A Safe and Efficient Woodworking Shop
Setting up a safe and efficient woodworking shop is essential for beginner woodworkers. You can avoid potential hazards and enjoy a smooth woodworking experience with proper organization and safety measures.
Woodworking tools safety
Always exercise caution when using woodworking tools, both hand tools and power tools. Read and follow the manufacturers’ instructions and safety guidelines. Familiarize yourself with the proper handling techniques and wear appropriate safety gear, such as goggles, gloves, and ear protection.
ABC of Safe Woodworking Environment
An effective dust collection system is crucial to maintaining a safe woodworking environment. Wood dust can pose respiratory hazards and create slippery surfaces when allowed to accumulate on the floor. Invest in a sound-quality dust collection system to keep your workspace clean, healthy, and safe.
Another way to mitigate safety hazards in your woodworking shop is to keep all electrical equipment and outlets in proper working order. Ensure that cords and plugs are free of damage, and use only recommended extension cords designed for your power tools.

In addition to these tips, build and maintain a solid workbench that can withstand the pressure and vibrations of your woodworking tasks. A sturdy workbench provides a stable foundation for your projects, reducing the risk of mistakes and accidents.
Lastly, keep a well-stocked first aid kit in your woodworking shop. Accidents can happen, and being prepared for potential injuries can significantly minimize risks and ensure your safety.
By following these guidelines and consistently practicing safe woodworking habits, you can create and maintain a secure, organized, and efficient woodworking shop that allows you to enjoy your newfound hobby with confidence and peace of mind.
Tool Storage Solutions: Organizing and Protecting Your Tools
One of the first tips for establishing a safe woodworking shop is to allocate enough space for your projects and tools. A well-organized workspace makes it easier to work efficiently and avoid accidents.
Tool storage solutions are vital for keeping your tools organized and protected. Whether it’s a simple toolbox, a wall-mounted system, or a rolling cabinet, having a place for every tool is crucial. Keep frequently used tools within easy reach, and securely store sharp or dangerous tools when not in use.
Workbench: Creating a Sturdy and Functional Workspace
The workbench is more than just a table—it is your primary workspace. A sturdy, reliable workbench is vital to efficient woodworking, offering a secure platform for various tasks.
Workbenches come in various styles, materials, and sizes. However, all good workbenches have standard features: they are sturdy, stable, and provide ample work surface for your projects.
Traditional Workbench: A traditional workbench typically has a large, thick wooden top and a sturdy base, often including a woodworking vise. This bench style provides a robust and stable work area for various woodworking tasks.
It’s also commonly fitted with dog holes (small, round holes evenly spaced along the bench), allowing bench dogs and holdfasts to secure your workpiece.
Portable Workbench: If space is a premium or you require mobility, a portable workbench might be the solution. These workbenches are typically lighter, compact, and easy to fold up for storage or transport. They often come with features like adjustable worktops and built-in clamping systems.
Workbench with Storage: Some workbenches include built-in storage solutions like drawers, shelves, or pegboards. This added storage can be invaluable in keeping your tools organized and within easy reach.
Multipurpose Workbench: A multipurpose workbench is designed to accommodate various types of work. These workbenches can incorporate elements like a metalworking vise, a machine mount, or a router table.
When choosing a workbench, consider the available space and the type of projects you plan to undertake. Consider the bench’s height, size, and sturdiness. Also, consider any additional features you might want, like integrated storage or built-in vises.
Remember, your workbench is the backbone of your woodworking setup. It’s worth taking the time and choose a workbench that will serve your needs well and stand up to years of use. Whether you buy or build your own, a well-chosen workbench will undoubtedly become essential to your woodworking journey.
Sawhorses: Portable Support for Cutting and Assembly
Sawhorses are one of the most practical tools a woodworker can possess. They offer a portable, sturdy platform that can turn any space into a temporary workshop. Especially important if you’re low on space or lack a dedicated workspace.

Whether cutting lumber, assembling a project, or simply needing to elevate your work, sawhorses are up to the task.
Traditionally made of wood, sawhorses come in various materials and designs. Modern sawhorses can be made from metal or heavy-duty plastic, offering excellent durability and weight capacity. Some are foldable or collapsible, making them easy to store and transport.
Here are a few key points to consider when choosing sawhorses:
1. Stability: A sawhorse should provide a stable, non-wobbling platform. Look for models with a wide base and non-slip feet.
2. Weight Capacity: Consider what you’ll use your sawhorses for. If you plan to work with heavy materials or use them as a stand for bigger power tools, choose a sawhorse with a high-weight capacity.
3. Height and Width: The height of your sawhorse should be comfortable for you to work at. Some sawhorses come with adjustable height, which can be a handy feature. The width should be sufficient to support the materials you’ll be working with.
4. Portability and Storage: If you’ll move your sawhorses around or have limited storage space, look for lightweight, foldable models.
5. Durability: Your sawhorses should stand up to heavy use. Metal sawhorses generally offer the best durability, but heavy-duty plastic can also be a good choice.
6. Added Features: Some sawhorses have handy features like built-in measuring scales, tool holders, or clamps.
Remember that while sawhorses can be purchased, they are also a great DIY project for those looking to practice their skills. Whichever route you choose, sawhorses will undoubtedly prove invaluable in your woodworking projects, offering reliable support wherever and whenever needed.
Additional Resources and Techniques
As a beginner woodworker, it’s important to familiarize yourself with essential tools and techniques to make your projects more successful. In this section, I’ll share additional resources and tips based on my personal experiences. ‘
A track saw can be a game-changer for making precise cuts in large sheets of plywood or MDF. It guides the saw along a straight path, ensuring that your cuts are straight and accurate.
Although it’s not a must-have tool for beginners, it is an excellent investment as you advance in your woodworking journey. However, If you don’t have the budget for another saw, a guide rail for a circular saw is a great alternative.
Wood can sometimes warp due to changes in humidity or improper storage. Store your lumber in a dry, flat area to avoid this issue, and use straight, unwarped boards for your projects. If you do encounter warped wood, you can sometimes fix it by using a technique called flattening which involves planing, clamping, or even ironing(!).
Take some time to explore local classes and workshops that can help you improve your skills. These classes can provide hands-on experience and personalized instruction in various woodworking techniques. You can also find online tutorials and forums where fellow woodworkers share their knowledge and expertise.
In conclusion, continue exploring the world of woodworking, and don’t be afraid to ask for help or experiment with new techniques. You’ll become more confident in tackling various projects as you practice and develop your skills. And remember to enjoy the process and have fun!
Frequently Asked Questions
Subscribe To My FREE DIY Newsletter!
Stay in touch and receive things like updates, special offers, new projects, tips, gear reviews, and more. No spam, promise!
By entering your email address, you agree to get an email newsletter from UpcycleThisDIYThat. I’ll respect your privacy, and you can unsubscribe at any time. For more details, review our Privacy Policy.
Last update on 2024-04-28 / Affiliate links / Images from Amazon Product Advertising API