
DIY Candlestick Holder- Upcycled Plastic Bottles with Faux Concrete/Stone Finish
This post includes affiliate links. If you decide to make a purchase through my link, I might get a small commission for it at no additional cost to you. Thank you for supporting Upcycle This DIY That!
The idea for this DIY candlestick holder project came from the beautiful shape of almond milk bottles we buy. It was too good not to use them for some sort of DIY home decor craft. This is how this upcycling project was born.
I bought a concrete spray paint some time ago and thought that this could be a great way to make use of it-candle holders with faux concrete/stone finish.
The project evolved as I was making it. The basic version of this DIY candlestick holder is very simple and quick to make using any plastic bottle. In the second version that I made, I used only chalk paint to show that you don’t even need specialty paint.
The last version is a bit more complicated. It was an experiment with using clay and stonecast powder. I do like how it turned out, but it’s not something I recommend for beginners.
Tools and materials
- Plastic bottles
- Air-dry clay
- stone cast powder/casting plaster/plaster of Paris
- Sanding sponge fine grit
- Concrete/cement spray paint
- Chalk paint in white and black/dark gray- you can then mix the colors to make various shades of gray- I used my DIY chalk paint in white plus charcoal and dove gray shades-Aldi brand. You can always use latex paint tester pots with chalk paint powder or black acrylic paint and white chalk paint.
- PVA glue
- Paper tissues
- Sand
- Sharp knife/craft knife
- Roller pin with thickness rings(rings are optional but make rolling the clay to the same thickness easier)
- Flat paintbrushes
- Plastic plate
- Paper towel
- Paint stirrers
- Kitchen scales plus a plastic bowl/container for mixing plaster


How to make DIY candlestick holder with faux concrete/stone finish
Prep the bottles
> Clean and fill the bottles
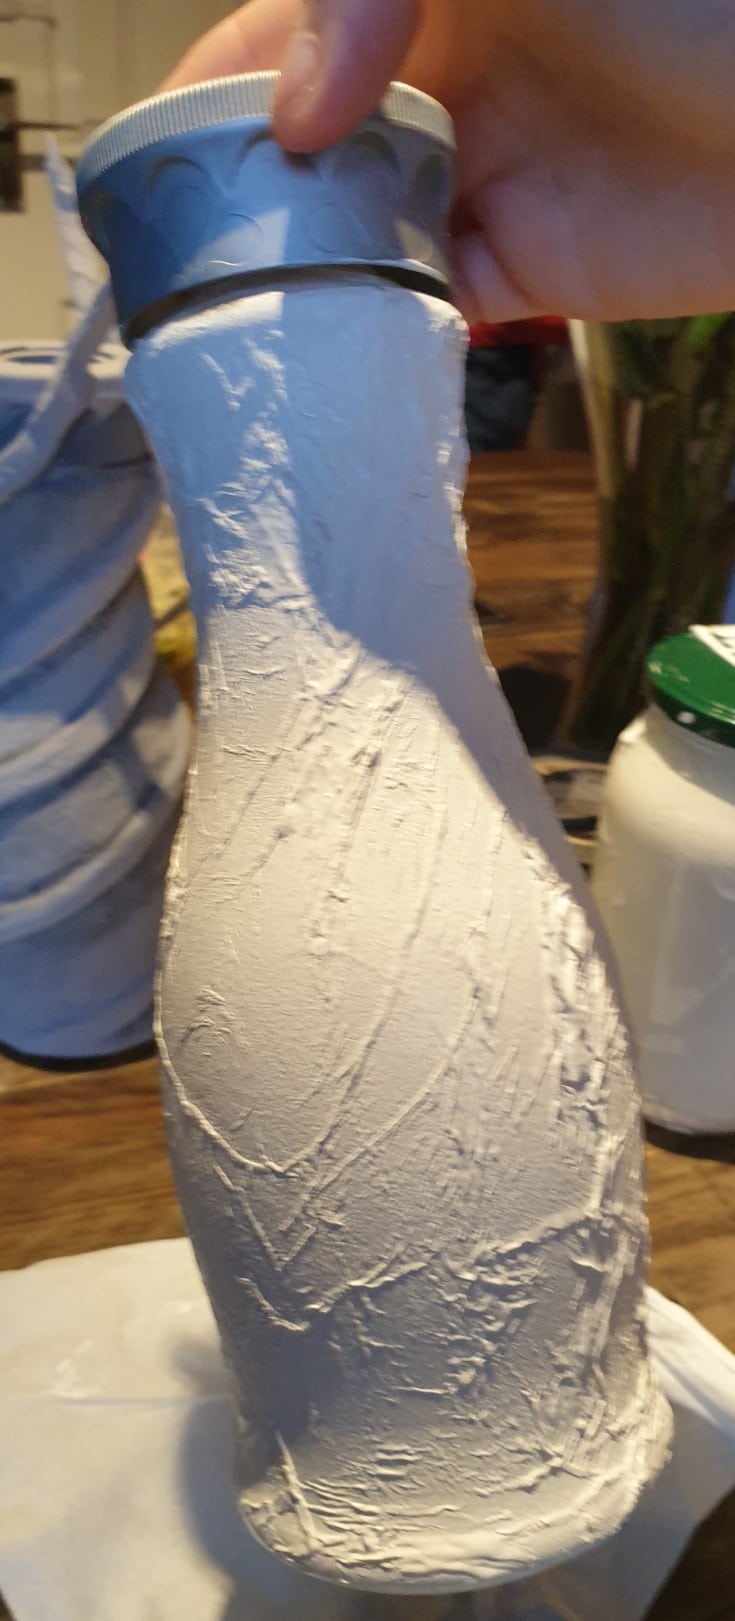
First, I cleaned the bottles, removed the plastic film, and let them dry. I wanted them to have some weight so they don’t tip over, so I filled them with sand. It doesn’t have to be much. But just enough to create the weight.
Creating the texture
Next, you want some texture. The quickest way is to use PVA glue and regular tissues(1 ply), or you can use tissue paper as well.
> Glue the tissues and dry


Cover the bottle pretty generously with glue and stick the tissue(s) to it. Work in sections, and don’t worry about any holes. You can cover them with extra glue and tissue.
Make sure you cover the tissue with the glue after it sticks to the bottle. Let it dry thoroughly. You can add more tissue layers later if you want to add even more texture.
Version 1
This version is made using concrete spray paint and chalk paint as well as air-dry clay. And this process is not precisely the one I followed(I was experimenting a lot, lol), but it turns out it is the most logical and time-efficient.
Paint the bottle with chalk paint

First, paint the whole bottle with white chalk paint. Cover the tissue thoroughly and let it dry.
Spray with the concrete spray

First, spray the bottle. Make sure you do it in a well-ventilated area and use safety goggles and a respirator. The best way not to make too much mess is to use a small spray tent.
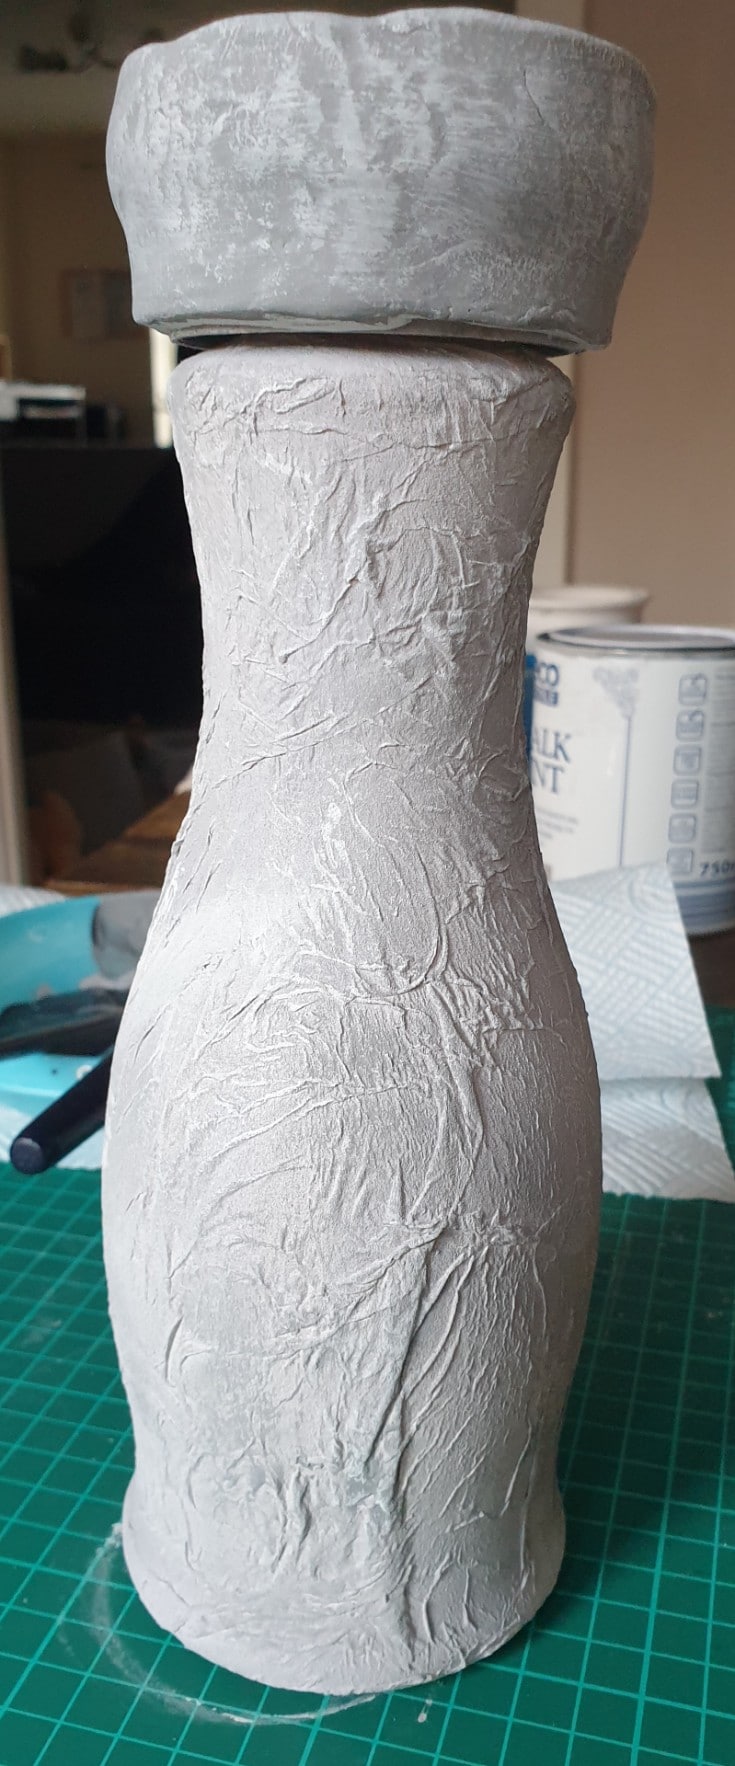
I didn’t have one on hand, so I used an old cardboard box. Let it dry thoroughly. While the paint is drying, you can make the clay cap cover.
I forgot to take a picture after spraying and before the clay cover was attached hence the images above.
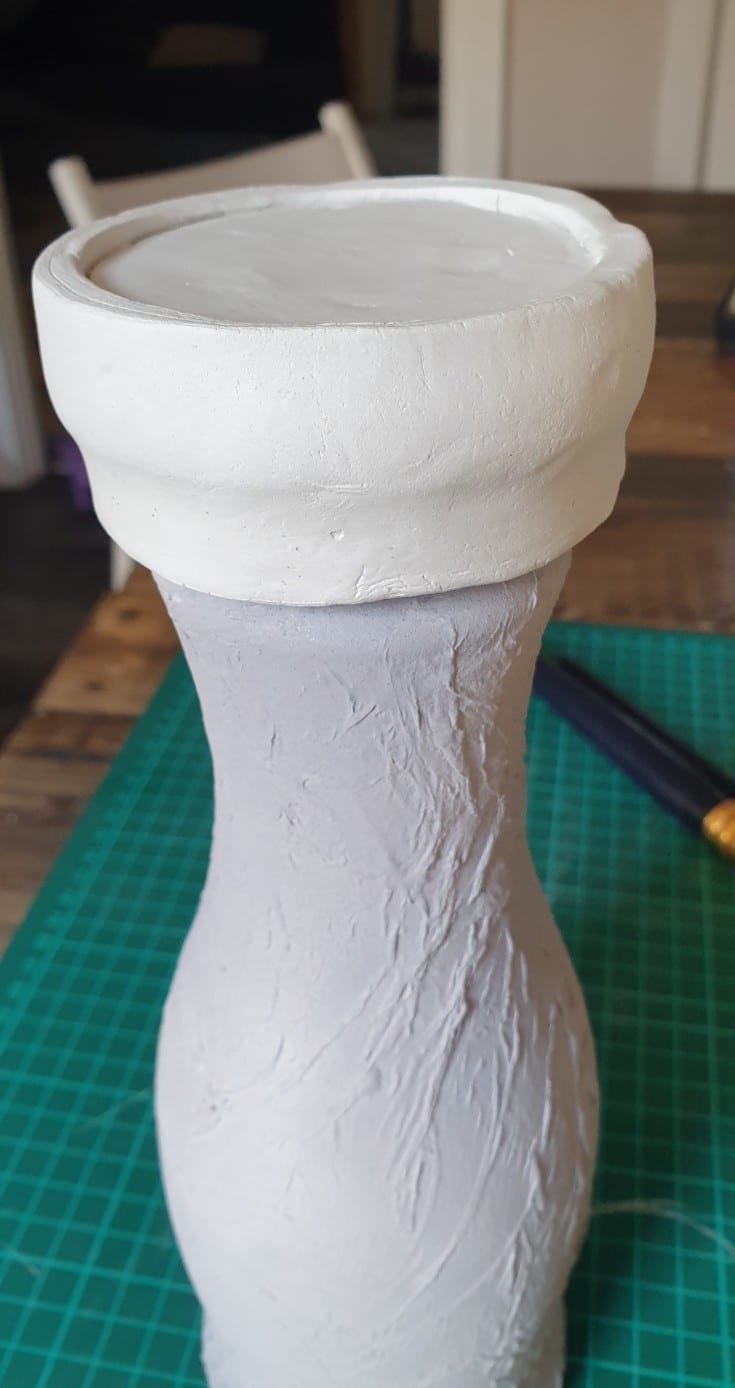
Make the cap cover from clay


To make the top(cap) cover from clay, you need to measure the cap’s circumference and height. Next, grab a piece of clay and work it in your palm for a minute. Then create an elongated shape that will be rolled flat to the desired thickness.
I needed 21×3.5×0.5cm(in). I cut the rectangle out of the rolled clay(you can use a regular rolling pin). To make the top part, I used some more clay, rolled it to pretty much the same thickness, and used a spray can cap/lid to cut out the round shape.
You can use a cookie cutter or something else that matches the size you need.
Fix the clay cover to the bottle cap


Next, I fixed the clay to the bottle cap using PVA glue. I covered the clay strip with the glue and pressed it gently around the lid. I used my fingers and some water to connect/merge the edges. Then I glued the round bit on top of the lid. I let it dry overnight.
Drybrush various shades of gray chalk paint

The concrete paint was a very light shade, and I wanted to add some more dimension to the finish. Using a small(1-½ in) flat paintbrush, I dry-brushed various shades of gray in every other direction.
Make sure the paintbrush is pretty dry(dip it very lightly in the paint and wipe it off on a paper towel), and start with light strokes. Then you can press a bit more while your paintbrush is getting drier/holds less paint). Let it dry.
Paint the clay cap cover gray

Now it’s time to paint the clay top with gray chalk paint as well. Let it dry.
Drybrush another layer of white chalk paint


To enhance the texture, even more, I dry brushed some white chalk paint on top of the gray on the bottle and the cap. Let it dry.
Version 2
This version is pretty much the same as the first one, but I only used chalk paint to create the concrete finish.

Make the cap from clay
While the glue was drying, I made the cap cover from clay. The process is the same as above.
Fix the clay cover to the bottle cap
Again the check the process above. I did sand this one a bit once it dried as I wasn’t very pleased with the shape.
Paint the bottle with gray chalk paint


I painted the whole bottle with dove gray chalk paint and let it dry completely. I painted the cap cover a darker gray shade.
Add some layering with shades of gray and white
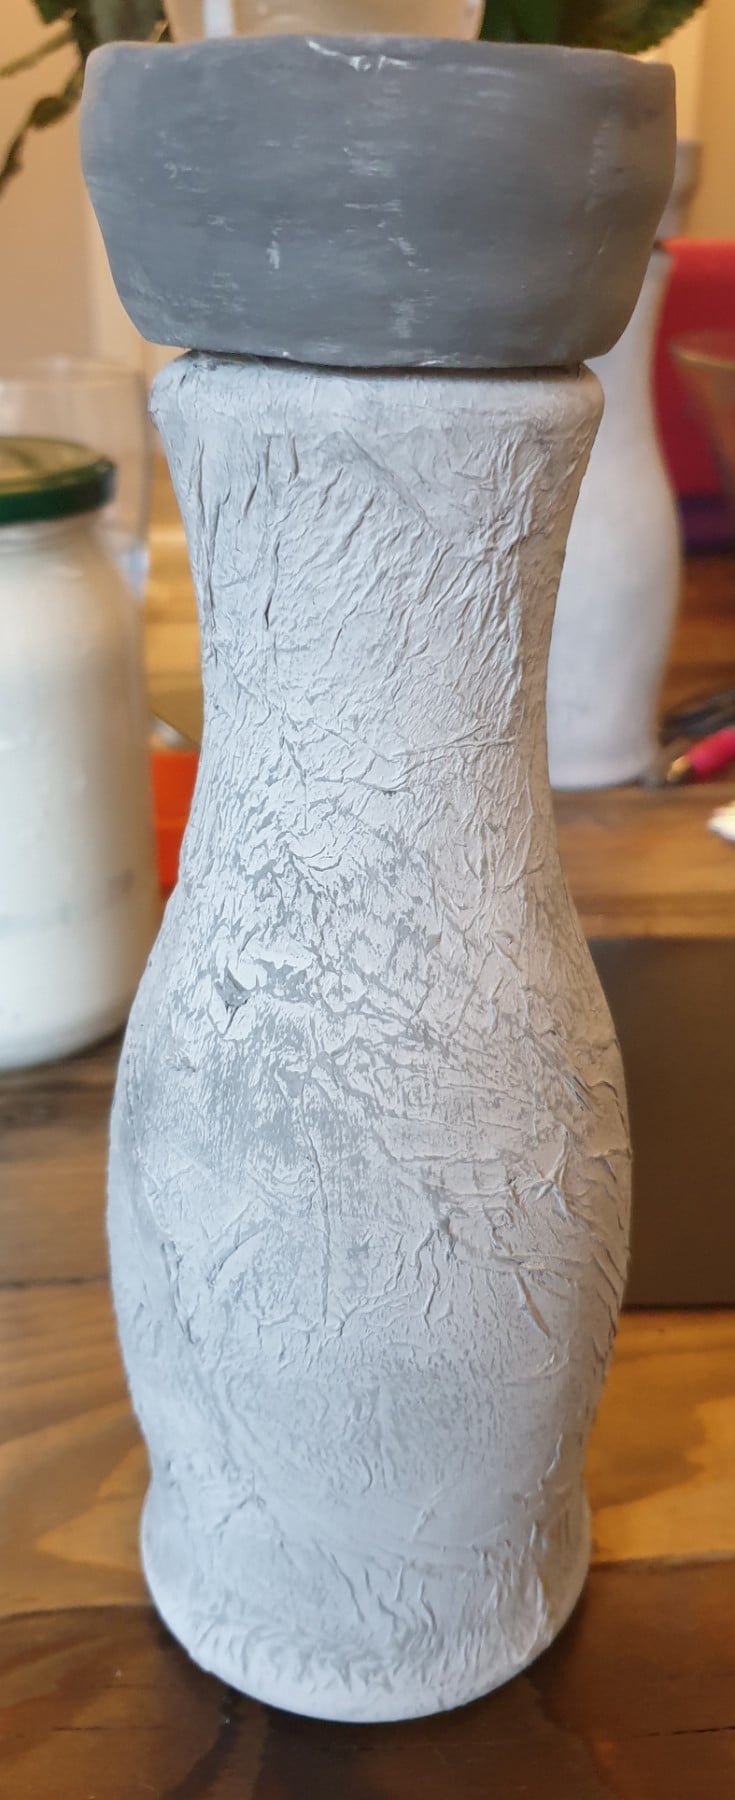


Once the light gray layer was dry, I dry brushed another shade of gray that was a bit darker. I finished with a layer of dry brushed white chalk paint on the bottle and the cap cover.
Version 3
This version was an experiment I wanted to try. It was a bit more complex as I used air-drying clay and plaster to create the shape and texture. The first step is the same as for the other two, though- the glue and tissues.
Drill the hole in the cap

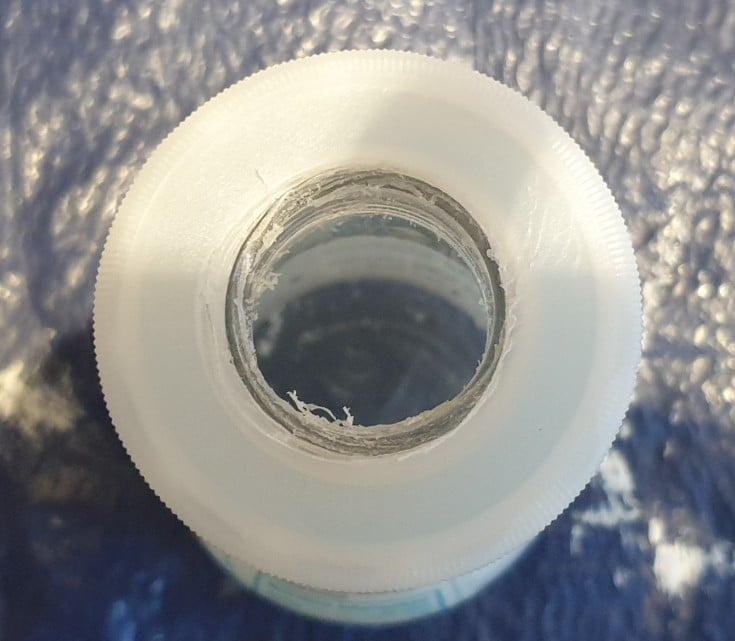
The next step was to drill a hole in the cap. You could skip it if you don’t have a hole drill bit. You would have to cut the neck of the bottle used for the “crown” element and glue it with hot glue to the top of the cap. I chose to drill the hole as it made it more secure.
If you choose to go the hot glue route, make sure to only glue the final “frosted” version.
[adinserter name=”adsense new ad unit”]
Make the crown elements from a plastic bottle
For the sake of this project, you would need to me two of these. One is a mockup/test element used to help with the shape at the top. And the other is a final one. You would need two because working with clay and plaster is pretty messy, and this element would eventually get dirty. This way you the final piece looks great and hasn’t got any stains.


- Cut the bottle
The bottle I used had a lovely pattern, so I went along the lines to cut it. Make sure you have two of these elements. But only one needs to be finished(as painted and cut out thoroughly). Make sure they are the same height, though.
- Spray one with frosted glass paint
Spray the element with the frosted glass paint and let it dry.


Measuring and marking
This step makes sure the clay elements are long enough and evenly spaced.


Firstly, I was going for five of them, but as I started to glue them, it turned out that three are enough. You can go freehand or make the measurements.
First, make marks at the bottom of the bottle. Spaced them evenly. Five clay elements need five spots etc.
Then starting at the bottom mark, mesure the length/height of the bottle and divide it evenly. Then, to measure the length of the clay bits needed, insert the crown element(the spare one) into the cap.
Next, starting at the bottom mark, take the measuring tape and go around the bottle.
Check the video below on how to make the lines/marks. It’s showing cutting a bottle, but the idea of marking the line is the same. Make sure you measure all the way up, including the crown bit. I got 50cm(20in).
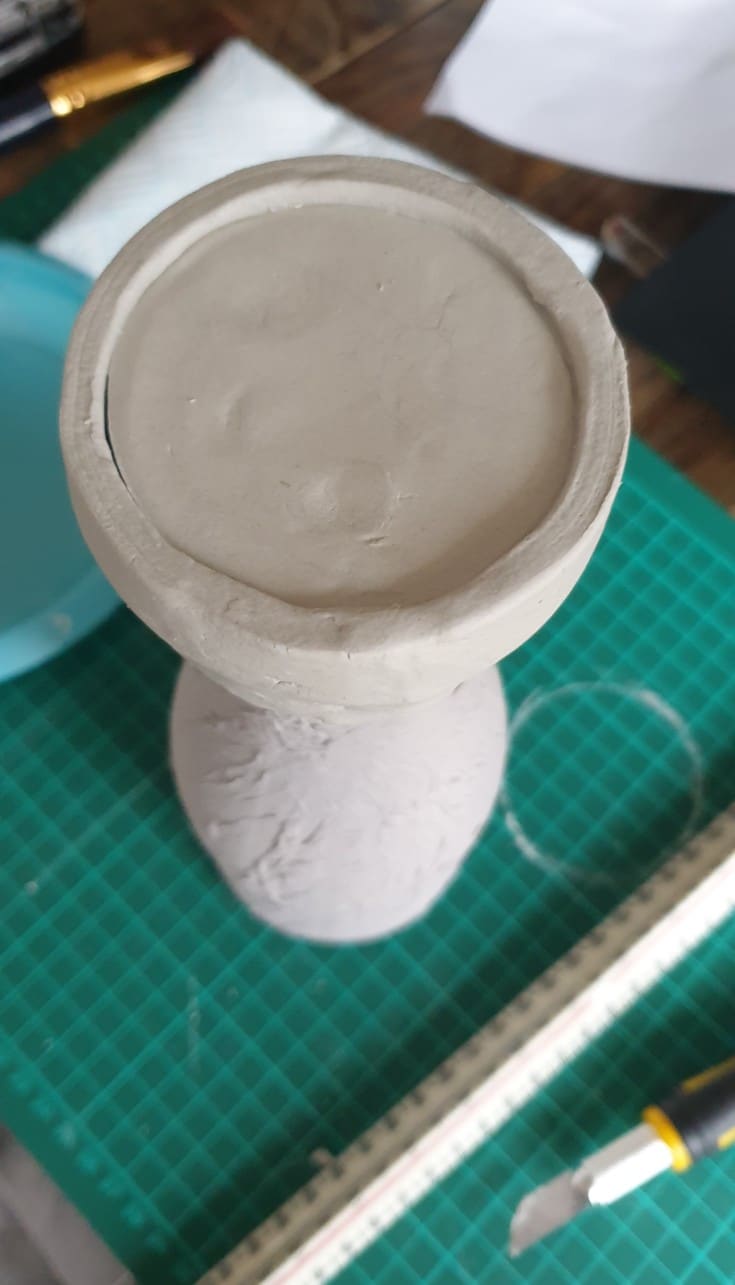
Make the base for the candle in the crown element with clay

This is the bit of clay that goes inside the crown element. It’s a flat surface for the candle. To make it, you simply need to take a bit of clay and insert it into the plastic crown bit.
Flatten the top surface, and once the top of it is dry, remove it from the plastic to dry thoroughly. You then reinsert it later.
Make the clay elements

Now that you have the measurements of the clay bits, it’s time to cut them out. Take a piece of clay and work it in your palms for a minute. Then the process is the same as for versions 1 and 2- roll the clay to the desired thickness and cut to size.
Glue the clay elements to the bottle and the crown element


The next step is to glue the clay bits to the bottle. Spread the glue onto the clay and, starting at the bottom, attach it to the bottle following the pattern you did with the measuring tape.
Make sure you secure the ends to the plastic crown element. Don’t worry. This can be removed gently once the clay and plaster are dry and cured.


Let it all dry thoroughly


Now let the clay cure and dry thoroughly. I left it for 48h.
Make the paste with the stonecast powder

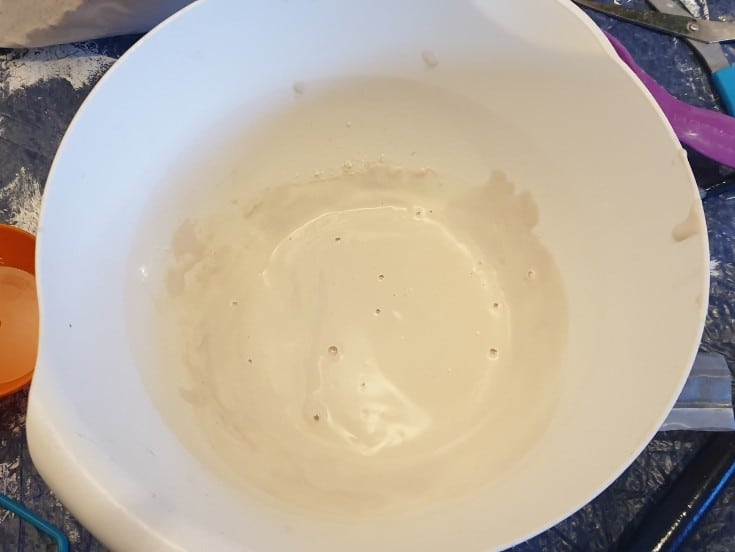
The next step is to make the plaster paste. I used the stone cast powder. And had to work quickly as it was drying fast. I had around 15 min. Take this into consideration.
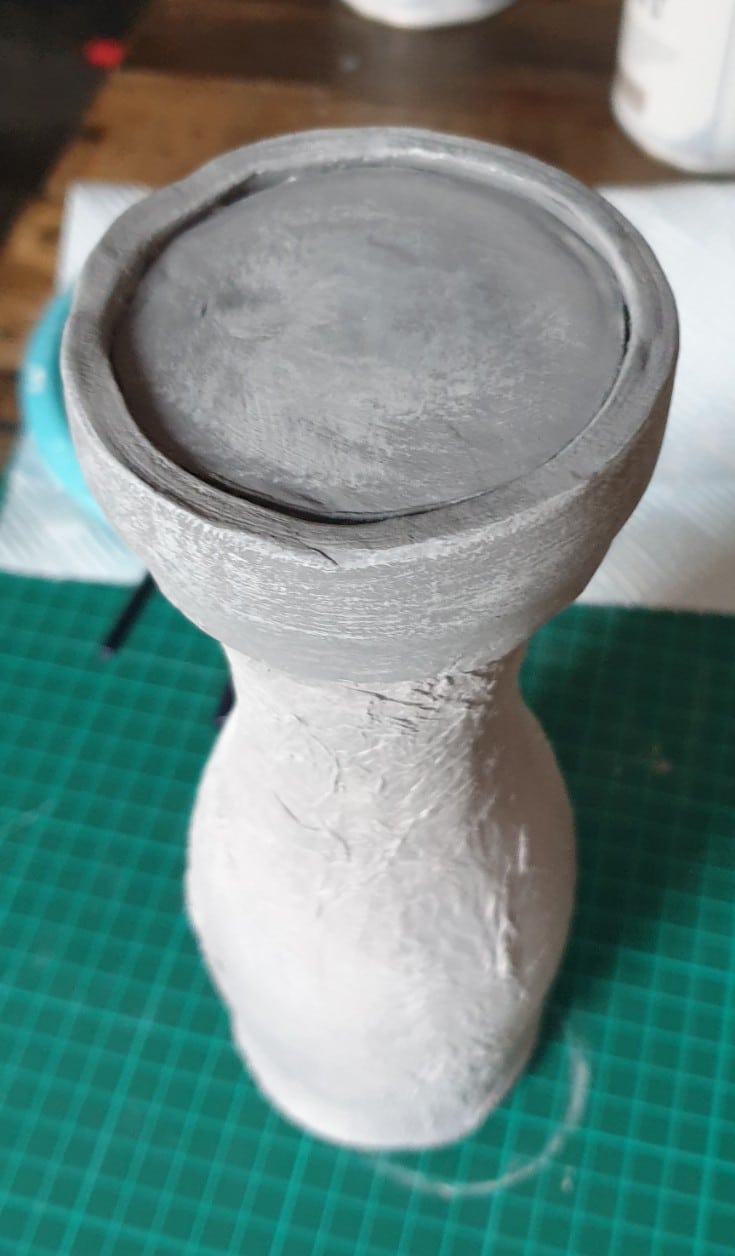
Cover the whole bottle with the paste


The paste’s consistency was like a pancake batter, and I used a paintbrush to apply it at first. Then once it started to thicken more, I used my fingers. I smoothed the surface out with my fingers. Make sure everything is coated evenly.
You can see in the pictures above how the plastic element got dirty. I had to make another one. That’s why you’d need to make the mockup one.
I gently detached the crown bit by bending the plastic and removed it. I had to make sure not to damage the thin clay bits.
Let it dry


Once I covered the bottle with the plaster, I let it cure and dry properly for 12-24h.
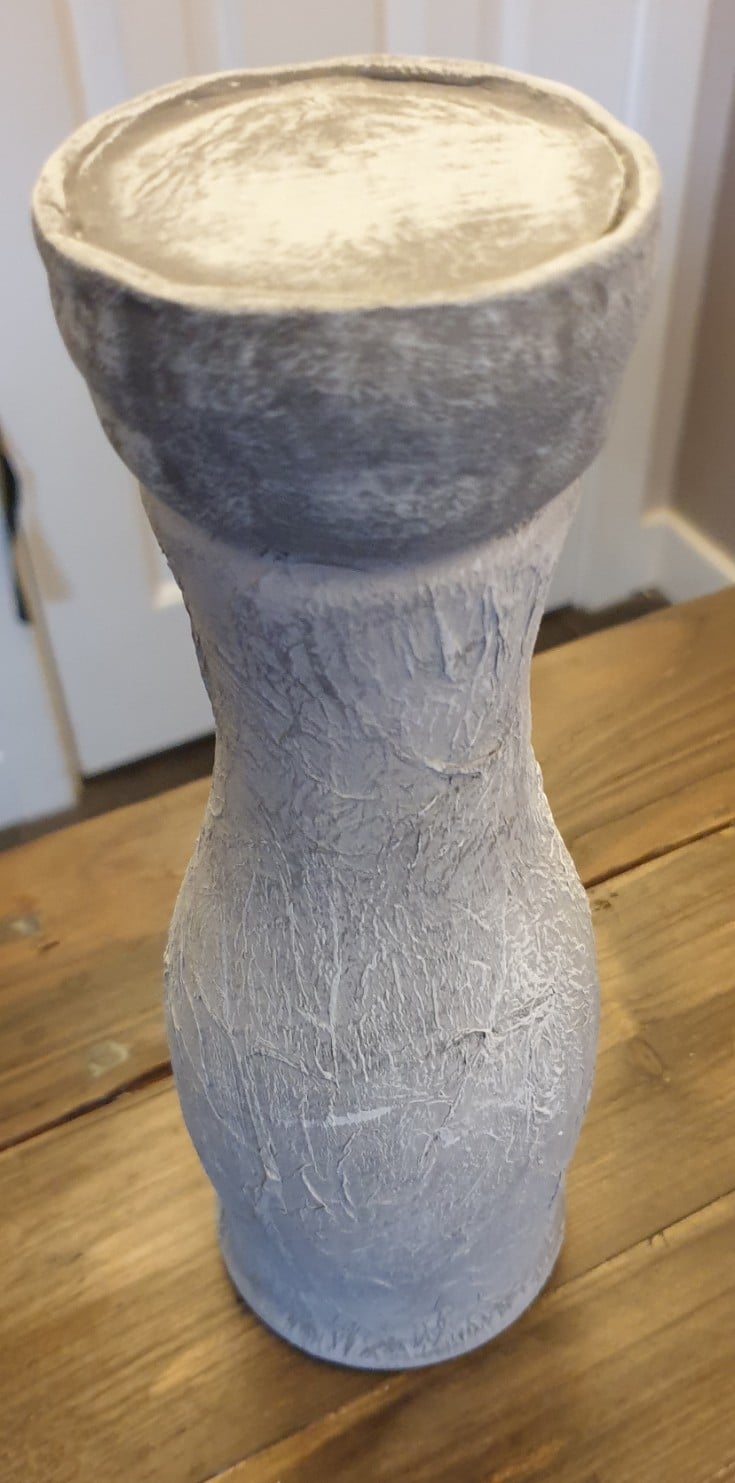
Spray with the concrete paint


Now was the fun time 🙂 I sprayed the whole bottle with the concrete spray and let it dry. I removed the crown bit before. If you are using the mockup one, you can leave it in.
Add more layers with chalk paint to add dimension and enhance the texture


I added more gray shades to enhance the texture and create more depth. Make sure the paint dries thoroughly between layers. I used mostly dry the brushing technique. I finished off with a layer of dry brushed white chalk paint.
Change the crown element to the frosted one


Once all the painting was done and dried, I installed the frosted crown element by putting the bottle’s neck into the drilled hole.

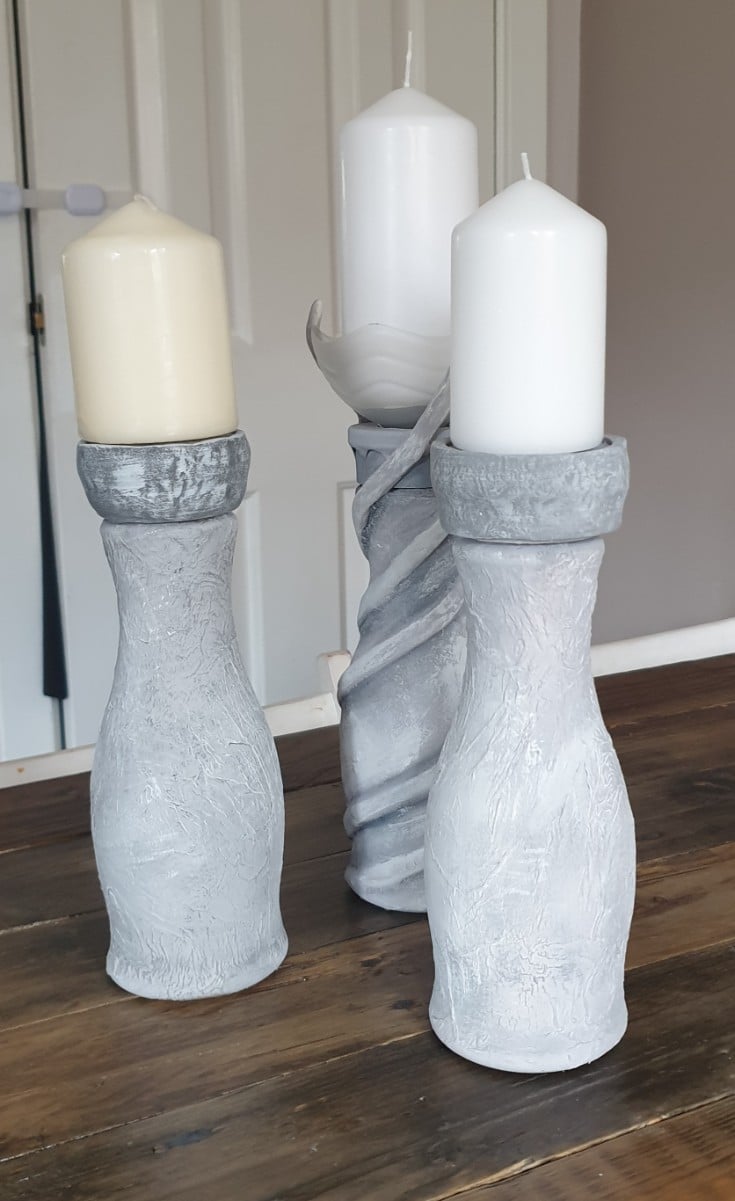
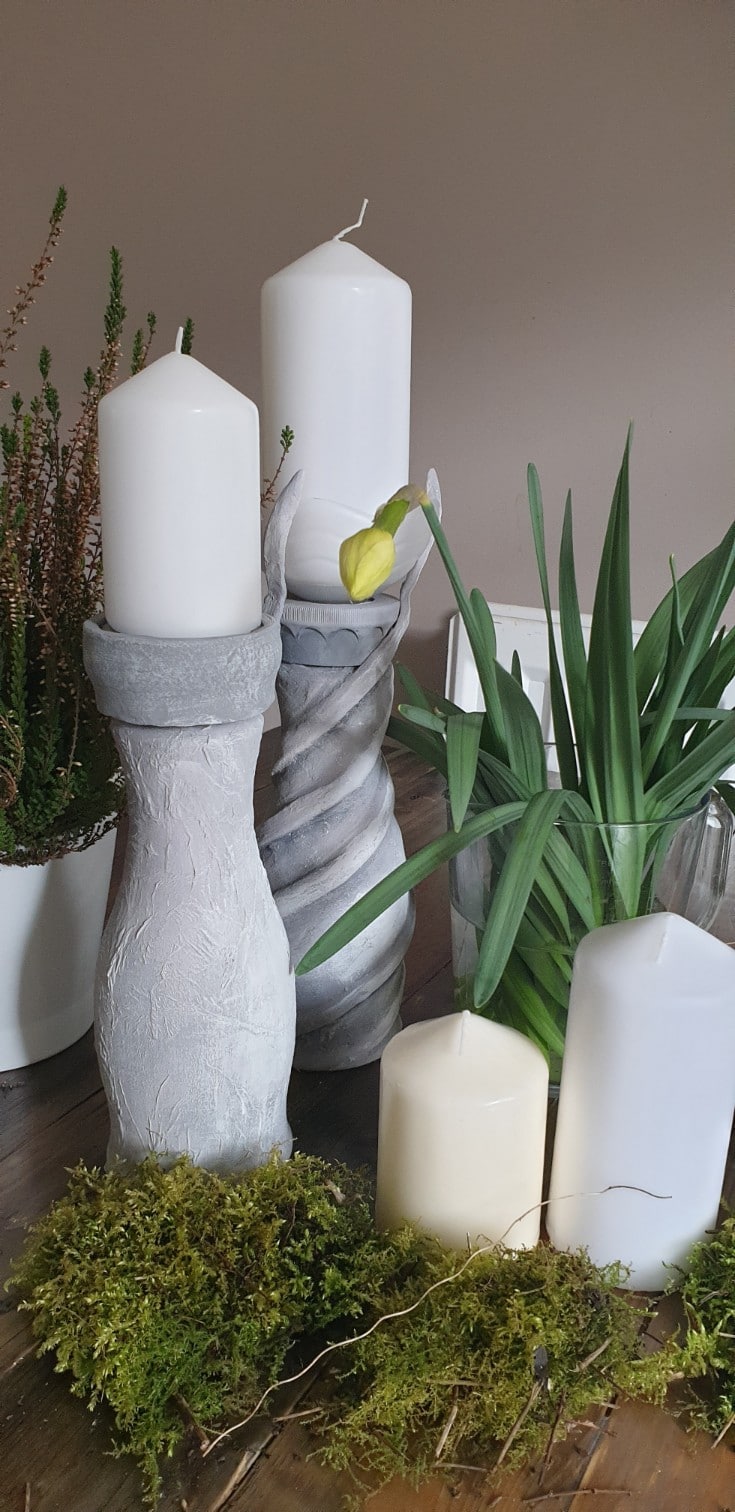
These candlesticks holders turned out great. I’ll be making more of them in different heights and colors. I hope you’ve enjoyed this tutorial on how to make DIY candlestick holder out of a plastic bottle.
You can even try and make your own candles to go with them. Don’t forget to save this post for later to your DIY Upcycling or DIY home decor board. Thanks!


Subscribe To My FREE DIY Newsletter!
Stay in touch and receive things like updates, special offers, new projects, tips, gear reviews, and more. No spam, promise!
By entering your email address, you agree to get an email newsletter from UpcycleThisDIYThat. I’ll respect your privacy, and you can unsubscribe at any time. For more details, review our Privacy Policy.


These turned out adorable! Thank you for the inspiration.
Corine
Thank you for your kind words, Corine!
They look great. Very creative! You definitely sparked some creativity in me. Thank you!
Thank you Niki!
I’m so excited about this post. I love cement. Thx for sharing with Funtastic Friday Link Party.
I’m happy you like it, Michele 🙂 Thank you for hosting an amazing party!
I love them, what a great idea. I could use these on my dining room table. Thank you for sharing on the Classy Flamingos blog party.
I’m pleased that you liked this idea, Linda. Thank you for hosting another great party!
What wonderful effects! I often wonder how I can re-use pretty bottles, so I’m pinning this and will give these ideas a try! Thanks for sharing with us at the Thursday Favorite Things party.
Thank you, Pam! I’ll be upcycling glass bottles using the technique with a different finish. This is so versatile. I love it. Thank you for hosting an amazing party and thanks for stopping by, Pam!
What fabulous ideas and great tutorial. LOVE. Featuring when my link party opens up tonight!
Thank you for the feature and your kind words, Carol!
Congrats on being one of the most viewed at Funtastic Friday Link Party. Be sure a pick up your badge . You were also picked as my favorite from last week.
Thank you, Michele, that’s amazing! I’ll definately pick up the badge. Thank you again for hosting the party!
Wow!! Those plastic bottles look so different!! Great tutorial – pinned 🙂
Thank you, Cindy! I’m glad you like it :))