
How To Stain Glass Bottles And Jars-3 Easy DIY Methods For DIY Crafts And Projects
This post includes affiliate links. If you decide to make a purchase through my link, I might get a small commission for it at no additional cost to you. Thank you for supporting Upcycle This DIY That!
If you’re a crafter or DIYer, then there’s no doubt that you’ve come across stained glass projects before. The methods below can be used for many different projects, such as vases, bowls, jars, and more!
The beautiful thing about stained glass is the endless possibilities of using it in your home to make it unique and special to you.
If you’re wondering how to stain glass bottles and jars easily, then you’re in the right place. This post will go over three easy methods, each with its own benefits and drawbacks.
I’ll also discuss tips on what materials are best suited for each method so that all of your hard work doesn’t end up in the trash heap because of improper preparation!
YOU MAY ALSO BE INTERESTED IN:
How To Cut Glass Bottles Or Jars In 3 Simple Steps
How To Polish Glass Edges- Super Quick Tutorial For Upcycling Glass Bottles
DIY Upcycled Glass Jars- Cute Stenciled Glass Vases
What is stained glass, and how can it be used in your home
Traditionally stained glass is a type of art that can be found in churches and historical buildings. It’s created by putting small pieces of colored glass together to form larger pieces of art.
You can make more modern stained glass using simple techniques to reproduce this effect.
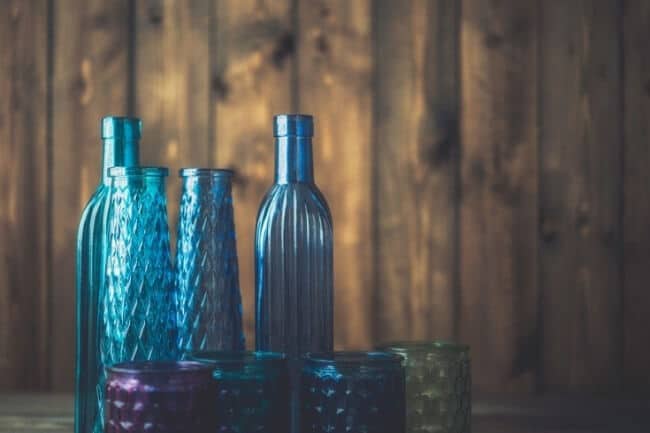
There are many different ways you can use stained glass at home for your DIY and craft projects and to create an aesthetic vibe in your space.
Some people like to use old windows to replace doors, upcycle glass bottles or jars, tabletop decorations, and more.
You could also use it as a border for your sliding doors or windows. People have been known to use it as the backdrop on their mantle or fireplace, where they’ll add accents like candles or flowers.
Benefits of using stained glass for your home
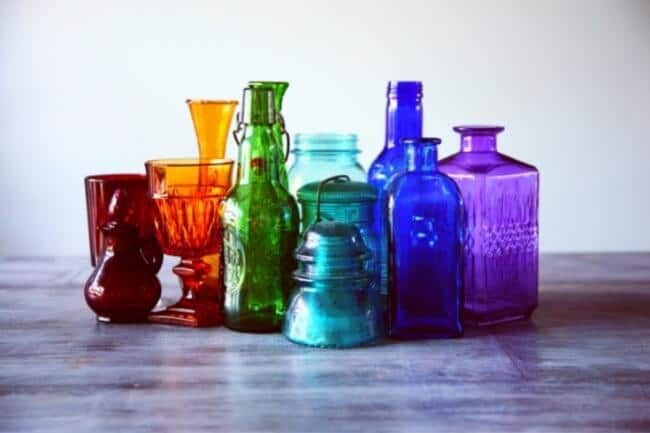
Whether you’re a beginner or an expert, there are some benefits to using stained glass for your home. Stained glass can be used as a beautiful way to bring color into your home- as well as to show your creativity.
It’s also a great way to incorporate a vintage feel into your space! There are many different ways to create your own beautiful piece of stained glass crafts and DIY projects.
Drawbacks of using stained glass crafts and projects for your home
There are a few drawbacks to using stained glass crafts and projects for your home. First, the end result differs depending on which method you’re using and what color you want to achieve. Second, some of the simpler methods that don’t use professional stains won’t be waterproof, dishwasher safe, or unsuitable for items in contact with food. So keep that in mind when you’re designing your project.
How to stain glass bottles and jars-3 Simple Methods
Mod Podge and food coloring v1
Mod Podge and food coloring is one way to create a water-based stain that allows for easy application. It is non-toxic and does not require the use of any solvents. All you need is a mod podge, food coloring, a brush, and a sealer.
materials needed:
- mod podge in gloss or dishwasher safe
- food coloring
- sponge brush for applying mod podge to the glass surface
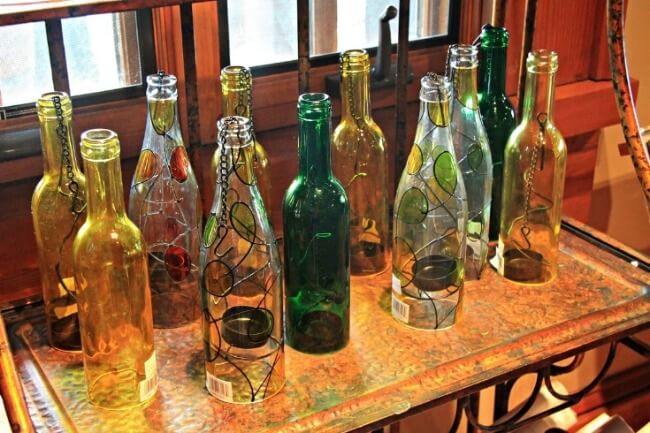
- glass object (bowl, wine bottle holder) with smooth, clean surfaces that can be stained.
- Apply a thin layer of mod podge onto the surface of the glass object with a sponge brush, then allow drying for 20 minutes. Do not apply too much Mod Podge as it will cause droplets and drip marks on your staining job.
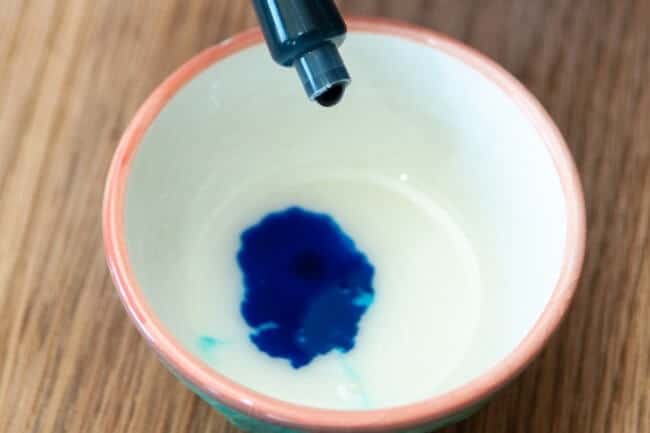
- Mix food colorings together in separate containers until desired colors are achieved.
- Allow each layer to dry before adding another layer, or else you risk streaking. Finally, seal your project once you’re done with the last layer of mod podge.
You use this method to stain the outside of the glass jars or bottles, and since the “stain” is not cured is not waterproof or dishwasher safe. Although you can buy a mod podge that is dishwasher safe and this perhaps could be a good option to make this waterproof.
Mod Podge and food coloring v2
The second method uses the same ingredients, but the method is slightly different. Although the color is more permanent, I don’t recommend using it for projects with water because once you want to clean the jars/bottles, they can become cloudy.
materials needed:
- Mod Podge in gloss
- water
- food colorings
- bowls
- newspaper
- paper towels
- parchment paper
- stir stick/small spoon
- oven
- Mix the mod podge, food coloring(s), and water in a bowl. Add enough water to the mixture so that you have a “thick but not too thick” consistency. 1:2 water to mod podge ratio is fine(for example, 1 TSB mod podge and 1/2 TSB water). If you’re staining more jars/bottles, you can make a bigger batch once you get the hang of it so the mixture doesn’t dry.
- The proportion above is enough for one smallish jar. Keep that in mind if you need to stain more. Pour some of the mixture into the jar and rotate it until all inside surfaces are well covered.
- Set the jar(s) upside down on a few sheets of newspaper and let sit for 1h or so. After that, place them right-side up on another baking sheet with baking parchment. Bake in the oven for about 45 min at 225 deg F.
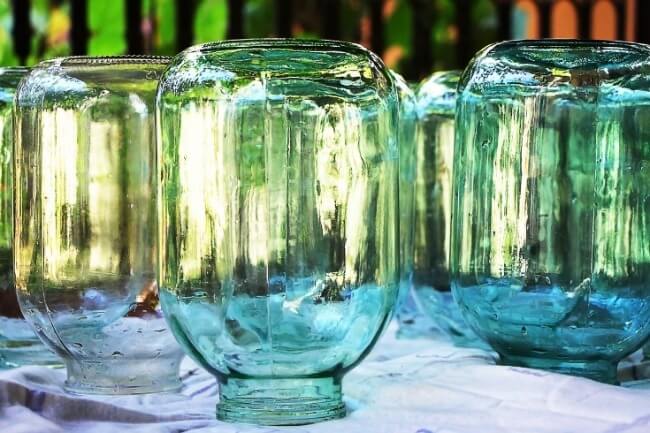
Staining glass bottles, jars, or vases with glass paint
This method produces a permanent waterproof color, so it’s great if you want to use it to color vases and other items that come in contact with water. All you need is glass paint, paint thinner, and a foam brush.
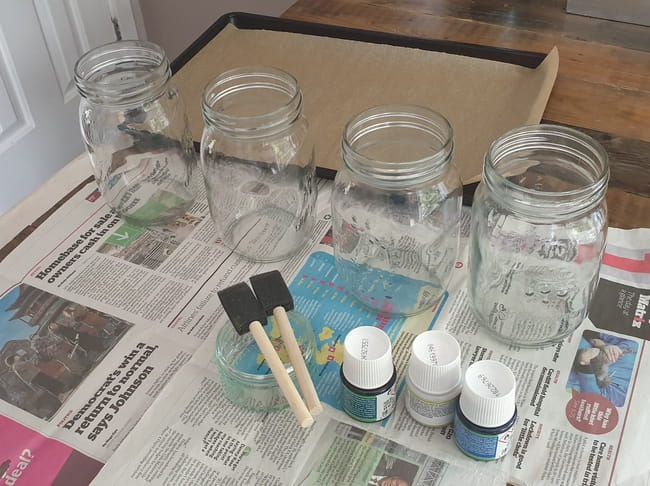
materials needed:
- Pebeo Vitrea paint
- Pebeo Vitrea paint thinner
- foam brush
- plastic cup or a bowl
- Mix a drop or two of the paint with a little splash of the thinner in a plastic container. More thinner, less intense color, less thinner, more intense color, and thicker paint.
- Apply paint to the desired surface of the glass using a foam brush. Make sure the glass surface is thoroughly cleaned. Work quickly and use long strokes to cover the surface. Make sure to get rid of all the air bubbles from the surface.
- Prepare a baking sheet lined with aluminum foil and put all of the painted pieces on it. Set the oven to 325 deg F/160deg C, and once it’s heated up, put the glass in. Set the timer and bake them for 40 min. Once the time is up, open the door slightly and let them cool down slowly in the oven.
You can use this method to stain the outside of your glass jar or bottle, and since it is a permanent color, it will not come off in the dishwasher.
Tips on properly using the staining so they don’t end up in the trash heap because of improper preparation!
- Make sure the glass surface is thoroughly cleaned before applying any of these methods. Remove any labels, dirt, oil, and stains.
- Apply a thin layer of mod podge mix/glass paint onto the surface with a sponge brush. If you want more coverage-add more layers. The glass paint comes in opaque, pearl, and translucent options.
- Mix food colorings together in separate containers until desired colors. Don’t mix too much in one go, as the glue dries quickly.
- Get creative! The sky is really the limit when it comes to how many different designs or staining glass can be created by mixing and matching these methods together in various ways!
I hope you’ve enjoyed learning about all the different methods and materials for staining glass bottles and jars. If any of these are new to you, I recommend experimenting with them to find one that best suits your needs.
And if you have any questions, please don’t hesitate to contact me via the contact form or leave a comment in the box below.
Subscribe To My FREE DIY Newsletter!
Stay in touch and receive things like updates, special offers, new projects, tips, gear reviews, and more. No spam, promise!
By entering your email address, you agree to get an email newsletter from UpcycleThisDIYThat. I’ll respect your privacy, and you can unsubscribe at any time. For more details, review our Privacy Policy.


I can’t seem to get it right on my bottles!
I’m trying to make them look like stain glass, so I can hang them outside on a project!
Hi Jacqueline,
Thanks for stopping by :)) What exactly do you have a problem with and which method?
I’ve used mod podge gloss with food coloring. Mod podge with acrylic paint.
Elmers school glue, also the clear kind , both with food coloring and acrylic paint. I’ve put them in oven, different temperature and for different length of times. I’m doing this on the inside of the bottles. For this will be for a outside project. So it needs to last in the weather.
Hi Jacque,
I can see you’ve tried all different methods, but what exactly do you have a problem with/is not working? Streaks? Not a translucent result? Let me know and perhaps we can try to troubleshoot whatever you have a problem with.
If you’re struggling with those methods, why not try the bakeable waterproof glass stain I recommend in the post? It goes on the outside of the bottle/jar and should be fine for outdoor projects.
Do I mix the mod podge with the acrylic paint and thinner then bake it for permanent color, and will it work on the outside of a wax warming dish.
Thank you for any advice.
Hi Darla.
I’m not sure about acrylic paint with mod podge, but you can simply use dishwasher-safe mod podge mixed with food coloring and water on the outside of the dish and bake it. Acrylic paint doesn’t require thinner as it’s a water-based paint, so using water to thin it is perfectly fine, and I’m sure the results could be similar to the method using food coloring. Or use the bakeable glass paint mixed with thinner for the permanent color, also on the outside of the dish. I hope this helps!
Best method to use on a glass elephant to make it light pink, please?
Hi CaraLynne,
Any of the mentioned methods will work. However, the glass paint method would probably be best if you are after specific color, as it gives you more control over the intensity and shade.
Just came across your website! It’s really awsome kuddos 🤗
Thank you!
👍😘